Home Theater Installation

Small Apartment Home Theater Design in New York City – NYC IT Tech

Small Apartment Home Theater Design In New York City - NYC IT Tech

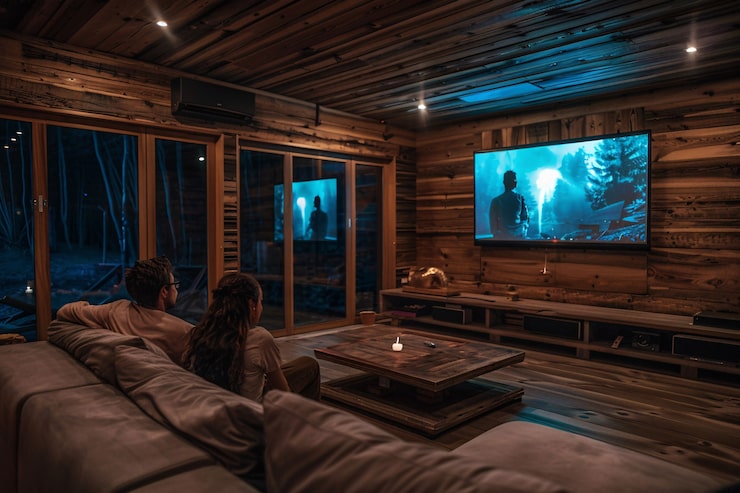
Small New York City apartments may be compact, but they can still host impressive home theater systems. With the right design choices and technology, even a Manhattan studio can feel like a private cinema. NYC IT Tech Audio Video, CCTV and Surveillance Camera Installation specializes in NYC apartment media room solutions, using short-throw projectors and hidden speakers to maximize every inch of limited space. By carefully selecting equipment and layout, you can enjoy a cinema-quality experience in your New York apartment without sacrificing comfort or style.

Space-Efficient Displays and Seating

In a small living room, choosing the right screen and seating is crucial. A 50–60 inch 4K Ultra HD TV is often ideal for NYC apartments. It provides a large picture without overwhelming the room, and Smart TV features give easy streaming access to Netflix, Hulu and more without extra devices. Alternatively, ultra-short-throw projectors and retractable screens can create a big-screen effect while saving wall space. For example, mounting a projector above or using a ceiling-mounted screen means you don’t need permanent fixtures, your screen can be hidden when not in use.

In very compact layouts, dual-purpose furniture helps save space. For instance, a storage ottoman or a bench can double as seating and equipment storage. If a large couch won’t fit, consider theater-style recliners or a smaller sofa placed against the far wall. Ceiling-mounted or wall-mounted speakers keep the floor clear Arendal Sound notes that positioning speakers on stands or away from walls in small rooms ensures better sound dispersion. Using slim, in-wall or in-ceiling speakers also gives a clean look and frees up space for seating. By planning the display and seating as a cohesive unit, your media area can feel open instead of cramped.

Optimizing Audio in Compact NYC Apartments

Sound is as important as picture. In a tight NYC room, you might not need huge speakers to feel immersed in a movie. A 5.1 surround sound system (five speakers plus a subwoofer) is often sufficient for a small apartment. For very tight spaces, a 2.1 setup (two front speakers and one subwoofer) can still provide stereo sound and bass without crowding the room. In either case, speaker placement is key. Experts recommend lifting speakers off the floor (for example on stands or mounted) so vibrations don’t transfer directly to the building structure. Arendal Sound advises avoiding putting speakers flush against walls instead, leave a small gap or use stands for the front speakers to improve clarity.

Subwoofers deserve special attention in NYC. Because low bass travels through walls easily, NYC IT Tech tunes sub placement carefully to avoid disturbing neighbors. Using a compact sub (8–10 inches) on a decoupling pad or platform can still deliver punchy bass without rattling the apartment. For simplicity, many urban dwellers choose a high-end soundbar. A quality soundbar mounted under the TV can simulate surround sound in a small space, often with a wireless subwoofer included. Rent.com notes that a soundbar “can mimic the dynamic sound of a surround system without taking up as much room”. This reduces wiring and blends into the decor, making it a great option for renters or those wary of drilling holes.

Creative Layout and Decor

Designing a media room in an NYC apartment also means adapting to the existing architecture. New York buildings often have open layouts, alcoves or odd angles. Work with these features: for example, a shallow closet can hide a projector or gear rack, or a window bay can hold a small seating nook. Lighting is important too. Use blackout shades or curtains to darken the room for better picture quality and consider motion-sensor lamps or smart lighting that dims automatically during a movie. The service page for audio-video media room design explains how concealing screens and cameras (such as motorized mounts) keeps the room looking tidy when not in use.

Walls in NYC apartments can also handle multi-use. For instance, mounting a TV above a fireplace or on a pivoting arm allows viewing from different angles. Incorporating storage built-in cabinets or floating shelves, keeps remotes, gaming consoles and DVDs out of sight. Soft furnishings like throw pillows and rugs enhance comfort and absorb some sound reflections. Arendal Sound recommends lighter wall colors to make a small room feel larger, but warns projector setups need a matte or light gray paint to keep image colors accurate. By integrating the home theater into your living decor, you get an entertainment space that feels like part of the apartment, not an add-on.

Acoustics and Noise Control

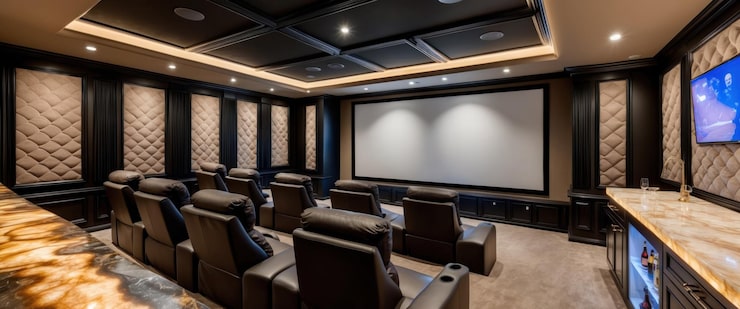
No matter how nice your equipment, acoustics can make or break a small theater. In New York City, thin walls and street noise are constant concerns. Treat the room with some basic sound control: hanging acoustic panels on the walls and ceiling near the seating reduces echoes and clarifies dialog. Carpets or area rugs help absorb sound, and sealing windows or doors keeps traffic noise out. According to TotalHomeInteriors.tech, combining soundproof curtains (for outside noise) with acoustic panels (for internal reflections) gives balanced control.

Internally, avoid reflecting surfaces opposite your speakers. If possible, place a fluffy couch or curtains on the rear wall to dampen sound. Arendal’s guide notes that small rooms can have bass buildup; using two smaller subwoofers in different corners helps even out low frequencies. And don’t ignore neighbors: always test your system at evening hours and adjust the bass and volume so you enjoy depth without vibrating through the building. When done right, even a street-level apartment in Manhattan can screen movies quietly and still deliver an immersive experience.

Smart Integration and Streaming

Modern home theaters rely on smart devices. In a small NYC flat, wireless convenience is key. A Smart TV with built-in Wi-Fi lets you stream services without extra boxes. Voice assistants (like Alexa or Google Assistant) can control volume or lights, letting you dim the lights and start the movie hands-free. If you already use home automation for lights or shades, linking your media system to it creates seamless scenes (e.g. “movie mode” that closes shades and lowers lights automatically). NYC IT Tech’s background in smart homes means they can integrate your theater with systems like Control4 or Lutron for a unified experience.

Storing and managing cables is another challenge. Aim for a clean install by hiding wires behind walls or using cable channels. Our team recommends in-wall HDMI and speaker wires whenever possible, which preserves aesthetics and protects cables. If you’re renting, there are peel-and-stick cable covers that can route wires under carpets or along baseboards without damage. The goal is a neat setup that anyone in your NYC apartment can use one-touch controls, minimal visible tech so the focus stays on the movie.

Professional vs. DIY in NYC Apartments

Some tech enthusiasts wonder if they can DIY a theater install in a New York apartment. Basic setups, like plugging a soundbar under your TV, are certainly DIY-friendly. However, any major installation in NYC often means navigating co-op or building regulations, as well as dealing with plaster walls and older wiring. For example, drilling into plaster in a pre-war flat can crack walls, and you may need board approval for rewiring. NYC IT Tech has experience with these challenges we plan projects around existing conditions.

If you’re unsure, a consultation is wise. An expert can suggest what’s feasible. For instance, some pre-war buildings require wireless or surface-mount solutions instead of in-wall wires. In contrast, modern condos might allow a clean in-wall cabling job. Whatever your situation, our goal is to deliver a professional result. We work with these constraints every day in Manhattan, Queens and Brooklyn. When you contact us, you benefit from our local knowledge we know NYC noise codes, permit requirements and the best gear for city living.

In the end, your small apartment can have a big-screen experience. By combining smart layouts, the right gear, and acoustic treatments, NYC IT Tech makes cinematic sound and picture part of city life. Transform a narrow living room into a private media oasis and enjoy movies like never before.

Frequently Asked Questions (FAQs)

Yes! Even compact NYC spaces can host a great home theater. With space-saving solutions like wall-mount speakers, ceiling projectors or soundbars, and careful layout, you can enjoy immersive audio and video in your living room.

Choose small subwoofers on isolation pads and place speakers on stands or wall-mounts. Use acoustic panels and heavy curtains to dampen sound. Always test sound late at night to ensure minimal bass vibration through walls.

For most small rooms, a 5.1 surround setup is ideal if you have space for five speakers and a sub. If not, a high-quality soundbar and subwoofer combo can still deliver excellent surround effects without multiple speakers.

Absolutely. We design and install custom media rooms in NYC apartments, from condos to pre-war co-ops. Our team takes care of layout, equipment choice, wiring, and tuning for your specific space.

It depends on the room. Short-throw projectors can give a large image without a big screen, which is great if you have a clear wall. Otherwise, a large flat-screen TV is simple and bright, especially in rooms with ambient light. Both can work well with the right placement.

Interested in a custom theater for your NYC home? Contact NYC IT Tech Audio Video, CCTV And Surveillance Camera Installation at +1 212-671-3330 for a free consultation. Our experts will help you plan and install a home theater that maximizes your apartment’s space and sound quality. Call today and bring the cinema experience home!

Can You DIY a Home Theater Installation in a Pre-War NYC Building?

Picture your ideal Saturday. Coffee in hand, a new 75-inch TV waiting in the box, and a vision of a cozy home theater. You’ve watched the YouTube tutorials, you’ve got your drill ready, and this feels like a manageable weekend project.

Then you start drilling into your Upper West Side apartment wall. This isn’t drywall. It’s three inches of horsehair plaster over wooden lath with brick behind it. Your drill bit just broke. There’s dust everywhere. And you have no idea if you just hit something important.

The biggest DIY disasters happen when enthusiasm meets 1920s construction methods. Pre-war NYC buildings have character and history, but their building techniques turn straightforward projects into complex challenges.

This guide will help you figure out if your home theater is DIY territory or if you need professional help.

The Soundbar Setup That Works in Pre-War Buildings

Meet James from Midtown Manhattan. He wanted better sound for movie nights but knew his 1935 building had limitations. His solution was simple: a 65-inch 4K smart TV, a quality soundbar with wireless subwoofer, and a streaming device.

Total installation time? Three hours. He mounted the TV to studs he located with a stud finder, plugged the soundbar into an existing outlet, and paired the wireless subwoofer. No fishing wires through walls. No opening ceilings. No calling the building super.

This works because James stayed on the surface. His soundbar sits on his media console. The subwoofer sits in the corner. The TV mounts to studs with lag bolts rated for plaster walls. He used existing outlets and didn’t touch the building’s wiring. For a smaller NYC apartment, this setup delivers impressive sound without fighting 1920s construction.

DIY Tips for This Setup:

  • Use a quality stud finder rated for plaster walls (they’re denser than drywall)
  • Mount to studs, never just plaster anchors for heavy TVs
  • Position your wireless subwoofer away from shared walls to avoid neighbor complaints
  • Test your room’s acoustics before buying – hardwood floors and high ceilings can create echo issues

When You Need Professional Help (Surround Sound Edition)

Now meet Sarah from the Upper East Side. She wanted a true home cinema with 5.1 surround sound, in-ceiling speakers, a ceiling-mounted projector, and a hidden AV receiver. Everything wired and integrated.

Her 1928 building has 10-foot ceilings, horsehair plaster walls, knob-and-tube wiring in some rooms, and no crawl space access. Buildings like hers require opening walls, fishing wires through impossible spaces, and mounting equipment to joists hidden behind three layers of different materials.

Sarah called professionals. They spent two days on the installation, brought specialized tools for working with plaster, coordinated with her co-op board for alteration approval, and hired a licensed electrician to add dedicated circuits.

The result? A home theater that works flawlessly and didn’t damage her apartment’s historic details.

The 4 Big Challenges of Pre-War AV Installation

1. Your Walls Are Not What They Seem

Pre-war walls use horsehair plaster over wooden lath strips. This creates a hard, brittle surface that cracks easily and makes running wires difficult.

Behind that plaster? Brick, concrete, or terra cotta tile. Buildings in Downtown Manhattan and the Lower East Side often have solid masonry party walls. You can’t fish wire through brick or drill through concrete without masonry bits and serious effort.

Finding studs is tricky. They might be 16 inches on center, 24 inches, or some irregular spacing from decades of modifications. Hit a water pipe or old electrical conduit, and you’re looking at thousands in repairs.

2. The Electrical Situation Gets Complicated

Knob-and-tube wiring was common in buildings before 1950. This old system can’t handle modern home theater loads. Add a receiver, powered speakers, subwoofer, and streaming devices on one circuit, and you’re risking an overload.

Many pre-war buildings have 15-amp circuits. Modern home theaters need 20-amp dedicated circuits. Any electrical modifications require a licensed electrician. Your co-op board will demand documentation, and your insurance won’t cover unpermitted work.

3. Your Building Has a Say in This

Co-op and condo boards in NYC require board approval, insurance certificates, specific work hours (typically 9 AM to 5 PM weekdays), damage deposits, and licensed contractors for electrical work.

That weekend project? Your board might need three weeks to approve it. Buildings in historic districts face additional scrutiny from the NYC Landmarks Preservation Commission. Some pre-war buildings prohibit in-wall modifications entirely.

4. Sound Behaves Differently in These Spaces

Pre-war apartments have high ceilings, hardwood floors, and plaster walls. All hard, reflective surfaces. Bass sounds boomy. Dialog echoes.

Room acoustics require careful speaker placement and sometimes acoustic treatment. Professional installers measure your room’s properties and adjust for how your ceilings, floors, and walls interact with sound.

Breaking Down the Costs of DIY vs. Hiring a Pro

AspectDIY ApproachProfessional Installation
Upfront Cost$2,000-3,500 (equipment only)$4,500-8,000+ (labor + equipment)
Time Investment2-4 weekends (or longer with problems)1-2 days
Risk of MistakesHigh (wall damage, wrong equipment, electrical issues)Low (experienced with pre-war construction)
Wall RepairsYour cost ($500-2,000 for cracked plaster)Covered by installer’s insurance
WarrantyManufacturer only (1 year)Labor warranty (1-2 years) + manufacturer
Building ApprovalNavigate co-op board yourselfOften handled by contractor
Final ResultDepends on your skills and luckProfessionally calibrated and guaranteed

Home theater installation in NYC runs higher than other cities because of building complexity and labor rates. But consider what mistakes cost. Cracked plaster medallions require specialized restoration. Damaged AV equipment doesn’t get refunded. Time troubleshooting has value.

Professional installation might add $2,000-3,000 in labor for a complex setup, but you get someone who knows horsehair plaster, has co-op board relationships, carries liability insurance, and gets it done right the first time.

Which Projects You Can Handle Yourself

Simple setups work as DIY projects, even in pre-war buildings.

Good DIY Projects:

  • Soundbar and TV on a media console (no wall mounting)
  • TV mounted to confirmed studs in plaster walls
  • Wireless subwoofer placement
  • Streaming device setup
  • Basic cable management with surface-mounted raceways

Leave to Professionals:

  • In-wall or in-ceiling speaker installation
  • Projector mounting to plaster ceilings
  • Running wires through walls or ceilings
  • Any electrical work beyond plugging into existing outlets
  • Installations requiring building board approval
  • Media room designs with integrated components

The line is clear. Surface-level work is manageable. Anything requiring you to open your building’s structure or modify electrical crosses into professional territory.

Why Complex Installations Get Complicated Fast

In-ceiling speakers need access above your ceiling. Many pre-war buildings have no crawl space. Getting wires from your AV receiver to ceiling speakers means opening walls, fishing cable through tight spaces, and patching everything afterward.

Projector mounts need solid attachment to joists. Finding those joists through thick plaster takes experience. Mount to just plaster and your $2,000 projector eventually falls.

The challenges multiply with each component. Each speaker needs wire. Each wire needs a path through your walls. Each hole needs restoration that matches your original plaster. In landmarked buildings, even patching requires specific techniques.

DIY vs Professional AV Installation: Which Makes Sense?

Ask yourself these questions:

About Your Project:

  • Does it require opening walls or ceilings?
  • Does it need electrical work beyond using existing outlets?
  • Will it require building board approval?
  • Does it involve mounting heavy equipment to plaster?

About Your Building:

  • Built before 1950? (Higher difficulty)
  • Plaster walls? (Much harder than drywall)
  • Landmarked or in a historic district? (Additional restrictions)
  • Strict co-op board? (Requires professional documentation)

About Your Situation:

  • Comfortable with the risk of cracking plaster?
  • Have time for a project that might take weeks?
  • Own or rent? (Renters have less flexibility to modify)
  • Concerned about liability if something goes wrong?

If you answered yes to multiple questions in each category, you’re looking at a professional installation. The complexity of your system combined with your building’s construction determines the right path forward.

Making the Smart Choice for Your Situation

Your dream of an immersive home theater in your pre-war NYC apartment is achievable. The question is how. Simple setups work as DIY projects. Complex integrated systems need someone who understands these buildings.

YouTube tutorials film in newer buildings with drywall and standard construction. Your pre-war apartment with horsehair plaster and no ceiling access is different. The materials, techniques, and risks are all different.

For ambitious projects, consulting with experienced installers is the smart first step. They can assess your apartment, explain what’s realistic, and provide accurate costs. Many offer consultations before you commit.

The goal is getting the home theater you want without creating problems that cost more to fix than professional installation would have in the first place.

Scroll to top
kuponbet giriş
Kuponbet Giriş
betgaranti giriş
Teknik Seo
betnano
betpark giriş
vaycasino giriş
betpark giriş
grandpashabet giriş
betnano
vaycasino giriş
grandpashabet giriş
vaycasino giriş
betnano
betpark giriş
vaycasino giriş
grandpashabet giriş
grandpashabet giriş
vdcasino giriş
interbahis giriş
grandpashabet giriş
grandpashabet giriş
padişahbet
vaycasino giriş
vaycasino giriş
vaycasino giriş
vaycasino giriş
vaycasino giriş
betnano
vdcasino giriş
restbet giriş
betpark giriş
grandpashabet giriş
grandpashabet giriş
grandpashabet giriş
vaycasino
grandpashabet giriş
betpark giriş
grandpashabet giriş
matbet giriş
vaycasino giriş
vaycasino giriş
kingroyal giriş
padişahbet
pusulabet giriş
grandpashabet giriş
padişahbet
interbahis giriş
grandpashabet giriş
interbahis