Smart Home

Your Building Isn’t Smart. It’s Alive. Here’s the Infrastructure That Makes It Possible

The most valuable commercial buildings of the next decade won’t be defined by steel and glass alone. They’ll be defined by data. Every system, from climate control to access management, will generate and consume information at a pace that older infrastructure simply cannot handle.

Think of IoT as a building’s nervous system, constantly sensing and reacting to conditions in real time. AI functions as the brain, interpreting that data and making decisions faster than any human operator could. But for this brain and nervous system to work together, they need a high-performance backbone. That backbone is a modern structured cabling system built to handle the demands of intelligent operations.

So What Makes a Building “Smart” in the First Place?

A smart building is not a collection of connected gadgets. It’s a unified ecosystem where multiple systems communicate with each other to improve efficiency, security, and the experience of everyone inside. The HVAC adjusts based on real-time occupancy data. Lighting syncs with natural daylight levels. Security systems use AI to identify potential threats before they escalate, and many facility managers across NYC are now integrating intelligent security platforms that tie directly into their building automation networks.

For commercial property owners in New York, this matters more than ever. Local Law 97 now requires significant reductions in building emissions, and smart building technology is one of the most effective ways to meet those targets. In competitive markets like Hudson Yards and the Financial District, buildings with modern automation attract higher-value tenants who expect operational transparency and energy-efficient systems.

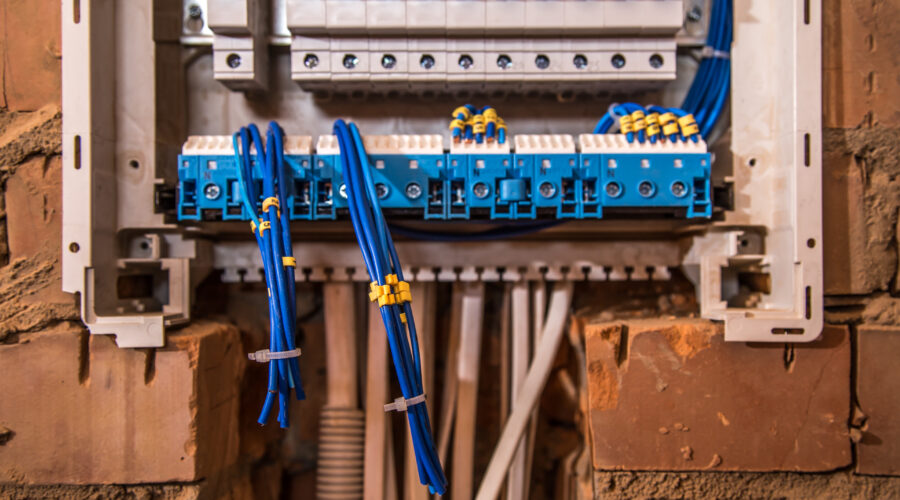
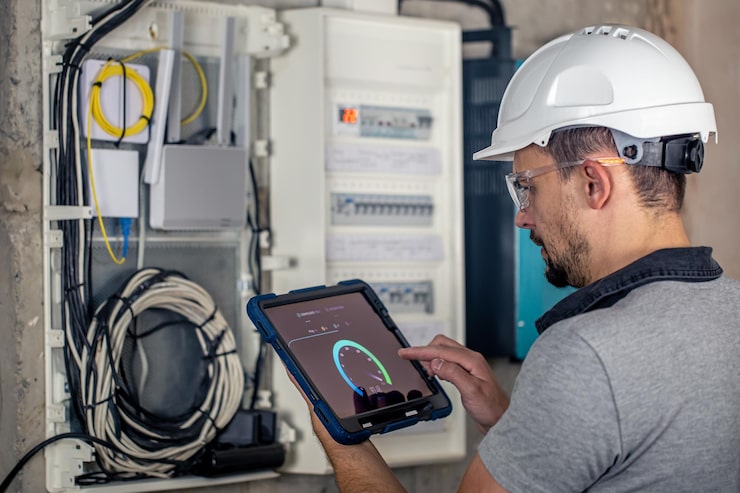
Why Legacy Wiring Can’t Handle Today’s Data Demands

An intelligent building is a data-generating machine. Dozens of device categories, each with distinct bandwidth and power requirements, must share the same network. The table below shows the scope of what a modern commercial facility needs to support.

IoT Device CategoryExamplesCabling Requirement
Security and Life Safety4K AI-powered cameras, access control readers, smart locks, smoke and CO2 sensorsHigh-bandwidth Cat6A or Fiber for cameras; PoE for most devices
HVAC and Energy ManagementSmart thermostats, occupancy sensors, automated shades, smart lightingLow-voltage wiring, often PoE-powered, connected to a central controller
Occupant ExperienceSmart displays, room booking systems, Wi-Fi access pointsHigh-performance Cat6A for Wi-Fi 6/7; dedicated bandwidth for media
Operational TechWater leak detectors, predictive maintenance sensors on elevators and HVACLower bandwidth but requires reliable and secure network pathways

The sheer volume and diversity of this traffic will overwhelm older, unorganized cabling systems. The result is bottlenecks, dropped connections, and system failures that cost time and money. A Cisco study found that 80 percent of IoT project failures stem from infrastructure limitations rather than device or software issues.

“The intelligence of your building is limited by the quality of its backbone.”

How AI and Automation Depend on Continuous Data Flow

AI-enabled building management systems depend on continuous data flow between connected devices, sensors, and processing hubs. Predictive maintenance algorithms monitor elevator performance and HVAC units around the clock, flagging potential failures before they cause disruptions. Intelligent lighting adjusts output based on occupancy patterns learned over weeks and months. Access control systems cross-reference credentials against behavioral baselines in milliseconds.

All of this requires fast, uninterrupted communication. Bottlenecks in cabling infrastructure mean AI systems receive delayed or incomplete data. Decisions get made on outdated information, reducing accuracy and increasing operational costs. The network infrastructure for IoT devices needs redundancy and segmentation built in from the start. Dual-path cabling and centralized patch panels maintain uptime for mission-critical systems if one connection fails.

Designing Infrastructure That’s Ready for AI

Building an AI ready commercial building requires more than upgrading a few cables. It demands a strategic approach to structured cabling for building automation that accounts for current needs and future growth.

Bandwidth and Low Latency

AI-driven applications, especially in security and analytics, require both high bandwidth to carry high-resolution video and low latency for real-time analysis. A hybrid approach combining Fiber optic lines for backbone connections and Cat6A for horizontal runs delivers the speed and responsiveness these systems demand. Without it, your AI tools are working with outdated information.

Power over Ethernet is Non-Negotiable

PoE technology simplifies infrastructure by delivering both data and electrical power over a single Ethernet cable. This reduces installation costs, simplifies maintenance, and allows for centralized power backup during outages. PoE lighting and controls can reduce energy consumption by up to 45 percent, supporting sustainability initiatives and NYC’s Local Law 97 compliance. Plan for PoE+ or PoE++ capacity to support emerging devices that require higher wattage.

Scalability Through Zoned Architecture

A zoned cabling architecture divides the building into sections, each served by its own intermediate distribution frame or network switch. This approach makes the network easier to manage, troubleshoot, and expand as new technologies come online. For projects involving pre-construction infrastructure planning, zoned design is one of the most effective smart building cabling best practices for long-term flexibility.

Meeting NYC’s Energy and Sustainability Requirements

Modern commercial buildings face mounting pressure to reduce energy consumption. Structured cabling supports centralized monitoring systems that track usage across departments, floors, and individual zones in real time. Building operators can identify waste patterns and adjust systems remotely without dispatching technicians.

PoE-connected sensors and controls give facilities teams granular visibility into where energy goes and when. This data feeds directly into compliance reporting for NYC’s Local Law 97 and similar regulations. For property owners seeking LEED certification or marketing their buildings as sustainable, this level of operational transparency has become a competitive advantage.

Preparing for 5G, Edge Computing, and Emerging Tech

The future of connected buildings depends on integrating wired and wireless systems. Structured cabling supports 5G, Wi-Fi 7, and edge computing, all of which demand low latency and high bandwidth.

Edge processing moves data analysis closer to the source for faster response times. Digital twins create virtual models of buildings that rely on accurate, real-time data from connected devices. Private 5G networks offer secure, high-speed communication in sensitive environments. None of these technologies can function without IoT building infrastructure requirements being met at the physical layer first.

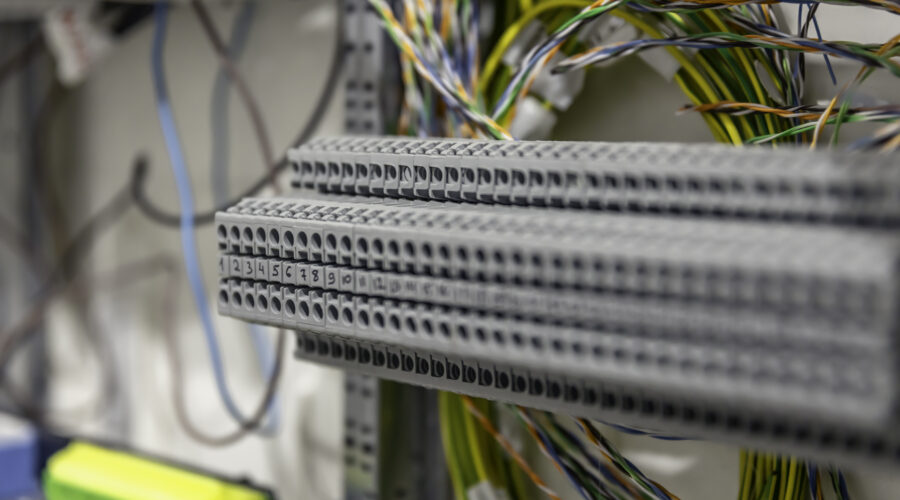
Network Security and Reliability Start With the Cables

A well-designed cabling system contributes directly to network security and operational resilience. It supports segmentation that isolates critical systems from general traffic, reducing vulnerability to cyberattacks. Clear labeling and documentation of cabling pathways simplify maintenance and support compliance with industry standards like TIA/EIA and ISO/IEC.

Common Questions Answered

What is structured cabling in a smart building?

Structured cabling is a standardized infrastructure of Cat6A copper and fiber optics that interconnects building systems like BMS, security, lighting, and IoT devices. It delivers reliable, scalable bandwidth with low latency for AI and automation applications.

How does cabling affect AI-driven building management?

AI systems require continuous, high-speed data flow to analyze information and make real-time decisions. A robust structured cabling system provides the low-latency backbone that allows predictive maintenance, intelligent HVAC control, and automated security responses to function without delays or data loss.

Why upgrade to Cat6A and fiber?

Cat6A supports 10 Gbps speeds at distances up to 100 meters, handling the bandwidth demands of 4K cameras, Wi-Fi 6/7 access points, and data-intensive IoT devices. Fiber optic lines offer even higher capacity for backbone connections between floors or buildings, future-proofing your investment.

How does PoE support energy efficiency?

Power over Ethernet delivers data and electrical power through a single cable, eliminating the need for separate power runs to each device. This simplifies installation, enables centralized power management, and allows building operators to monitor and control energy consumption at the device level.

What improves reliability and cybersecurity in cabling design?

Implement zoned architecture with dedicated distribution frames for each building section. Maintain accurate documentation and standardized labeling for all cable runs. Use network segmentation to isolate critical systems from general traffic, and build redundancy into pathways serving mission-critical equipment.

Building Intelligence Starts With the Right Foundation

The path to an AI-ready building doesn’t start with software. It starts with the physical layer infrastructure that carries every signal, powers every sensor, and connects every system. A strategic consultation can help you design a cabling infrastructure that supports your operational goals and prepares your facility for the next generation of building technology.

How Smart Home Technology Drives ROI for NYC Developers

In the hyper-competitive NYC real estate market, the rooftop pool and state-of-the-art gym have become standard. The new frontier for differentiation is in-unit technology. Smart home features are no longer a luxury add-on reserved for penthouses. They have become a core component of modern living that today’s buyers actively seek out.

For developers focused on maximizing asset value and accelerating sales cycles, the question is no longer “should we include smart technology?” It’s “how do we implement it strategically?” This post breaks down the financial returns of investing in smart home infrastructure for new residential developments in New York City.

What NYC Buyers Expect From Luxury Living in 2026

The definition of luxury has evolved. Marble countertops and hardwood floors remain important, but affluent buyers now prioritize convenience, security, and a seamless living experience. The post-pandemic hybrid work model has made a robust home environment critical for professionals who split time between the office and their apartment.

“Today’s luxury buyer in SoHo or the Upper East Side doesn’t want a beautiful apartment. They want an intelligent one. They expect the technology to work as flawlessly as the Sub-Zero refrigerator.”

According to industry data, 78% of homebuyers will pay more for a property with smart devices. Among millennial renters, that number climbs to 86%, with an average willingness to pay a 20% rent premium for apartments equipped with smart technology.

The Numbers Behind Smart Home ROI for Real Estate

Smart home ROI for real estate is quantifiable. Studies from the Consumer Technology Association and National Association of Realtors show that smart home features can increase a property’s value by 3% to 5%. On a $2 million Manhattan apartment, that translates to $60,000 to $100,000 in additional value.

Investment AreaImpact on ROIKey Data Points
Increased Property ValueDirect impact on sale priceSmart home features that increase property value by 3-5%. On a $2M unit, that’s $60K-$100K.
Faster Sales CycleReduced carrying costsTech-enabled properties have up to 40% greater chance of selling at a higher price point.
Higher Perceived ValueJustifies premium pricingAutomated shades, integrated lighting, and unified security create a powerful first impression.
Future-Proofing the AssetLong-term value retentionA building pre-wired for technology adapts to future upgrades, protecting its asset value for decades.

For multifamily properties, the returns are even more compelling. Smart home technology creates a 3-5% rise in building valuation with an average ROI of 30%.

Three Smart Home Investments That Deliver the Highest Returns

Not every smart feature delivers equal value. Based on market data, three categories consistently provide the highest return for developers building in Manhattan, Brooklyn, and Queens.

Intelligent Lighting and Motorized Shades

Circadian rhythm lighting creates an atmosphere of wellness and luxury that resonates with health-conscious buyers. Motorized shades offer effortless privacy in a city where neighboring buildings sit feet away. Smart lighting systems can also reduce electricity use by up to 50%, a selling point that appeals to environmentally minded residents and translates to real monthly savings.

Keyless Entry and Unified Security Systems

Video intercoms that route directly to a smartphone, keyless entry, and unified security systems rank among the most requested features in NYC buildings. Smart security systems can add up to 5% to a property’s value. For residents in a city where personal safety and package security are daily concerns, these features are expected rather than optional.

Building-Wide Network Infrastructure

High-speed Wi-Fi and wired connectivity have become the “fourth utility” after water, gas, and electricity. Offering guaranteed, building-wide network infrastructure is a massive differentiator for professionals who work from home. A robust network backbone supports every other smart feature in the building and belongs on any developer’s requirements checklist for new construction.

Why Pre-Wiring During Construction is the Only Cost-Effective Option

The only cost-effective way to implement these features is through pre-wiring during the construction phase. Running cable through open walls costs a fraction of what it takes to retrofit a finished luxury apartment. Attempting to add comprehensive smart systems after completion means tearing into walls, ceilings, and floors.

When developers pre-wire for home automation, they create a foundation that supports integrated platforms like Savant, Control4, or Crestron without limitation. The upfront investment is minimal compared to the long-term asset value it protects.

Smart Home Market Growth Through 2027

The global smart home market reached $127.67 billion in 2024 and is projected to hit $1.4 trillion by 2034. In the United States, over two-thirds of homes will have smart devices by 2027.

YearUS Smart Homes in MillionsPercentage of US Homes
202577.05~52%
202684.92~57%
202793.59~68%

Buildings without integrated technology will struggle to compete for buyers and tenants in the very near future.

Why Tech-Forward Markets Like NYC Command Higher Premiums

Location affects ROI significantly. In tech-forward markets like New York, San Francisco, and Austin, the premium for AI-integrated smart features can reach 7% to 10%. More traditional markets typically yield 2% to 5%. For developers building in NYC, the numbers strongly favor smart home investment. Buyers here expect cutting-edge technology and will pay accordingly.

Why Professional Installation Commands a Premium

DIY solutions work for a single smart thermostat. Comprehensive building-wide systems require professional installation, and buyers recognize the difference. A professionally installed and integrated system commands a higher premium because prospective owners trust it will function on move-in day. They do not want to inherit someone’s weekend project or troubleshoot a patchwork of disconnected devices. Systems that integrate through platforms like Control4 or Savant signal quality and reliability to discerning buyers.

Smart Technology as a Competitive Advantage

In a crowded market, smart home technology is a powerful tool for differentiation, value creation, and faster ROI. The most successful smart buildings result from collaboration between developer, architect, and technology integrator from day one.

Integrating professional home automation systems starts with a strategic plan rather than a last-minute addition. Early collaboration in the design phase maximizes returns and creates a standout property that commands premium pricing.

The Complete Pre-Wire Checklist for Your New Home Build in 2026

Building a new home means making hundreds of decisions before the drywall goes up. Your low-voltage wiring plan is one of the most important choices you will make during this process. Getting it right now saves you from expensive retrofits later.

This smart home wiring checklist will help you have a productive conversation with your builder and technology integrator. Print it out, bring it to your next meeting, and go through each section together. The goal is simple. Make sure no critical infrastructure gets overlooked while the walls are still open.

Why Pre-Wiring During Construction Matters

Running cables after drywall is installed can cost three to five times more than doing it during the framing stage. In some multi-story homes with fire breaks between studs, adding wire later is impossible. The labor to pull Cat6A cable through open framing takes a fraction of the time compared to fishing wire through finished walls.

Even if you do not plan to use every cable right away, having them in place means you are ready for whatever technology comes next. The wires will sit there waiting until you need them.

Setting Up Your Central Wiring Location

Every connected home needs a single spot where all systems come together. Some builders call it a distribution center or media closet. This is where your network equipment, patch panels, and amplifiers will live.

Look for a location that stays at a moderate temperature and has good airflow. It should sit close to where your internet service enters the home and have easy access from the main floor. A spot above the basement or crawlspace makes cable runs much simpler. Plan for plenty of electrical outlets and enough wall space for at least one equipment rack.

Infrastructure Basics

  • Dedicated closet or cabinet space for network equipment with ventilation
  • At least two 1.5-inch conduits running from the closet to the attic and basement
  • A clear path from where your internet provider enters the home to the equipment location
  • Whole-home surge protection at the electrical panel
  • Space and power for a battery backup unit

Understanding the Cables You Will Need

Knowing what each cable type does helps you communicate with your contractor and avoid confusion on site.

  • Cat6A is the standard for network wiring in new construction. It handles high-speed data, supports Power Over Ethernet for cameras and access points, and will meet your needs for years to come. The installation labor is identical to older cable types and the cost difference per foot is minimal.
  • RG6 Coaxial is still useful for over-the-air TV antennas and certain cable services. Run it alongside Cat6A at media locations.
  • Speaker Wire in 16-gauge runs back to your distribution center for connection to amplifiers. You will need it for any in-wall or in-ceiling audio.
  • Low-Voltage Wire handles motorized shades, contact sensors, and other smart home components that do not require network connectivity.

Living Spaces and Entertainment Areas

Your living room and family room will likely have the most technology. Plan for multiple network drops at TV locations to support streaming devices, gaming consoles, and future equipment you have not thought of yet.

  • 2-4 Cat6A drops at the primary TV location
  • 1 RG6 Coaxial drop at the TV location
  • 1 speaker wire run for a soundbar
  • 5-7 speaker wire runs for surround sound
  • 1 Cat6A drop in the ceiling for a Wi-Fi access point

Home Office Wiring for Remote Work

A home office benefits from hardwired connections more than any other room. Wi-Fi works fine for casual browsing, but video calls and large file transfers perform better over Ethernet.

  • 2-4 Cat6A drops at the desk location
  • 1 RG6 Coaxial drop
  • 1 Cat6A drop for a network printer
  • Additional drops behind desk areas for future devices

Bedroom and Hallway Runs

Each bedroom needs basic media connectivity. A central hallway location works well for a Wi-Fi access point that covers multiple rooms.

  • 2 Cat6A drops at the TV or media location in each bedroom
  • 1 RG6 Coaxial drop in each bedroom
  • 2 speaker wire runs for in-ceiling audio in the primary bedroom
  • 1 Cat6A run in a central hallway ceiling for Wi-Fi coverage

Kitchen and Laundry Room Considerations

Smart displays, small TVs, and in-ceiling speakers are common in kitchens. Running network cable behind appliance locations is speculative but forward-thinking. Future refrigerators and ovens may connect directly to your network instead of relying on Wi-Fi.

  • 1 Cat6A drop for a smart display or small TV
  • 2 speaker wire runs for in-ceiling music
  • 1 Cat6A behind the refrigerator location
  • 1 Cat6A behind the oven location
  • 1 Cat6A behind the washer in the laundry room
  • 1 Cat6A behind the dryer location

Bathroom Audio Integration

Speaker wire to bathrooms lets you extend your whole-home audio system into spaces where you might want music during morning routines.

  • 2 speaker wire runs for in-ceiling speakers in the primary bathroom
  • 1 speaker wire run for guest bathrooms
  • 1 Cat6A drop if you plan to install a smart mirror

Garage Connectivity and Access

The garage often gets overlooked during wiring planning. Security cameras, Wi-Fi coverage, and smart garage door integration all require network connectivity.

  • 1 Cat6A drop for a security camera at the garage entrance
  • 1 Cat6A drop for a Wi-Fi access point
  • 1 Cat6A drop near the garage door opener
  • 1 RG6 Coaxial drop if you plan to mount a TV

Outdoor and Landscape Wiring in NYC Homes

Outdoor spaces need network and audio infrastructure too. Running conduit from the attic to outer foundation walls gives you flexibility to add irrigation controls, landscape lighting, or additional speakers later. For homes across NYC, Brooklyn, and Queens, rooftop and patio entertainment systems are increasingly popular.

  • 1 Cat6A drop for an outdoor Wi-Fi access point
  • 2-4 outdoor-rated speaker wire runs for landscape audio
  • 1 Cat6A and power for an outdoor TV location
  • Conduit to the yard for future irrigation or lighting controls

Climate Control and Thermostat Wiring

Smart thermostats perform better with network connectivity than Wi-Fi alone. If your HVAC system supports zoned climate control, plan for multiple thermostat locations.

  • Cat6A drop at each thermostat location
  • Verify HVAC compatibility with smart home platforms
  • Consider wiring for zoned control if your system supports it

Smoke and Carbon Monoxide Detection

Hardwired smoke and CO detectors that interconnect throughout the house provide better safety than battery-powered units. An alarm in the basement will trigger alerts on every floor.

  • Hardwired power to all smoke detector locations
  • Hardwired power to CO detector locations near bedrooms and fuel-burning appliances
  • Cat6A drops near detectors for smart monitoring integration

Irrigation and Landscape Automation

Smart sprinkler controllers need either network or low-voltage wire at the installation location. Running conduit to the yard now means you can add soil moisture sensors or expand the system later.

  • Cat6A or low-voltage wire to the irrigation controller location
  • Conduit from the house to the yard for future expansion

Security Camera and Sensor Placement

Plan camera locations at every corner of the house, front door, back door, and garage. Running two cables to each location instead of one gives you room to add coverage later without pulling new wire. Power Over Ethernet cameras receive both data and power through a single Cat6A cable, which simplifies installation significantly. If you are planning integrated security systems with access control and monitoring, discuss additional wiring needs with your integrator.

  • Cat6A to all potential camera locations
  • Wire runs to windows and doors for contact sensors
  • Wire run for the main security panel and keypads
  • Consider doubling camera drops for future expansion

Smart Lighting and Motorized Shade Wiring

Smart switches require a neutral wire at each switch location. Confirm this with your electrician during the rough-in phase. Motorized interior shades can run on battery power, low-voltage wire, or Power Over Ethernet depending on the manufacturer.

  • Confirm neutral wire availability at all switch locations
  • Low-voltage wire to each window for motorized shades
  • Direct electrical wiring for exterior motorized shades

Home Automation Touchscreens and Control Systems

In-wall touchscreens from manufacturers like Savant and Control4 need network connectivity. If you are planning for whole-home audio and video distribution, discuss the specific wiring requirements with your integrator early in the design process.

  • Cat6A to each planned in-wall touchscreen location
  • Additional drops for future control panel expansion

Planning for Technology That Does Not Exist Yet

The cables you install today need to support devices that have not been invented. Run more cable than you think you need. Drop two network cables to camera locations instead of one. Pull speaker wire to every room where you might want music someday, even if you do not plan to install speakers right away.

Conduit is your best tool for future flexibility. PVC pipe between the attic and equipment rack lets you pull new cable types as technology evolves. The cost of extra materials during construction is minimal compared to the expense of opening walls later.

Using This Checklist With Your Builder

Print this list and bring it to your next meeting with your contractor and technology integrator. Go through each section room by room. Mark what applies to your home and note any questions that come up.

Every home is different. This checklist covers the most common needs for a new home pre-wire in 2026, but your specific situation may require additional planning. Use it as a starting point to create a professional new construction cabling plan that fits your family and how you live.

Your Home in 2030 and How to Pre-Wire Today for Tomorrow’s Technology

Remember when 4K TVs felt like science fiction? Conversations have already shifted to 8K displays, virtual reality setups, and AI assistants spread throughout every room. Technology moves fast, and homes built without the right infrastructure start feeling outdated within a few years.

The solution is a flexible, high-bandwidth structured cabling system. This goes beyond running wires through walls. It creates a platform for innovation that supports devices and systems we haven’t even imagined yet. Homeowners in NYC undertaking major renovations or new builds will find that planning cabling during new construction ranks among the most important infrastructure decisions of the entire project.

How the Connected Home Has Changed From 2000 to 2030

  • The 2000s brought most homes a single DSL modem and one coaxial cable running to the living room TV. Internet was something you logged onto rather than lived with constantly.
  • The 2020s look completely different. The average household now runs 17 connected devices. Streaming boxes, smart speakers, security cameras, home office setups, and Wi-Fi thermostats all compete for bandwidth. The network has become as critical as plumbing or electricity.
  • The 2030s will push things further. Expect immersive experiences like holographic displays and dedicated VR rooms requiring massive, low-latency bandwidth. AI assistants will move beyond countertop speakers to become integrated home automation systems woven into walls and ceilings. Dozens of IoT sensors will monitor health metrics, manage energy consumption, and coordinate security systems all at once.

Building a Home Network Foundation That Lasts for Decades

Building network infrastructure for emerging technology requires more than running cables. It demands thinking about what comes next.

High-Bandwidth Cabling with Fiber and Cat6A

Cat6A delivers excellent performance for current applications, supporting 10 Gbps speeds across standard distances. But a truly future-proof structured cabling design runs fiber optic lines alongside copper.

The cost of running fiber optic cable alongside Ethernet during construction is minimal. The cost of adding it after the walls close is enormous.

This hybrid approach gives you reliable copper for today’s devices while positioning your home for multi-gigabit speeds that will become standard within the decade.

Installing Conduit for Easy Future Upgrades

Conduit, sometimes called smurf tube, is flexible plastic tubing that runs from a central wiring closet to key locations throughout the home. With conduit in place, you can pull new cable types through walls years from now without demolition or drywall repair.

This matters especially in high-end NYC apartments where renovations are disruptive and expensive. The upfront cost is modest, but the long-term value for anyone thinking about how to future proof their home network is substantial.

Centralizing Network Equipment in a Dedicated Closet

Scattered equipment creates maintenance headaches. A dedicated, well-ventilated closet or rack houses the modem, router, switches, and patch panels in one accessible location.

This approach simplifies troubleshooting, makes upgrades easier, and keeps unsightly equipment out of living spaces.

Smart Home Standards Worth Understanding

Open standards matter more than brand names when selecting smart home components. The Matter protocol enables devices from Apple, Google, Amazon, and other manufacturers to communicate seamlessly. Thread wireless connectivity provides low-latency performance for sensors and controls.

Technology StandardBenefit
Matter ProtocolCross-brand compatibility without ecosystem lock-in
Thread ConnectivityReliable low-power communication for IoT devices
Wi-Fi 7Multi-gigabit wireless speeds with reduced latency
PoE++Powers devices up to 90W through Ethernet cables

Choosing systems built on these open protocols protects your investment as the smart home landscape continues to shift.

Wiring for Technologies on the Horizon

Wi-Fi 7 and Beyond

Next-generation wireless networks will deliver multi-gigabit speeds, but only when access points have wired backhauls capable of handling that throughput. This means running Ethernet to ceiling locations throughout the home, not to a single router location.

Power over Ethernet

New high-wattage PoE standards can power security cameras, VoIP phones, small displays, and even some lighting fixtures through a single Ethernet cable. This simplifies installation and reduces the number of electrical outlets needed in walls and ceilings.

Low-Voltage Lighting Systems

Tunable LED systems operate on low-voltage wiring rather than traditional electrical circuits. These systems adjust color temperature throughout the day to support circadian rhythms and can integrate directly with home automation platforms.

Designing Rooms That Adapt as Life Changes

A nursery becomes a home office. A guest bedroom transforms into a media room. Life shifts, and rooms need to shift with it.

Smart wiring anticipates these changes. Running multiple cable types to each room during construction costs little but pays off when that spare bedroom needs to support video conferencing equipment or a home gym with connected fitness mirrors. Placing junction boxes in locations that support wall-mounted displays makes sense even if you have no immediate plans to install one.

Connecting Sustainability and Health Systems to Your Network

Energy monitoring systems, solar panel integration, and EV charging stations all rely on data connectivity to function at their best. Smart breaker panels communicate usage patterns to the home network. Battery backup systems report charge levels through connected interfaces.

Wellness technology has similar requirements. Whole-house air quality monitors need network connections to log data and trigger HVAC adjustments. Water filtration systems with smart sensors alert homeowners to filter changes. These systems work independently, but when connected through a structured cabling backbone, they coordinate to create healthier living environments.

What Homeowners Ask About Pre-Wiring for Smart Technology

How much does future-proof cabling add to a new construction budget?

Pre-wiring during construction typically adds 1-3% to overall project costs. Retrofitting the same infrastructure after walls close can cost five to ten times more due to labor, drywall repair, and painting.

Can cabling be upgraded in an existing NYC apartment?

Yes, though options depend on building type. Pre-war buildings with plaster walls present challenges, but conduit pathways and surface-mounted solutions can work. Co-op and condo boards may require approval for any work affecting shared infrastructure.

What is the minimum to install if budget is tight?

At minimum, run Cat6A to every room where a TV or computer might go, plus ceiling locations for wireless access points. Add conduit runs from the central closet to the attic or basement for future expansion.

How long will Cat6A cabling remain relevant?

Cat6A supports 10 Gbps speeds and should remain viable for residential applications through the 2030s. Running fiber alongside copper provides additional insurance for bandwidth demands beyond that timeframe.

Creating Infrastructure That Grows With Technology

Future-proofing is not about predicting exactly what technology will emerge. It is about creating a flexible foundation that adapts to whatever comes next. Fiber alongside copper, conduit pathways for future cables, and centralized equipment placement give a home the infrastructure to grow.

The smartest homes of 2030 will be the ones planned with foresight today. A conversation with a technology integrator can help design an infrastructure ready for whatever innovations arrive over the coming decades.

7 Low-Voltage Wiring Mistakes That Can Ruin Your New NYC Apartment

The drywall is up. The paint looks perfect. But the Wi-Fi keeps dropping and your smart TV buffers constantly. If you’ve wondered why your ethernet is slow in your new house, the answer is usually hiding behind those freshly painted walls.

A simple, avoidable mistake made months earlier during the wiring phase is often to blame. These low voltage wiring errors aren’t always obvious during construction, but they show up the moment you move in. Here’s what goes wrong and how to prevent it.

The Most Expensive Wiring Mistakes at a Glance

Running Data Cables Too Close to Power Lines

Think of it like trying to have a quiet conversation next to a roaring subway train. Data cables running parallel to high-voltage electrical lines pick up electromagnetic interference that disrupts the signal.

What You’ll Notice

Unreliable Wi-Fi connections. Ethernet speeds that never reach their rated potential. Crackling in audio systems. Random data errors that seem impossible to diagnose.

How to Prevent It

Low-voltage data cables should maintain at least 12 inches of separation from electrical cables when running parallel. If they must cross, they should intersect at a 90-degree angle.

In tight Manhattan apartments and Brooklyn brownstone renovations, every trade competes for limited space inside walls and ceilings. A coordinated new construction cabling plan before anyone starts pulling wire makes all the difference.

Cheap Cabling That Fails When You Need It Most

Not all ethernet cable performs the same. Copper Clad Aluminum cables cost less than solid copper, but they’re brittle, less conductive, and don’t comply with TIA industry standards.

What You’ll Notice

Connections that fail over time. Network ports that suddenly stop working. An inability to deliver Power over Ethernet to security cameras or Wi-Fi access points.

How to Prevent It

Always specify and verify that your installer uses 100% solid copper Category 6A or better cabling from a reputable manufacturer.

Pro-Tip: Ask to see the box the cable came in. It should be clearly marked as solid copper and rated for the category you specified. If the installer can’t show you the packaging, that’s worth questioning.

Not Installing Enough Network Drops

A minimalist approach to wiring rarely pays off. Homeowners and builders sometimes try to save a few hundred dollars by installing only one or two ethernet ports in the entire home. This is one of the most common pre-wire mistakes in new construction projects.

What You’ll Notice

A home office that depends entirely on spotty Wi-Fi. A media center buried under switches and tangled cables. No wired option for the bedroom smart TV.

How to Prevent It

Plan for a minimum of two data drops in every key room. Living room, home office, bedrooms. Running an extra cable during construction costs almost nothing compared to opening finished walls later.

A cabling subcontractor involved during the rough-in phase can help you plan for both current needs and future expansion.

Bending Cables Too Sharply or Cinching Bundles Too Tight

Data cables aren’t as forgiving as standard electrical wire. Exceeding the bend radius or using plastic zip ties to cinch bundles too tightly damages the internal copper pairs and degrades performance over time.

What You’ll Notice

A network port that tests fine during the walkthrough but fails under heavy load. A gigabit connection that only registers at 100Mbps. Intermittent dropouts during video calls. These are classic network cable installation mistakes.

How to Prevent It

Installers should follow the manufacturer’s specified bend radius for each cable type. Loose-fitting Velcro straps work better than plastic zip ties for bundling cables.

Pro-Tip: The rule of thumb for bend radius is no tighter than the diameter of a coffee mug. If it looks kinked, it probably is.

Forgetting to Document Before the Drywall Goes Up

This isn’t a technical mistake. It’s a process mistake with major consequences. Once the walls close, you lose all visibility into where cables actually run.

What You’ll Notice

You hang a picture and drive a nail through a critical data line. You want to add a new outlet and have no idea what’s already in the wall. A future technician spends hours troubleshooting because there’s no documentation.

How to Prevent It

During the pre-wire walkthrough, take detailed photos and videos of every wall and ceiling cavity before insulation and drywall go up. Label these images by room and store them digitally.

This documentation becomes invaluable for future service calls. It’s also a selling point when your apartment hits the market, giving the next owner a clear map for their technicians.

Using Cable Not Rated for the Installation Environment

This is different from cable quality. Even solid copper Cat6A will fail if it’s not rated for where you install it. Indoor-rated cable used outdoors degrades from UV exposure. Standard cable in air handling spaces violates fire codes. Unshielded cable near motors or fluorescent lighting picks up interference.

What You’ll Notice

Insulation that cracks or becomes brittle within a year. Failed inspections that delay your certificate of occupancy. Intermittent signal problems that only appear under certain conditions.

How to Prevent It

Match the cable rating to the installation environment. Use plenum-rated cable in air handling spaces and drop ceilings. Choose UV-resistant, outdoor-rated cable for any exterior runs. Install shielded cable near sources of electrical noise.

Ignoring Voltage Drop on Long Cable Runs

Voltage drop happens when electrical resistance in the cable reduces the power available at the far end. This matters most for low-voltage lighting, powered devices, and PoE equipment. A 3-volt drop that’s negligible in a 120V circuit can completely disable a 12V system.

What You’ll Notice

LED landscape lights that dim noticeably at the far end of a run. Security cameras that randomly reboot or won’t power on. Access control panels that behave erratically.

How to Prevent It

Calculate voltage drop for any cable run longer than 25 feet. Keep total drop under 5% for general use and under 3% for sensitive equipment. For longer runs, use a larger gauge wire or add a power source closer to the load.

Common Questions Answered

Which mistake costs the most to fix after construction?

Not installing enough network drops. Opening finished walls to run new cables costs significantly more than adding extra runs during the rough-in phase. The cable itself is inexpensive compared to the labor of cutting, patching, and repainting drywall.

How can I tell if my installer used quality cable?

Ask to see the original packaging. Quality cable is clearly marked with the manufacturer name, cable category, and “solid copper” designation. Avoid any cable marked CCA or cable without clear labeling.

Do I need permits for low-voltage wiring in NYC?

Low-voltage work typically doesn’t require the same permits as high-voltage electrical, but it depends on the scope of your project. Work involving fire alarm systems, building-wide infrastructure, or modifications to common areas in co-ops and condos often requires permits and inspections.

How far should data cables be from electrical wires?

Maintain at least 12 inches of separation when running parallel to electrical cables. If data and power cables must cross, they should do so at a 90-degree angle to minimize electromagnetic interference.

Planning Your Low-Voltage Wiring Early Prevents Expensive Fixes

A successful smart home starts with thoughtful wiring. These mistakes are easy to make but equally easy to avoid with some planning upfront.

The most reliable way to sidestep these issues is working with experienced installers during the new construction cabling phase. A solid structured cabling foundation is one of the smartest investments in any home’s technological future.

What Every NYC Homeowner Should Know About Pre-Wiring During Renovation

You’ve closed on a stunning new apartment in Manhattan. The finishes are gorgeous and the views are incredible. But within the first week, the Wi-Fi drops out in the bedroom. Your smart TV buffers constantly. Running cables for that home office means ugly wires along the baseboards or expensive demolition later.

This scenario plays out often in New York City. The fix is simple, but it needs to happen before those walls close up. Pre-wiring is the hidden infrastructure that separates a modern, connected home from one that fights against itself. This guide covers what cables to run in new apartment construction and how to plan for the technology you’ll use today and years from now.

Why Wired Connections Still Matter in NYC High-Rises

Living in a New York apartment means dealing with challenging wireless conditions. Your neighbors’ networks compete with yours. Concrete walls and steel framing block signals. A pre-war building conversion or modern high-rise with reinforced construction can turn a fast internet connection into frustration.

Hardwired Ethernet delivers consistent speeds, lower latency for video calls and gaming, and better security than broadcasting data through the air. For critical devices like your work computer or main TV, relying on Wi-Fi alone leaves performance on the table. The network infrastructure you install during construction becomes the backbone for every connected device in your home.

Room-by-Room Wiring for a Connected Apartment

Smart home wiring during construction requires thinking through how you’ll actually use each space. Going room by room helps identify exactly where you need connectivity.

Your Entertainment Hub

This room typically needs the most attention. Plan for multiple Ethernet ports behind the TV location for streaming devices, gaming consoles, and the television itself. Speaker wire runs for surround sound should be mapped out now. If you use cable TV, include a coaxial drop as well.

Your Home Office Setup

Remote work has made the home office essential. Run at least two Ethernet drops to your desk area for your computer and a backup device. If this room sits far from your main router, consider adding a ceiling mount for a dedicated wireless access point.

Bedroom Connectivity

Each bedroom benefits from Ethernet behind the TV mounting location. If you’re planning motorized window shades, low-voltage wiring needs to reach each window. Speaker wire turns any bedroom into part of a whole-home music system, and pairs well with a broader home automation setup.

Kitchen Wiring Needs

Even kitchens need connectivity. An Ethernet drop supports smart displays, small TVs for recipe videos, or future smart appliances. In-ceiling speakers keep music flowing while you cook without taking up counter space.

Comparing Cable Types for Residential Pre-Wires

Different cable types serve different purposes. Here’s what you need to know about each.

Cable TypePrimary UseWhy You Need It
Cat6A EthernetInternet and NetworkingDelivers the fastest, most reliable connection for computers, TVs, and Wi-Fi access points. Supports 10-Gigabit speeds over standard distances.
Fiber OpticFuture-ProofingOffers nearly unlimited bandwidth. Ideal for connecting your apartment to the building’s main fiber line or for demanding applications.
RG6 CoaxialCable TV and InternetStill required by most cable TV and internet providers throughout NYC.
Speaker Wire 16/2 or 14/2AudioConnects in-wall, in-ceiling, or traditional speakers for distributed audio throughout the home.

A structured cabling approach treats all these cable types as part of one unified system, with everything terminating at a central location for easy management.

Evaluating Your Existing Electrical Infrastructure

Before any cables get pulled, a contractor needs to evaluate the existing infrastructure. In older NYC apartments, this starts with the electrical panel. How many circuits exist? Is there capacity for additional loads? Experienced professionals can look at the panel and determine what the current system can handle versus what needs upgrading.

Pre-war apartments that haven’t been updated in decades often need significant work. Many buildings constructed through the early twentieth century have outdated wiring systems with only 60 to 100 amps of service. Modern homes typically require 200 amps to support today’s electrical demands. Some older systems lack code-approved grounding conductors or use materials that increase the risk of electrical issues.

What Low-Voltage and Electrical Work Costs in NYC

Understanding potential costs helps avoid surprises mid-project. Rough-in work, where cables are run to outlets and switches before walls close, is typically charged by the junction box or outlet at $250 to $400 each. The total depends on how many locations you need wired.

Electrical panel upgrades range from $2,000 to $5,000 or more for a new box. If your existing panel has room for new circuits but you’re adding energy-hungry devices, each new circuit breaker runs between $300 and $800. Additional outlets typically cost $100 to $300 each.

Full electrical overhauls that include demolition, permits, labor, materials, and refinishing can start at $15,000 and climb based on apartment size. For gut renovations, electrical work often represents around 5% of the total budget. If you’re only renovating one room, a full electrical upgrade for that space might match or exceed the rest of the project cost.

NYC Permits and Inspection Requirements

Anything beyond a simple fixture swap requires an electrician licensed by the Department of Buildings. The electrician must file an electrical application and pay permit fees before work begins. Once completed, an inspection takes place and a certificate is issued confirming the work meets code.

Each room must have a light fixture according to NYC electrical code. Smoke and carbon monoxide detectors must be hardwired since battery-powered models are not permitted. Your contractor should walk through these requirements during the initial assessment.

Challenges Unique to New York Apartment Buildings

New York City presents unique obstacles. Co-op and condo boards often require detailed approval before work begins, including documentation of exactly what’s being installed. Building codes are strict, and high-rise construction typically requires plenum-rated cables that meet fire safety standards.

Pre-war buildings add another layer of complexity. Working around original plaster, brick, and decades of previous renovations takes experience. These challenges aren’t reasons to skip pre-wiring. They’re reasons to plan carefully with professionals who understand how NYC buildings are constructed.

How the Pre-Wiring Process Works During Construction

The pre-wiring timeline aligns with specific construction phases.

  • Consultation and Design happens before demolition wraps up. This is when you map out every cable run based on how you’ll use each room.
  • Rough-In occurs after framing but before drywall installation. Cables are pulled through walls and ceilings to their designated locations, with extra length left at each end for termination.
  • Termination and Testing comes after the walls are finished. Wall plates get installed, cables are connected to a central patch panel, and every run is tested to verify performance.

Missing the rough-in window means either surface-mounted cables or expensive wall demolition later.

The Long-Term Value of Pre-Wiring Your NYC Apartment

Pre-wiring represents a small fraction of a renovation budget but delivers outsized returns in usability, home value, and future flexibility. A well-executed low-voltage system eliminates frustrations that come from retrofitting technology into a finished space.

The key is starting early. By thinking about technology needs from the beginning, you build an apartment ready for whatever comes next. For a deeper look at how this process works during construction, new construction cabling covers the full scope of planning and installation.

NYC Pre-War Building Smart Home Installation Experts

Smart home technology offers modern convenience and security, but installing it in New York City’s historic pre-war buildings requires special expertise. Older brownstones and co-op apartments have unique construction quirks, from plaster walls hiding legacy wiring to steam-heated radiators that make a simple retrofit challenging. NYC IT Tech Audio Video, CCTV And Surveillance Camera Installation specializes in integrating smart home systems into these classic structures throughout Manhattan and the five boroughs. We combine respect for historic details with cutting-edge solutions so your NYC brownstone feels both smart and authentic.

Unique Challenges in Pre-War Buildings

Pre-war and brownstone residences often come with very old infrastructure. Many Manhattan brownstones in Murray Hill, Gramercy Park or the Upper East Side still use original plaster walls and knob-and-tube wiring behind the walls. Simply drilling holes or fishing cables can crack the plaster if done carelessly. Our team knows how to work with those materials: we use specialized anchors, wall-safe cable channels, and wireless devices whenever possible. We also update outdated components like fuse boxes or fragile outlets. For example, if your Park Slope or Chelsea home has an old steam radiator heating system, we add smart thermostats or radiator valves that integrate without replacing any pipes. Every step is done with an eye on New York City building codes and landmark regulations, ensuring your historic home stays beautiful and compliant.

Modernizing Electrical and Infrastructure

A key part of any smart home installation in a pre-war building is upgrading the power supply. Many century-old brownstones were built with 60- or 100-amp electrical panels, which can’t handle today’s load. At NYC IT Tech, our licensed electricians perform electrical upgrades up to 200 amps or more as needed. This gives your home enough capacity for dozens of devices, from AV systems to air conditioning, without tripping breakers. We pull all necessary permits and coordinate inspections with the NYC Department of Buildings. Because we’re based in Manhattan, we’re familiar with Con Edison procedures and local safety requirements. Whether it’s running new circuits for your theater room or installing a whole-house surge protector, we handle the heavy lifting so your pre-war home can safely power modern technology.

Seamless, Non-Invasive Installation Techniques

In New York’s dense neighborhoods, builders often restrict disruptive construction. That’s why NYC IT Tech uses wireless and minimally-invasive solutions whenever possible. For example, we install wireless smart sensors and controls for lighting, shades, and climate, avoiding the need to open walls. When we do run wires, we use surface-mounted raceways or tuck cables along trim lines to keep them out of sight. In landmarked areas or co-op buildings, we follow all regulations for facades and common areas, using small wireless access points or antennas instead of large antennas. Even for equipment like smart thermostats or intercoms, we choose compact, elegant designs that blend with historic decors. The result: modern automation in your pre-war building with minimal disruption to your life or the building’s character.

Local NYC Expertise

Located near Grand Central Terminal in Midtown Manhattan, NYC IT Tech knows New York City inside out. We’ve worked in pre-war buildings across neighborhoods like Murray Hill, Kips Bay, Gramercy Park, Chelsea, the Upper East Side, and the Upper West Side. We also handle Brooklyn brownstones in Park Slope, Carroll Gardens, and Williamsburg. This local footprint means we understand each area’s unique rules and architectural styles. For example, integrating smart security cameras on a pre-war façade near Times Square requires careful compliance with FDNY and NYC fire codes, something our team is fully prepared for. Our familiarity with landmarks like Grand Central or the Empire State Building ensures we always bring the right equipment for each setting. With NYC IT Tech, you get a smart home solution tailored to the specific neighborhood and building where you live.

Enhancing Comfort, Safety, and Value

A brownstone smart home isn’t just about gadgets, it’s about making daily life better. Imagine coming home to a perfectly climate-controlled Manhattan apartment after a hot summer commute. Our smart thermostats can adjust your pre-war home’s temperature automatically, even if it has old steam radiators. Picture automated lighting scenes in a Brooklyn Heights living room: warm lights turn on in the evening while preserving the charm of original moldings and woodwork. We also integrate advanced security systems designed for urban living. Video doorbells and smart locks let you grant access to guests or service people from your phone, whether you’re at your Midtown office or away in Central Park. All these upgrades, from energy-saving automation to apartment-wide audio, increase comfort and can even boost the value of your historic NYC home.

Why Choose NYC IT Tech for Your Smart Home Installation

NYC IT Tech Audio Video, CCTV And Surveillance Camera Installation stands out as the local authority on smart homes in pre-war buildings. Our team combines decades of experience in home automation, professional audio/video, and security. We design each system with New York’s unique needs in mind, so your smart home works flawlessly within older structures. Because we’re based in Manhattan, our response times are fast across the city, from Midtown to Manhattan’s Upper West Side. We treat every brownstone like our own, providing personalized service you can trust. When you choose NYC IT Tech, you choose NYC neighbors who care about preserving your home’s history while adding modern convenience.

Contact NYC IT Tech Today

Ready to modernize your NYC pre-war home? Call NYC IT Tech at (212) 671-3330 to schedule your free consultation. Our experts will walk you through smart home options for your building. You can also visit our website for more information or check out our Google Business Profile to see customer reviews. Let us help you enjoy the best of both worlds, the charm of a historic home with the cutting-edge convenience of today’s technology.

Frequently Asked Questions (FAQs)

Absolutely. NYC IT Tech has specialized experience integrating smart home technology into century-old buildings. We account for antique wiring and plaster walls. For example, we upgrade electrical panels and use wireless controls so your home’s technology is seamless and your walls stay intact.

We are based in Manhattan and serve clients throughout New York City. Our work is common in Manhattan areas like Murray Hill, Kips Bay, Chelsea, the Upper East Side, and Gramercy Park. We also handle Brooklyn brownstones in Park Slope, Carroll Gardens, Williamsburg and more. Wherever your pre-war building is, our team knows the local codes and routes.

In many cases, yes – especially for electrical upgrades or if the building is landmarked. NYC IT Tech takes care of all permit pulls and ensures compliance with NYC building codes. We coordinate with local agencies (and co-op boards, if applicable) so the process is smooth and worry-free for you.

We minimize disruption. Our approach uses wireless devices and carefully routed wiring to avoid tearing into walls. Most smart home installations in pre-war apartments can be completed in a day or two. We schedule work at your convenience and always leave the site clean.

It’s easy! Call us at 212-671-3330 or visit our website to request an estimate. We’ll discuss your goals, inspect your building, and provide a clear plan for installing smart technology in your NYC brownstone.

In summary, upgrading a pre-war building in New York City with smart home technology requires local expertise, careful planning, and respect for historic construction. NYC IT Tech Audio Video, CCTV And Surveillance Camera Installation delivers all of the above. Contact us today at (212) 671-3330 and enjoy the modern convenience of a fully integrated smart home while preserving the charm of your historic NYC residence.

Aging in Place in NYC with Smart Home Technology for Seniors

For seniors who’ve spent decades in New York City, this place means home. The bodega owner who knows your order, the park bench where you’ve watched seasons change, neighbors you’ve known for thirty years. Moving away from all that feels impossible, and it doesn’t have to happen. Aging in place technology solutions are giving older New Yorkers practical ways to stay in their apartments and brownstones while addressing real safety concerns.

Why More NYC Seniors Choose to Age in Place

Your apartment holds memories that no facility can replace. Grandmother’s recipes tested in that same kitchen, family gatherings around the dining table, the view you’ve woken up to for decades. Smart home technology for seniors is helping New Yorkers maintain independence without sacrificing safety.

Three out of four people over 50 want to stay in their current homes as they age. With accessible home security services now available, that goal is realistic. Adult children living in other boroughs or states can check in without constant phone calls or visits that feel intrusive.

Aging in Place Technology Solutions for Everyday Challenges

Fall Prevention and Getting Around Safely

Walking through a dark hallway at 2 AM to use the bathroom shouldn’t feel dangerous. Motion-activated lighting changes that. Sensors detect movement and gently brighten pathways before you reach for a switch. A voice activated assistant for seniors lets you say “turn on the bedroom lights” without fumbling in the dark.

Brownstone living presents unique challenges with multiple floors and narrow staircases. When you add smart home automation throughout each level, lights respond to your presence automatically. Professional lighting and shading systems can be programmed to adjust throughout the day, mimicking natural light patterns that help maintain healthy sleep cycles.

Remembering Medications and Appointments

Smart displays sit on kitchen counters or nightstands and announce medication times with gentle audio and visual alerts. They also handle video calls with doctors for telehealth appointments. The same screen that reminds you about morning pills can connect you with your cardiologist or show you how to prepare a recipe.

Voice assistants answer questions about the weather, play your favorite radio station, and set reminders without complicated phone menus. For seniors who struggle with small buttons or touchscreens, voice activated systems remove physical barriers to staying organized.

Protecting Against Security Threats and Scams

Scammers target seniors, assuming older people are more trusting or less tech-savvy. Installing video intercom systems at building entrances lets you see exactly who’s buzzing before letting anyone in. You can speak to visitors through your phone even when you’re visiting family in Queens or Jersey.

Smart locks eliminate hiding spare keys under doormats or dealing with unreliable superintendent services. Adult children can unlock the door remotely if their parent falls and can’t reach it, or when a home health aide arrives. These systems work with access control installations that track who enters and when, creating a digital record for both security and accountability.

Maintaining Family Connections

Video calling devices designed for seniors skip the complicated setup that smartphones require. Press one large button and your granddaughter appears on screen. These bridge the gap between Sunday dinners and give grandparents front-row seats to school plays, piano recitals, and everyday moments they might otherwise miss.

The cameras work both ways. When adult children worry about a parent who lives alone, two-way video chat offers reassurance without feeling like surveillance. You can show them the new plant you bought or ask their opinion about rearranging furniture.

How to Help Elderly Parents Live at Home Safely with Remote Monitoring

Remote monitoring gives families information without constant check-ins that feel patronizing. Motion sensors on refrigerator doors confirm that someone is eating regularly. Installing security camera systems around entry points sends alerts when doors open or close, so you know your mother made it home from her afternoon walk.

Learning how to help elderly parents live at home safely starts with understanding which tools provide genuine support versus unnecessary complications. Nobody wants to feel spied on in their own home. Transparency about which devices are active and what they monitor maintains trust while providing the safety net both generations need. Door and window sensors work well when integrated with professional alarm system installation, alerting family members to unusual activity patterns without invasive cameras in every room.

Designing Systems That Help Without Adding Complexity

The best smart home setup is one that gets used. Complicated apps with dozens of menus sit untouched because nobody has time to figure them out. Professional installation matters. Smart home technology for seniors needs to work intuitively from day one, responding reliably to simple voice commands or single-button presses.

Seniors throughout Brooklyn neighborhoods have different needs than those in Manhattan high-rises. A walk-up apartment requires different solutions than a building with 24-hour doormen. The goal is independence, not adding more things to worry about. Technology should fade into the background of daily life, working quietly without demanding constant attention. When your lights turn on as you enter a room and your front door locks itself at bedtime, you’re not thinking about smart features. You’re just living in a home that adapts to your needs, letting you stay in the place you love.

Can You Add Smart Tech to a 100-Year-Old Brownstone?

Walk up to your Park Slope brownstone and the door unlocks automatically. Inside, lights adjust to evening mode, your playlist starts, and the temperature is perfect. Your original crown molding, hardwood floors, and century-old plaster walls stay completely untouched.

This happens every day in brownstones across Cobble Hill, Bedford-Stuyvesant, and Fort Greene. The question isn’t whether you can add smart technology to a 100-year-old building, it’s how to do it without damaging what makes your home special.

The First Thing to Know About Brownstone Upgrades

The best technology is invisible. When renovating a historic brownstone with technology, your upgrades should protect what’s already there. If your brownstone falls under NYC Landmarks Preservation Commission designation, exterior changes need approval. But even non-landmarked homes benefit from this mindset: integration that enhances daily life without compromising the architecture.

The Reality of 100-Year-Old Construction

Brownstones built between 1870 and 1930 share features that affect tech decisions:

  • Plaster walls over wood lath (crack easily, hard to patch)
  • Original electrical systems, sometimes with knob-and-tube wiring
  • High ceilings creating hot and cold zones
  • Thick masonry walls blocking wireless signals
  • Historic facades with strict modification rules

Get an electrical assessment first. Many brownstones run on 60-amp or 100-amp service, which struggles with modern devices. Upgrading to 200-amp service gives you the foundation for a brooklyn brownstone smart home.

Installing Tech Without Destroying Your Walls

What Makes This Hard

Plaster walls crack, crumble around screw holes, and hide surprises. Running new wires means cutting, patching, and often losing original plaster you can’t replicate. For landmarked homes or exceptional plasterwork, this isn’t acceptable.

What Works Better

Wireless home automation for historic homes has come a long way. WiFi, Z-Wave, or Zigbee systems eliminate new wiring runs, protecting your walls while delivering full functionality.

For stronger connectivity:

ChallengeWhat to UseWhy It Helps
Thick walls block WiFiMesh network systemsMultiple access points cover vertical space
Multiple floorsPowerline adaptersUses existing electrical wiring
Keeping things hiddenAccess points in closetsBehind furniture or in storage

When wires are necessary, work with home automation installers who know old buildings. They fish cables through existing spaces and use basement/attic routes to minimize wall cuts.

Heating and Cooling Multiple Floors

Brownstone owners know that the third floor swelters in winter while the parlor floor stays cold. Single-zone systems push heat up with no balance across stories. You’re overheating the entire house trying to warm one cold room.

Here’s how to install smart home temperature control in multi-story house layouts:

Smart Thermostats with Sensors

Nest Learning Thermostat and Ecobee SmartThermostat place sensors on each floor. The main unit replaces your existing thermostat (simple swap), while wireless sensors report temperature data back. The system averages temperatures across sensors or prioritizes rooms at different times: bedrooms at night, common areas during the day.

Zone Dampers

For brownstones with ductwork, motorized zone dampers are installed inside existing ducts to direct airflow. Combined with a smart thermostat, you get true multi-zone comfort. Needs professional installation but works within your current system.

Basic thermostat replacement takes a few hours. Whole-home automation coordinating climate with other systems takes more planning.

Results?

Most homeowners see 15-20% lower heating costs. Every floor becomes comfortable, top-floor bedrooms cool enough to sleep, garden-level kitchens warm enough to cook.

Keeping Historic Switches While Going Smart

Original light switches, push-button mechanisms, porcelain faceplates, brass toggles are part of your home’s character. Modern plastic switches or touch panels ruin that. But you still want dimming, scheduling, and lighting scenes.

You can keep every original switch and still add smart control:

Smart Modules Behind Switches

Lutron Caseta installs behind your existing switch. Original hardware stays and works normally, plus you get phone control, schedules, and automation scenes. Works for dimmers and on/off control.

Smart Bulbs

Philips Hue or LIFX screw into existing fixtures. No wiring changes. Wall switches keep working, bulbs respond to apps, voice commands, and automation. Perfect for chandeliers and decorative fixtures.

New Switches That Fit

If replacing switches, choose smart options in oil-rubbed bronze, aged brass, or matte black instead of white or chrome.

Security That Doesn’t Ruin Your Facade

Modern security cameras on historic facades look out of place and can violate Landmarks Preservation Commission guidelines. But security matters for valuable homes in developing neighborhoods.

Robust security without visual intrusion is possible with the right approach:

Video Doorbells

Modern video doorbells are smaller and available in bronze, brass, or black finishes matching existing hardware. Installation replaces your current doorbell using the same wiring. For landmarked properties, confirm LPC compliance first.

Cameras

Interior cameras placed in windows monitor stoops, front yards, or rear gardens without exterior mounting. Position behind sheer curtains or in upper windows. For exterior cameras: mount under eaves, disguise as light fixtures, or position at rear entries where facade rules don’t apply.

Smart Locks

August Smart Lock installs on the interior, leaving exterior hardware unchanged. Schlage and Yale offer smart locks in traditional finishes. Complete systems coordinate locks that disarm alarms and cameras that record when motion triggers.

Security Components

ComponentWhat It DoesInstallation Notes
Door/window sensorsDetects openingsWireless models don’t damage frames
Motion detectorsInterior monitoringBattery-powered and repositionable
Glass break sensorsDetects intrusionMounts on window frames
Smart sirensAlerts during eventsHidden in closets

LPC Requirements

NYC Landmarks Preservation Commission requires approval for cameras on primary facades, new doorbell installations on landmarked buildings, exterior lighting changes, and any visible modifications including wiring. Interior work typically doesn’t need approval, but verify your situation.

The Best Systems for Historic Homes

Systems that consistently perform well across Brooklyn historic homes, include:

Temperature Control

Nest Learning Thermostat (3rd Gen) – Works with older heating including radiators, includes one sensor (more available), learns your schedule, compatible with most brownstone HVAC.

Ecobee SmartThermostat Premium – Includes one sensor, supports unlimited additional sensors for multi-floor monitoring, built-in air quality monitoring, works with radiators.

Lighting

Lutron Caseta Wireless – Installs behind existing switches, doesn’t require neutral wire (important in older homes), reliable proprietary wireless, integrates with major platforms.

Philips Hue – No wiring changes, 16 million colors, works with existing switches, good for accent lighting and fixtures.

Audio and Video

Sonos Multi-Room Audio – WiFi-based, no speaker wire through walls, finishes that complement traditional decor, expandable room by room.

In-Ceiling Speakers – Install in dropped ceilings or between joists, paintable grilles, requires speaker wire but better sound quality.

Security and Access

Ring Video Doorbell Pro 2 – Smaller form factor, venetian bronze finish, uses existing wiring, 1536p HD video.

August Wi-Fi Smart Lock (4th Gen) – Interior installation, exterior hardware unchanged, works with existing deadbolt, auto-unlock.

Arlo Essential Spotlight Camera – Wire-free battery-powered, 1080p video with color night vision, weather-resistant.

Whole-Home Integration

Control4 (professional installation, complex systems), Savant (high-end interface), Apple HomeKit (Apple ecosystem), Home Assistant (open-source, tech-savvy users).

What to Expect During Installation?

Installing smart home tech in a brownstone is different from new construction. Here’s the typical process when working with installers experienced in historic homes:

Initial Visit

A technician walks through your home to identify challenges testing Wi-Fi coverage, inspecting the electrical panel, checking whether walls are plaster or drywall, and photographing potential equipment locations. You’ll discuss priorities and budget.

Planning Phase

The team designs a system around your home’s constraints. This includes selecting equipment suited for historic construction, planning an installation approach that minimizes wall damage, and mapping out how different systems will integrate. Timeline accounts for any permits or approvals.

Installation Day(s)

Installers protect original hardwood floors and work carefully around plaster walls. They clean up daily, test all systems before leaving, and train you on how everything works.

Timeline

  • Smart thermostat: 2-4 hours
  • Whole-home lighting: 1-2 days
  • Security system: 2-3 days
  • Full automation: 1-2 weeks

Budgeting Your Smart Home Upgrade

Investment varies based on scope. General ranges for Brooklyn brownstone installations:

  • Smart thermostat with sensors: $400-800 installed
  • Lighting control (per room): $200-500
  • Video doorbell: $300-500 installed
  • Smart locks: $250-400 per door installed
  • Security camera system (4-6 cameras): $1,500-3,500
  • Whole-home audio (3-4 zones): $2,500-6,000
  • Complete smart home integration: $8,000-25,000+

These reflect quality equipment and professional installation by technicians who know historic homes.

The Power of System Integration

Connected systems transform how you live. However, these require planning during installation to ensure compatibility and proper programming.

  • Arriving Home: Door unlocks as you approach, lights turn on based on time of day, thermostat adjusts, music starts, security disarms.
  • Leaving Home: One button locks doors, arms security, adjusts thermostats, turns off lights, activates cameras.
  • Overnight: Lights dim throughout, thermostats adjust for sleeping, motion sensors activate on lower floors while disabling upstairs.

Bringing Your Brownstone Into the Modern Era

A century ago, your home represented modern comfort: indoor plumbing, central heating, electricity. Now, you’re doing the same thing with different technology.

Smart climate control, security, lighting, and audio enhance your historic home without compromising its character. The key is working with installers who understand both modern systems and historic preservation.

Whether you start with one smart thermostat or plan full automation, take time to do it right. Your brownstone has survived because owners maintained it thoughtfully. Properly installed smart technology continues that tradition making the house work better for how you live while preserving what makes it special.

Your First Smart Home: 5 Simple Automation Tips for NYC Renters

Smart homes aren’t just for wealthy homeowners with sprawling houses in the suburbs. Your studio in Hell’s Kitchen or one-bedroom in Astoria can benefit from the same technology without calling an electrician or asking permission from your landlord.

The biggest challenge isn’t cost or complexity. It’s feeling overwhelmed by the sheer number of products and platforms. Walk into any electronics store and you’ll find hundreds of “smart” devices, each claiming to revolutionize your life. This beginner’s guide to home automation cuts through that noise.

Here’s what you’ll learn. Five simple, affordable, and renter-friendly automation ideas you can implement this weekend. No drilling. No rewiring. No losing your security deposit. Just practical upgrades that make your daily routine in NYC smoother. If you can plug in a lamp and download an app, you’re qualified.

Before You Start: Choosing Your “Brain” (Alexa, Google, or Apple)

Every smart home needs a central voice assistant to act as the brain of your setup. The good news? You probably already own one.

PlatformWhat You NeedCostBest For
Amazon AlexaEcho Dot or Echo$30-50Most device compatibility
Google AssistantNest Mini or Android phone$30 or freeIntegration with Google services
Apple HomeKitiPhone or iPadFreePrivacy and security focus

Most smart plugs, bulbs, and sensors work across all three platforms. Picking Google doesn’t lock you out of using Amazon-compatible devices later. Start with what you already have or pick up an affordable smart speaker.

You Can Start for Under $100

The best smart home devices for small apartments share three traits. They’re wireless, they’re removable, and they solve real daily frustrations. You can start getting started with smart home on a budget with less than $100 total investment.

Here’s what that starter kit looks like:

  • 3-4 smart plugs ($60-80)
  • 2-3 smart bulbs ($30-45)
  • 1 door/window sensor ($20-30)
  • Total ($110-155)

You don’t need to buy everything at once. Start with one automation from this guide, get comfortable with it, then add another next month.

Automation #1: The “Good Morning” Routine

  • Benefit: Wake up gently without fumbling for light switches in the dark.
  • Recipe: One smart plug on a bedside lamp + your voice assistant.

How it works:

Program your smart plug to turn on your lamp gradually at 6:45 AM. Light starts at 10% brightness and increases over 15 minutes. Your voice assistant can simultaneously play your news podcast, weather forecast, or playlist.

This simple home automation idea for apartments works with your natural circadian rhythm. Gradual light helps you wake up less groggy. In NYC apartments with limited natural light, it compensates for rooms without morning sun.

Setup takes 5 minutes. Create a “Good Morning” routine in your voice assistant’s app. No permanent installation or rewiring.

Why This Works in NYC Apartments

Many pre-war buildings have lamps with switches in inconvenient locations. Put that hard-to-reach floor lamp on a smart plug and control it from bed. This renter friendly smart home setup moves with you to your next apartment.

Automation #2: The “I’m Leaving” Routine

  • Benefit: Save money on electricity and stop worrying about what you left on.
  • Recipe: Smart plugs on non-essential electronics throughout your apartment.

How it works

Rushing to catch the 1 train and can’t remember if you unplugged the hair straightener? Program an “I’m Leaving” routine that shuts down everything non-essential with one voice command.

Connect these devices to smart plugs:

  • Coffee maker
  • Phone chargers
  • TV and entertainment system
  • Hair styling tools
  • Desk fan or portable heater
  • “Vampire” devices that draw power when not in use

Say “Alexa, I’m leaving” as you walk out. Everything turns off automatically. Check from the subway to confirm everything is shut down.

The NYC Energy Savings

Phantom power from standby devices can add $10-20 to your monthly electric bill. This automation pays for itself within a few months.

Fast-paced NYC lifestyles mean you’re always rushing. This routine eliminates the mental burden of remembering what you left on.

Automation #3: The “Movie Night” Scene

  • Benefit: Create instant ambiance for entertaining, date nights, or binge-watching.
  • Recipe: 2-3 smart bulbs in your main living area lamps.

How it works

Smart bulbs screw into any standard lamp socket. Most connect directly to your WiFi without a separate hub. They cost $10-15 per bulb and display millions of colors plus different white temperatures.

Create a scene called “Movie Night” that sets all your living room lamps to 20% brightness and warm amber color (around 2200K). Optional setting turns off overhead lights if you have smart switches.

Say “Hey Google, movie night” and your apartment transforms. The same bulbs can create bright white light (5000K+) for cleaning or cool blue tones for late-night reading.

Perfect for Small Spaces

Smart home automation maximizes convenience in compact living spaces. Your entire studio or one-bedroom can transform with just 2-3 bulbs. That’s the advantage of small NYC apartments.

If you’re interested in more integrated lighting control throughout your space, professional systems can sync with your entertainment setup, but simple bulbs get you started for under $50.

Automation #4: The “Welcome Home” Security Light

  • Benefit: Never walk into a dark apartment after sunset. Add security that makes it look like someone’s home.
  • Recipe: One door/window sensor + one smart plug on your entryway lamp.

How it works

Stick a small sensor to your apartment door frame using the included adhesive. Pair it with a smart plug controlling your entryway lamp. Configure the automation so the sensor triggers the lamp to turn on automatically after 7:00 PM.

ComponentCostInstallation TimeRemoval
Door sensor$20-302 minutes (peel & stick)Leaves no marks
Smart plug$15-2030 secondsUnplugs normally
Total setup$35-50Under 5 minutesCompletely reversible

You open your door after work, and light floods the entryway before you reach for the switch. A small convenience that makes a big difference during dark NYC winters.

Security Benefits for NYC Renters

This setup works as a deterrent. If you’re away for a long weekend, the light still turns on at sunset, making it appear as if it’s someone’s home. For renters who can’t install hardwired security systems, this simple automation provides peace of mind for $50.

Automation #5: The Smart Coffee Maker

  • Benefit: Wake up to fresh coffee without doing anything except rolling out of bed.
  • Recipe: Your existing drip coffee maker + one smart plug.

How it works

What is the easiest smart home system to use? This one. You don’t need a $300 “smart” coffee maker. Your basic $30 drip machine works perfectly.

Here’s the setup:

  1. Before bed, fill your coffee maker with water and grounds
  2. Flip the physical power switch to “ON”
  3. Unplug the machine from the wall
  4. Plug it into a smart outlet
  5. Program the smart outlet to turn on at 6:55 AM

The outlet provides power, the switch is already on, and the coffee starts brewing. You wake up at 7:00 AM to fresh coffee ready to pour. This trick works with any appliance that has a physical on/off switch.

NYC Morning Rush Solution

NYC mornings mean rushing to catch your train and spending $4-5 daily on bodega coffee. This automation saves time and money. Over a month, that’s $80-100 in coffee shop savings just by having coffee ready at home.

Setup takes 60 seconds. Return on investment happens within two weeks.

Smart Home Devices That Work Best in NYC Apartments

Once you’ve tried a few of these automations, you’ll start to see what actually works in a smaller space. Here’s what to keep in mind when you’re choosing smart home setups for your apartment.

Must-Have Features

  • Wireless connectivity – No drilling or running cables through walls
  • Adhesive mounting – Sensors and cameras that stick on rather than screw in
  • Portable – You can take them to your next apartment
  • Budget-friendly – Under $30 per device keeps costs manageable
  • Cross-platform compatible – Works with Alexa, Google, and Apple

Recommended Brands for Reliability

Stick with established names that get regular firmware updates:

  • Smart Plugs: TP-Link Kasa, Wyze, Amazon Smart Plug
  • Smart Bulbs: Philips Hue, LIFX, Wyze Bulbs
  • Sensors: Wyze Sense, Aqara, Ring Contact Sensors

The beauty of starting small is that you’re not locked into anything. Try a smart plug or a couple of bulbs first, see what makes your life easier, then build from there. No need to outfit your entire apartment in one go.

Adding Sensors Makes Everything More Automatic

Voice control and schedules get you pretty far, but sensors are where it gets really hands-off. They notice what’s happening and trigger actions without any input from you.

Types of Sensors for Apartments

Sensor TypeWhat It DoesExample UseCost
Motion sensorDetects movementBathroom light turns on at night$15-25
Light sensorMeasures brightnessBulbs adjust based on natural light$20-30
Temperature sensorTracks heat/coldAlerts if apartment gets too cold$15-25
Water leak sensorDetects moistureAlerts for leaks under sink$20-30

These all mount with adhesive backing or just sit where you place them. No permanent changes, nothing that’ll make your landlord raise an eyebrow.

Bathrooms are perfect for motion sensors. Set yours to activate the light at a low 30% brightness when it picks up movement late at night. No more fumbling for switches or getting blinded by full brightness at 2 AM.

Light sensors are great for living rooms. They monitor how much daylight is coming through your windows and tell your lamps to brighten as the sun goes down. You get seamless lighting without ever touching a switch.

Don’t Buy Everything at Once, Build Your System Over Time

Don’t rush out and buy ten devices this weekend. You’ll spend hours setting up and get frustrated. Here’s a better approach.

  • Week 1: Start with the coffee maker automation. One smart plug for $15-20. Setup takes 5 minutes.
  • Week 3-4: Add the “I’m Leaving” routine. Buy 2-3 more smart plugs for $45-60. Setup takes 15 minutes.
  • Month 2: Install the “Good Morning” routine. Repurpose an existing smart plug for your bedside lamp. Setup takes 10 minutes.
  • Month 3: Try smart bulbs. Buy 2-3 bulbs for $30-45. Create your movie night scene. Setup takes 20 minutes.
  • Month 4: Add the welcome home security light. Buy a door sensor for $20-30. Setup takes 10 minutes.

Total investment over 4 months: $110-155
Total setup time: About 60 minutes

This approach lets you learn each feature before adding complexity.

NYC Apartment Challenges and How to Handle Them

Living in NYC apartments means dealing with unique obstacles that suburban smart home guides don’t address. Here’s how to handle them.

Thick Walls Block WiFi Signals

Pre-war buildings in the Upper West Side or Park Slope have plaster and lathe walls that block wireless signals better than modern drywall. Your router in the living room might not reach your bedroom.

Solution: WiFi extenders cost $25-40 and solve most coverage issues. Place one halfway between your router and dead zones.

Older Electrical Systems

Buildings from the 1920s-1940s sometimes have quirky wiring. Switches might control unexpected outlets.

Solution: Test one smart plug in different outlets before buying multiples. Most apartments have enough working outlets to support 5-10 smart plugs without issues.

Limited Outlets in Pre-War Units

Your 1930s apartment in the East Village might only have two outlets per room. Installing smart plugs fills up available space fast.

Solution: Use power strips with surge protection, then plug smart devices into the strip. Just avoid overloading circuits with high-draw appliances.

Co-op and Condo Board Restrictions

Some NYC buildings have strict rules about modifications. Even removable smart doorbells might require board approval.

Solution: Everything in this guide happens inside your apartment. Door sensors stick to your interior door frame. Smart plugs are just plugs. No board approval needed. If you’re considering external cameras or smart locks, check your building’s rules first.

High Ceilings Make Bulb Changes Difficult

Converted lofts in Tribeca or Williamsburg might have 12-15 foot ceilings. Changing a burned-out bulb requires a ladder.

Solution: Smart LED bulbs last 15-25 years. Install them once and forget about them. You’ll probably move to your next apartment before these bulbs burn out.

What Advanced Automation Looks Like

You’ve mastered the five simple automations. You’re comfortable with voice commands and app controls. What’s next?

Advanced Automation with IFTTT

IFTTT (If This Then That) connects different platforms and services in ways their native apps can’t. For example:

  • If your phone’s GPS detects you left home, turn off all smart plugs
  • If tomorrow’s weather forecast shows rain, flash your bedroom light as a morning reminder
  • If you receive an email from your landlord, flash the lights to alert you

IFTTT is free for basic use and opens up hundreds of automation possibilities beyond what Alexa or Google routines offer.

Professional Integration Systems

After living with basic automations for 6-12 months, some renters want more sophisticated control. Professional home automation installers can create systems that integrate climate control, security, entertainment, and lighting into one unified interface.

Systems like Savant offer enterprise-level automation with elegant control panels and work in rental apartments with no permanent modifications.

The difference between DIY and professional systems is integration depth. Your smart plugs and bulbs work independently. Professional systems make everything work together as one ecosystem where lights, music, temperature, and security respond to single commands.

Adding Smart Locks and Video Doorbells

Got a private entrance? Maybe you’re renting in a brownstone or you’ve got a ground-floor apartment with its own door. Smart locks eliminate keys and video doorbells let you see who’s there without getting up. Both require landlord approval since they replace existing hardware, but they’re often allowed if you reinstall the original equipment before moving out.

Voice Control Everything

As you add more devices, voice control becomes increasingly powerful. “Alexa, goodnight” can turn off all lights, lock smart locks, lower temperature, arm security sensors, set your coffee maker for tomorrow, and play white noise for sleeping.

Creating these complex routines takes practice, but once configured, they transform your apartment into a responsive environment.

Start This Weekend and Build Your Smart Apartment

You’ve got a complete roadmap for transforming your NYC apartment into a smart home. These are simple, affordable automations that solve real daily frustrations for people living in small rental spaces.

Pick one automation from this guide and implement it this weekend. The coffee maker automation takes 5 minutes and costs $15-20. Get comfortable with the app.

Next month, add the “I’m Leaving” routine. Month after that, try smart bulbs. Build gradually. That’s how most people approach getting started with a smart home on a budget. One device. One automation. One improvement at a time.

Living in a renter friendly smart home setup means choosing solutions that work within apartment living constraints. No drilling. No rewiring. No losing your security deposit. Just smart devices that move with you as you navigate NYC.

Pick your first automation. Set it up this weekend.