Smart Tech

The Complete Pre-Wire Checklist for Your New Home Build in 2026

Building a new home means making hundreds of decisions before the drywall goes up. Your low-voltage wiring plan is one of the most important choices you will make during this process. Getting it right now saves you from expensive retrofits later.

This smart home wiring checklist will help you have a productive conversation with your builder and technology integrator. Print it out, bring it to your next meeting, and go through each section together. The goal is simple. Make sure no critical infrastructure gets overlooked while the walls are still open.

Why Pre-Wiring During Construction Matters

Running cables after drywall is installed can cost three to five times more than doing it during the framing stage. In some multi-story homes with fire breaks between studs, adding wire later is impossible. The labor to pull Cat6A cable through open framing takes a fraction of the time compared to fishing wire through finished walls.

Even if you do not plan to use every cable right away, having them in place means you are ready for whatever technology comes next. The wires will sit there waiting until you need them.

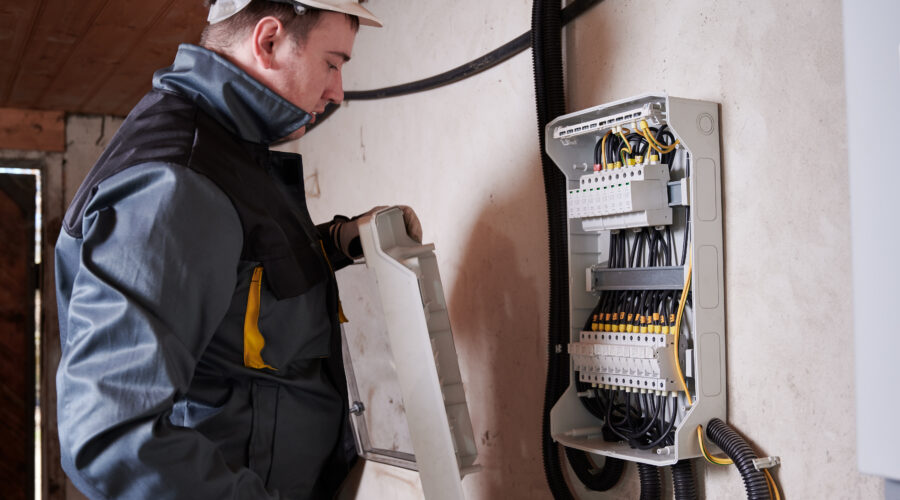
Setting Up Your Central Wiring Location

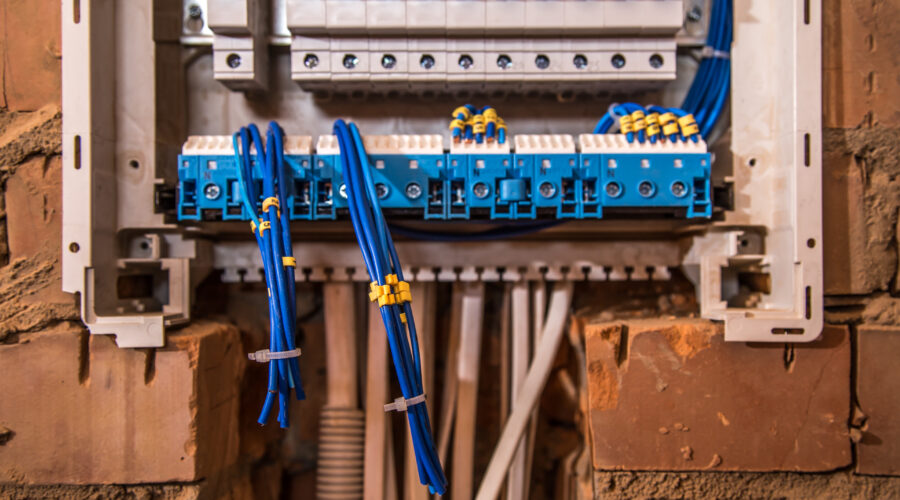
Every connected home needs a single spot where all systems come together. Some builders call it a distribution center or media closet. This is where your network equipment, patch panels, and amplifiers will live.

Look for a location that stays at a moderate temperature and has good airflow. It should sit close to where your internet service enters the home and have easy access from the main floor. A spot above the basement or crawlspace makes cable runs much simpler. Plan for plenty of electrical outlets and enough wall space for at least one equipment rack.

Infrastructure Basics

  • Dedicated closet or cabinet space for network equipment with ventilation
  • At least two 1.5-inch conduits running from the closet to the attic and basement
  • A clear path from where your internet provider enters the home to the equipment location
  • Whole-home surge protection at the electrical panel
  • Space and power for a battery backup unit

Understanding the Cables You Will Need

Knowing what each cable type does helps you communicate with your contractor and avoid confusion on site.

  • Cat6A is the standard for network wiring in new construction. It handles high-speed data, supports Power Over Ethernet for cameras and access points, and will meet your needs for years to come. The installation labor is identical to older cable types and the cost difference per foot is minimal.
  • RG6 Coaxial is still useful for over-the-air TV antennas and certain cable services. Run it alongside Cat6A at media locations.
  • Speaker Wire in 16-gauge runs back to your distribution center for connection to amplifiers. You will need it for any in-wall or in-ceiling audio.
  • Low-Voltage Wire handles motorized shades, contact sensors, and other smart home components that do not require network connectivity.

Living Spaces and Entertainment Areas

Your living room and family room will likely have the most technology. Plan for multiple network drops at TV locations to support streaming devices, gaming consoles, and future equipment you have not thought of yet.

  • 2-4 Cat6A drops at the primary TV location
  • 1 RG6 Coaxial drop at the TV location
  • 1 speaker wire run for a soundbar
  • 5-7 speaker wire runs for surround sound
  • 1 Cat6A drop in the ceiling for a Wi-Fi access point

Home Office Wiring for Remote Work

A home office benefits from hardwired connections more than any other room. Wi-Fi works fine for casual browsing, but video calls and large file transfers perform better over Ethernet.

  • 2-4 Cat6A drops at the desk location
  • 1 RG6 Coaxial drop
  • 1 Cat6A drop for a network printer
  • Additional drops behind desk areas for future devices

Bedroom and Hallway Runs

Each bedroom needs basic media connectivity. A central hallway location works well for a Wi-Fi access point that covers multiple rooms.

  • 2 Cat6A drops at the TV or media location in each bedroom
  • 1 RG6 Coaxial drop in each bedroom
  • 2 speaker wire runs for in-ceiling audio in the primary bedroom
  • 1 Cat6A run in a central hallway ceiling for Wi-Fi coverage

Kitchen and Laundry Room Considerations

Smart displays, small TVs, and in-ceiling speakers are common in kitchens. Running network cable behind appliance locations is speculative but forward-thinking. Future refrigerators and ovens may connect directly to your network instead of relying on Wi-Fi.

  • 1 Cat6A drop for a smart display or small TV
  • 2 speaker wire runs for in-ceiling music
  • 1 Cat6A behind the refrigerator location
  • 1 Cat6A behind the oven location
  • 1 Cat6A behind the washer in the laundry room
  • 1 Cat6A behind the dryer location

Bathroom Audio Integration

Speaker wire to bathrooms lets you extend your whole-home audio system into spaces where you might want music during morning routines.

  • 2 speaker wire runs for in-ceiling speakers in the primary bathroom
  • 1 speaker wire run for guest bathrooms
  • 1 Cat6A drop if you plan to install a smart mirror

Garage Connectivity and Access

The garage often gets overlooked during wiring planning. Security cameras, Wi-Fi coverage, and smart garage door integration all require network connectivity.

  • 1 Cat6A drop for a security camera at the garage entrance
  • 1 Cat6A drop for a Wi-Fi access point
  • 1 Cat6A drop near the garage door opener
  • 1 RG6 Coaxial drop if you plan to mount a TV

Outdoor and Landscape Wiring in NYC Homes

Outdoor spaces need network and audio infrastructure too. Running conduit from the attic to outer foundation walls gives you flexibility to add irrigation controls, landscape lighting, or additional speakers later. For homes across NYC, Brooklyn, and Queens, rooftop and patio entertainment systems are increasingly popular.

  • 1 Cat6A drop for an outdoor Wi-Fi access point
  • 2-4 outdoor-rated speaker wire runs for landscape audio
  • 1 Cat6A and power for an outdoor TV location
  • Conduit to the yard for future irrigation or lighting controls

Climate Control and Thermostat Wiring

Smart thermostats perform better with network connectivity than Wi-Fi alone. If your HVAC system supports zoned climate control, plan for multiple thermostat locations.

  • Cat6A drop at each thermostat location
  • Verify HVAC compatibility with smart home platforms
  • Consider wiring for zoned control if your system supports it

Smoke and Carbon Monoxide Detection

Hardwired smoke and CO detectors that interconnect throughout the house provide better safety than battery-powered units. An alarm in the basement will trigger alerts on every floor.

  • Hardwired power to all smoke detector locations
  • Hardwired power to CO detector locations near bedrooms and fuel-burning appliances
  • Cat6A drops near detectors for smart monitoring integration

Irrigation and Landscape Automation

Smart sprinkler controllers need either network or low-voltage wire at the installation location. Running conduit to the yard now means you can add soil moisture sensors or expand the system later.

  • Cat6A or low-voltage wire to the irrigation controller location
  • Conduit from the house to the yard for future expansion

Security Camera and Sensor Placement

Plan camera locations at every corner of the house, front door, back door, and garage. Running two cables to each location instead of one gives you room to add coverage later without pulling new wire. Power Over Ethernet cameras receive both data and power through a single Cat6A cable, which simplifies installation significantly. If you are planning integrated security systems with access control and monitoring, discuss additional wiring needs with your integrator.

  • Cat6A to all potential camera locations
  • Wire runs to windows and doors for contact sensors
  • Wire run for the main security panel and keypads
  • Consider doubling camera drops for future expansion

Smart Lighting and Motorized Shade Wiring

Smart switches require a neutral wire at each switch location. Confirm this with your electrician during the rough-in phase. Motorized interior shades can run on battery power, low-voltage wire, or Power Over Ethernet depending on the manufacturer.

  • Confirm neutral wire availability at all switch locations
  • Low-voltage wire to each window for motorized shades
  • Direct electrical wiring for exterior motorized shades

Home Automation Touchscreens and Control Systems

In-wall touchscreens from manufacturers like Savant and Control4 need network connectivity. If you are planning for whole-home audio and video distribution, discuss the specific wiring requirements with your integrator early in the design process.

  • Cat6A to each planned in-wall touchscreen location
  • Additional drops for future control panel expansion

Planning for Technology That Does Not Exist Yet

The cables you install today need to support devices that have not been invented. Run more cable than you think you need. Drop two network cables to camera locations instead of one. Pull speaker wire to every room where you might want music someday, even if you do not plan to install speakers right away.

Conduit is your best tool for future flexibility. PVC pipe between the attic and equipment rack lets you pull new cable types as technology evolves. The cost of extra materials during construction is minimal compared to the expense of opening walls later.

Using This Checklist With Your Builder

Print this list and bring it to your next meeting with your contractor and technology integrator. Go through each section room by room. Mark what applies to your home and note any questions that come up.

Every home is different. This checklist covers the most common needs for a new home pre-wire in 2026, but your specific situation may require additional planning. Use it as a starting point to create a professional new construction cabling plan that fits your family and how you live.

Your Home in 2030 and How to Pre-Wire Today for Tomorrow’s Technology

Remember when 4K TVs felt like science fiction? Conversations have already shifted to 8K displays, virtual reality setups, and AI assistants spread throughout every room. Technology moves fast, and homes built without the right infrastructure start feeling outdated within a few years.

The solution is a flexible, high-bandwidth structured cabling system. This goes beyond running wires through walls. It creates a platform for innovation that supports devices and systems we haven’t even imagined yet. Homeowners in NYC undertaking major renovations or new builds will find that planning cabling during new construction ranks among the most important infrastructure decisions of the entire project.

How the Connected Home Has Changed From 2000 to 2030

  • The 2000s brought most homes a single DSL modem and one coaxial cable running to the living room TV. Internet was something you logged onto rather than lived with constantly.
  • The 2020s look completely different. The average household now runs 17 connected devices. Streaming boxes, smart speakers, security cameras, home office setups, and Wi-Fi thermostats all compete for bandwidth. The network has become as critical as plumbing or electricity.
  • The 2030s will push things further. Expect immersive experiences like holographic displays and dedicated VR rooms requiring massive, low-latency bandwidth. AI assistants will move beyond countertop speakers to become integrated home automation systems woven into walls and ceilings. Dozens of IoT sensors will monitor health metrics, manage energy consumption, and coordinate security systems all at once.

Building a Home Network Foundation That Lasts for Decades

Building network infrastructure for emerging technology requires more than running cables. It demands thinking about what comes next.

High-Bandwidth Cabling with Fiber and Cat6A

Cat6A delivers excellent performance for current applications, supporting 10 Gbps speeds across standard distances. But a truly future-proof structured cabling design runs fiber optic lines alongside copper.

The cost of running fiber optic cable alongside Ethernet during construction is minimal. The cost of adding it after the walls close is enormous.

This hybrid approach gives you reliable copper for today’s devices while positioning your home for multi-gigabit speeds that will become standard within the decade.

Installing Conduit for Easy Future Upgrades

Conduit, sometimes called smurf tube, is flexible plastic tubing that runs from a central wiring closet to key locations throughout the home. With conduit in place, you can pull new cable types through walls years from now without demolition or drywall repair.

This matters especially in high-end NYC apartments where renovations are disruptive and expensive. The upfront cost is modest, but the long-term value for anyone thinking about how to future proof their home network is substantial.

Centralizing Network Equipment in a Dedicated Closet

Scattered equipment creates maintenance headaches. A dedicated, well-ventilated closet or rack houses the modem, router, switches, and patch panels in one accessible location.

This approach simplifies troubleshooting, makes upgrades easier, and keeps unsightly equipment out of living spaces.

Smart Home Standards Worth Understanding

Open standards matter more than brand names when selecting smart home components. The Matter protocol enables devices from Apple, Google, Amazon, and other manufacturers to communicate seamlessly. Thread wireless connectivity provides low-latency performance for sensors and controls.

Technology StandardBenefit
Matter ProtocolCross-brand compatibility without ecosystem lock-in
Thread ConnectivityReliable low-power communication for IoT devices
Wi-Fi 7Multi-gigabit wireless speeds with reduced latency
PoE++Powers devices up to 90W through Ethernet cables

Choosing systems built on these open protocols protects your investment as the smart home landscape continues to shift.

Wiring for Technologies on the Horizon

Wi-Fi 7 and Beyond

Next-generation wireless networks will deliver multi-gigabit speeds, but only when access points have wired backhauls capable of handling that throughput. This means running Ethernet to ceiling locations throughout the home, not to a single router location.

Power over Ethernet

New high-wattage PoE standards can power security cameras, VoIP phones, small displays, and even some lighting fixtures through a single Ethernet cable. This simplifies installation and reduces the number of electrical outlets needed in walls and ceilings.

Low-Voltage Lighting Systems

Tunable LED systems operate on low-voltage wiring rather than traditional electrical circuits. These systems adjust color temperature throughout the day to support circadian rhythms and can integrate directly with home automation platforms.

Designing Rooms That Adapt as Life Changes

A nursery becomes a home office. A guest bedroom transforms into a media room. Life shifts, and rooms need to shift with it.

Smart wiring anticipates these changes. Running multiple cable types to each room during construction costs little but pays off when that spare bedroom needs to support video conferencing equipment or a home gym with connected fitness mirrors. Placing junction boxes in locations that support wall-mounted displays makes sense even if you have no immediate plans to install one.

Connecting Sustainability and Health Systems to Your Network

Energy monitoring systems, solar panel integration, and EV charging stations all rely on data connectivity to function at their best. Smart breaker panels communicate usage patterns to the home network. Battery backup systems report charge levels through connected interfaces.

Wellness technology has similar requirements. Whole-house air quality monitors need network connections to log data and trigger HVAC adjustments. Water filtration systems with smart sensors alert homeowners to filter changes. These systems work independently, but when connected through a structured cabling backbone, they coordinate to create healthier living environments.

What Homeowners Ask About Pre-Wiring for Smart Technology

How much does future-proof cabling add to a new construction budget?

Pre-wiring during construction typically adds 1-3% to overall project costs. Retrofitting the same infrastructure after walls close can cost five to ten times more due to labor, drywall repair, and painting.

Can cabling be upgraded in an existing NYC apartment?

Yes, though options depend on building type. Pre-war buildings with plaster walls present challenges, but conduit pathways and surface-mounted solutions can work. Co-op and condo boards may require approval for any work affecting shared infrastructure.

What is the minimum to install if budget is tight?

At minimum, run Cat6A to every room where a TV or computer might go, plus ceiling locations for wireless access points. Add conduit runs from the central closet to the attic or basement for future expansion.

How long will Cat6A cabling remain relevant?

Cat6A supports 10 Gbps speeds and should remain viable for residential applications through the 2030s. Running fiber alongside copper provides additional insurance for bandwidth demands beyond that timeframe.

Creating Infrastructure That Grows With Technology

Future-proofing is not about predicting exactly what technology will emerge. It is about creating a flexible foundation that adapts to whatever comes next. Fiber alongside copper, conduit pathways for future cables, and centralized equipment placement give a home the infrastructure to grow.

The smartest homes of 2030 will be the ones planned with foresight today. A conversation with a technology integrator can help design an infrastructure ready for whatever innovations arrive over the coming decades.

7 Low-Voltage Wiring Mistakes That Can Ruin Your New NYC Apartment

The drywall is up. The paint looks perfect. But the Wi-Fi keeps dropping and your smart TV buffers constantly. If you’ve wondered why your ethernet is slow in your new house, the answer is usually hiding behind those freshly painted walls.

A simple, avoidable mistake made months earlier during the wiring phase is often to blame. These low voltage wiring errors aren’t always obvious during construction, but they show up the moment you move in. Here’s what goes wrong and how to prevent it.

The Most Expensive Wiring Mistakes at a Glance

Running Data Cables Too Close to Power Lines

Think of it like trying to have a quiet conversation next to a roaring subway train. Data cables running parallel to high-voltage electrical lines pick up electromagnetic interference that disrupts the signal.

What You’ll Notice

Unreliable Wi-Fi connections. Ethernet speeds that never reach their rated potential. Crackling in audio systems. Random data errors that seem impossible to diagnose.

How to Prevent It

Low-voltage data cables should maintain at least 12 inches of separation from electrical cables when running parallel. If they must cross, they should intersect at a 90-degree angle.

In tight Manhattan apartments and Brooklyn brownstone renovations, every trade competes for limited space inside walls and ceilings. A coordinated new construction cabling plan before anyone starts pulling wire makes all the difference.

Cheap Cabling That Fails When You Need It Most

Not all ethernet cable performs the same. Copper Clad Aluminum cables cost less than solid copper, but they’re brittle, less conductive, and don’t comply with TIA industry standards.

What You’ll Notice

Connections that fail over time. Network ports that suddenly stop working. An inability to deliver Power over Ethernet to security cameras or Wi-Fi access points.

How to Prevent It

Always specify and verify that your installer uses 100% solid copper Category 6A or better cabling from a reputable manufacturer.

Pro-Tip: Ask to see the box the cable came in. It should be clearly marked as solid copper and rated for the category you specified. If the installer can’t show you the packaging, that’s worth questioning.

Not Installing Enough Network Drops

A minimalist approach to wiring rarely pays off. Homeowners and builders sometimes try to save a few hundred dollars by installing only one or two ethernet ports in the entire home. This is one of the most common pre-wire mistakes in new construction projects.

What You’ll Notice

A home office that depends entirely on spotty Wi-Fi. A media center buried under switches and tangled cables. No wired option for the bedroom smart TV.

How to Prevent It

Plan for a minimum of two data drops in every key room. Living room, home office, bedrooms. Running an extra cable during construction costs almost nothing compared to opening finished walls later.

A cabling subcontractor involved during the rough-in phase can help you plan for both current needs and future expansion.

Bending Cables Too Sharply or Cinching Bundles Too Tight

Data cables aren’t as forgiving as standard electrical wire. Exceeding the bend radius or using plastic zip ties to cinch bundles too tightly damages the internal copper pairs and degrades performance over time.

What You’ll Notice

A network port that tests fine during the walkthrough but fails under heavy load. A gigabit connection that only registers at 100Mbps. Intermittent dropouts during video calls. These are classic network cable installation mistakes.

How to Prevent It

Installers should follow the manufacturer’s specified bend radius for each cable type. Loose-fitting Velcro straps work better than plastic zip ties for bundling cables.

Pro-Tip: The rule of thumb for bend radius is no tighter than the diameter of a coffee mug. If it looks kinked, it probably is.

Forgetting to Document Before the Drywall Goes Up

This isn’t a technical mistake. It’s a process mistake with major consequences. Once the walls close, you lose all visibility into where cables actually run.

What You’ll Notice

You hang a picture and drive a nail through a critical data line. You want to add a new outlet and have no idea what’s already in the wall. A future technician spends hours troubleshooting because there’s no documentation.

How to Prevent It

During the pre-wire walkthrough, take detailed photos and videos of every wall and ceiling cavity before insulation and drywall go up. Label these images by room and store them digitally.

This documentation becomes invaluable for future service calls. It’s also a selling point when your apartment hits the market, giving the next owner a clear map for their technicians.

Using Cable Not Rated for the Installation Environment

This is different from cable quality. Even solid copper Cat6A will fail if it’s not rated for where you install it. Indoor-rated cable used outdoors degrades from UV exposure. Standard cable in air handling spaces violates fire codes. Unshielded cable near motors or fluorescent lighting picks up interference.

What You’ll Notice

Insulation that cracks or becomes brittle within a year. Failed inspections that delay your certificate of occupancy. Intermittent signal problems that only appear under certain conditions.

How to Prevent It

Match the cable rating to the installation environment. Use plenum-rated cable in air handling spaces and drop ceilings. Choose UV-resistant, outdoor-rated cable for any exterior runs. Install shielded cable near sources of electrical noise.

Ignoring Voltage Drop on Long Cable Runs

Voltage drop happens when electrical resistance in the cable reduces the power available at the far end. This matters most for low-voltage lighting, powered devices, and PoE equipment. A 3-volt drop that’s negligible in a 120V circuit can completely disable a 12V system.

What You’ll Notice

LED landscape lights that dim noticeably at the far end of a run. Security cameras that randomly reboot or won’t power on. Access control panels that behave erratically.

How to Prevent It

Calculate voltage drop for any cable run longer than 25 feet. Keep total drop under 5% for general use and under 3% for sensitive equipment. For longer runs, use a larger gauge wire or add a power source closer to the load.

Common Questions Answered

Which mistake costs the most to fix after construction?

Not installing enough network drops. Opening finished walls to run new cables costs significantly more than adding extra runs during the rough-in phase. The cable itself is inexpensive compared to the labor of cutting, patching, and repainting drywall.

How can I tell if my installer used quality cable?

Ask to see the original packaging. Quality cable is clearly marked with the manufacturer name, cable category, and “solid copper” designation. Avoid any cable marked CCA or cable without clear labeling.

Do I need permits for low-voltage wiring in NYC?

Low-voltage work typically doesn’t require the same permits as high-voltage electrical, but it depends on the scope of your project. Work involving fire alarm systems, building-wide infrastructure, or modifications to common areas in co-ops and condos often requires permits and inspections.

How far should data cables be from electrical wires?

Maintain at least 12 inches of separation when running parallel to electrical cables. If data and power cables must cross, they should do so at a 90-degree angle to minimize electromagnetic interference.

Planning Your Low-Voltage Wiring Early Prevents Expensive Fixes

A successful smart home starts with thoughtful wiring. These mistakes are easy to make but equally easy to avoid with some planning upfront.

The most reliable way to sidestep these issues is working with experienced installers during the new construction cabling phase. A solid structured cabling foundation is one of the smartest investments in any home’s technological future.

Kuponbet Giriş
betgaranti giriş
Teknik Seo
betnano giriş
betnano giriş
vdcasino giriş
grandpashabet giriş
grandpashabet giriş
vaycasino giriş
vaycasino giriş
grandpashabet giriş
betnano giriş
betnano giriş
grandpashabet giriş
grandpashabet giriş
grandpashabet giriş
grandpashabet giriş
vaycasino giriş
grandpashabet giriş
vaycasino giriş
betnano giriş
grandpashabet giriş
grandpashabet giriş
betebet giriş
grandpashabet giriş
vaycasino giriş
betebet giriş
betnano giriş
grandpashabet giriş
vaycasino giriş
parmabet giriş
grandpashabet giriş
betpas giriş
grandpashabet giriş
grandpashabet giriş
pusulabet giriş
parmabet giriş
parmabet giriş
betnano giriş
betparibu giriş
grandpashabet giriş
betlike giriş
safirbet giriş
safirbet giriş
betparibu giriş
betlike giriş
parmabet giriş
betpark giriş
grandpashabet giriş
betpark giriş
betpark giriş
vaycasino giriş
grandpashabet giriş
betpark giriş
parmabet giriş
betlike giriş
vaycasino giriş
betparibu giriş
klasbahis giriş
madridbet giriş
madridbet giriş
mariobet giriş
mariobet giriş
grandpashabet giriş
betlike giriş
parmabet giriş
grandpashabet giriş
betparibu giriş
grandpashabet giriş
grandpashabet giriş
grandpashabet giriş
grandpashabet giriş
grandpashabet giriş
norabahis giriş
parmabet giriş