
The Commercial Security Camera Maintenance Schedule Your Business Needs
You installed cameras. You have coverage at the front door, the loading dock, the lobby. Everything looked great on day one. But when was the last time anyone checked if those cameras are still recording?
Most businesses treat their surveillance systems like a “set it and forget it” investment. The problem is that cameras degrade, firmware gets outdated, lenses get dirty, and storage fills up. You usually don’t find out until something happens and you pull up footage that’s blurry, corrupted, or missing entirely.
A structured commercial security camera maintenance schedule is the difference between a system that protects your business and one that gives you a false sense of security.
Why Preventative Maintenance Protects More Than Your Cameras
Regular maintenance keeps your video evidence clear, retrievable, and legally usable for HR disputes, slip-and-fall claims, insurance investigations, and criminal cases.
Think about what happens when an incident occurs and you go to pull the footage. If the camera was offline, or the NVR ran out of storage two weeks ago, or the lens was so coated in grime that faces are unrecognizable, that footage is worthless. And the liability falls on the business.
Preventative maintenance for corporate security cameras is about risk management as much as it’s about keeping equipment running. A commercial security system that goes unchecked is a liability waiting to surface. Companies that maintain clear documentation of their camera servicing history are in a much stronger position if a legal claim ever requires video evidence.
What a Commercial CCTV Maintenance Schedule Looks Like
Not every task needs to happen at the same frequency. Some checks are quick digital verifications your internal team can handle monthly. Others require physical inspection quarterly. And at least once a year, a professional integrator should do a full system review.
Monthly Digital Health Checks
Every month, IT or security staff should verify that all cameras are online, confirm the NVR or server is actively recording, and check that storage capacity hasn’t hit its limit.
This is the bare minimum, and it catches the majority of silent failures. Cameras go offline for all kinds of reasons. A power fluctuation, a loose Ethernet connection, a firmware glitch. If nobody is checking, a dead camera can sit unnoticed for months.
Your monthly checklist should include verifying that date and time stamps are synced across all cameras, reviewing playback quality from a few angles, and confirming that motion detection alerts are triggering correctly. If your business relies on IT support for day-to-day operations, folding these checks into your existing IT workflow makes sense.
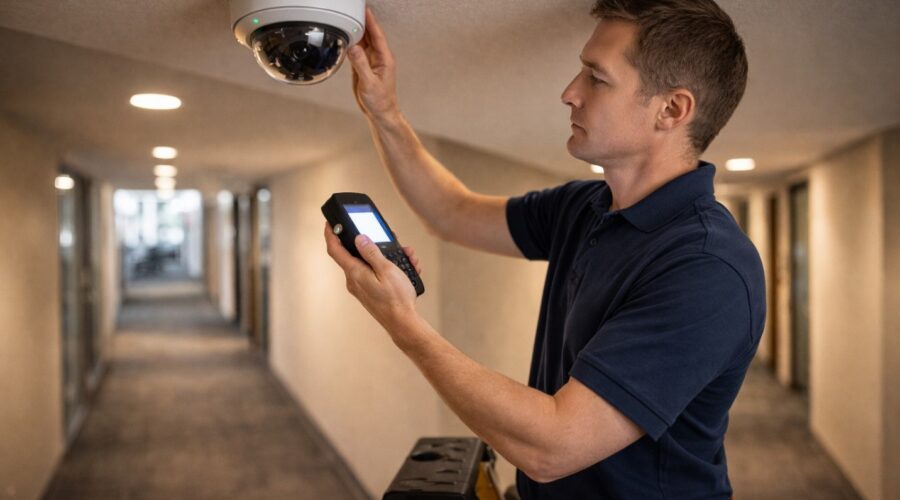
Quarterly Physical Inspections
Every three months, physically inspect camera housings for damage or tampering, clean the lenses with microfiber cloths, and trim any foliage or obstructions blocking the field of view.
NYC’s environment is hard on exterior cameras. Subway dust, vehicle exhaust, and seasonal temperature swings from freezing winters to humid summers all build up on lenses and wear down housings faster than you’d expect. Interior cameras aren’t immune either. Office renovations shift furniture, new signage blocks angles, and cobwebs accumulate in corners where dome cameras sit.
During your quarterly walk-through, check that mounting brackets haven’t loosened and that cable connections at each camera are still snug. If you have PTZ cameras, cycle through the full range of motion to confirm the motors are responding.
Annual System Deep Dive
Once a year, a professional integrator should update all camera and NVR firmware, test UPS battery backups, audit cybersecurity settings, and evaluate if camera placements still match the current office layout.
Firmware updates are one of the most overlooked tasks in CCTV maintenance. Manufacturers release patches that fix bugs and close security vulnerabilities. A camera running outdated firmware is a potential entry point for a network breach, which is a growing threat for businesses with IP-based surveillance.
The annual review is also the right time to assess if your camera locations still make sense. Offices change. Walls go up, desks move, new entry points get added. What was full coverage a year ago might have blind spots today.
Maintenance Frequency by Camera Environment
How often you service a business CCTV system depends on where the cameras are installed and how much environmental stress they face.
| Camera Location | Recommended Maintenance Cycle | Key Concerns |
| Indoor office cameras | Every 6 months | Dust, layout changes, storage capacity |
| Outdoor building cameras | Every 3 months | Weather, exhaust, lens buildup, housing wear |
| Parking and loading areas | Every 3 months | Vibration, vandalism, extreme temperature shifts |
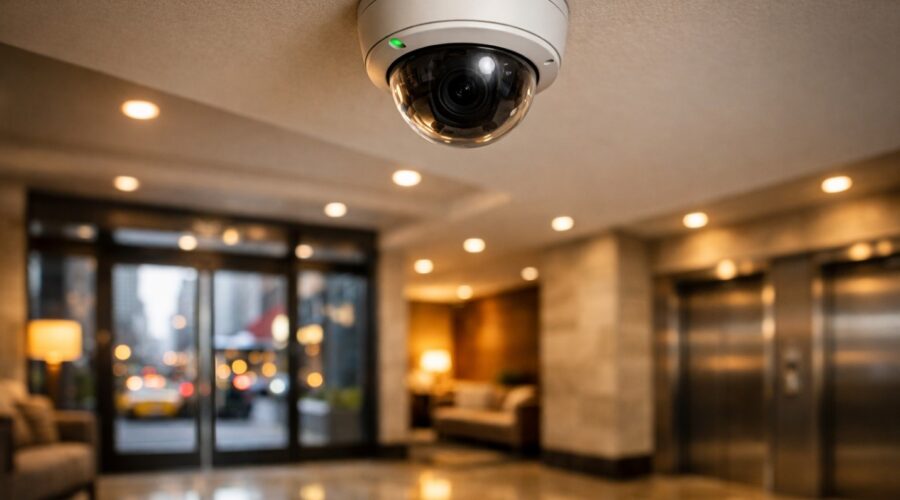
| Lobby and entry cameras | Every 3 months | High foot traffic, lighting changes, access control integration |
| Server room and IT closets | Every 6 months | Temperature monitoring, restricted access verification |
Businesses with cameras in high-exposure areas should increase their inspection frequency during summer and winter months when temperature extremes put the most stress on equipment.
Cleaning and Maintaining Office Surveillance Cameras the Right Way
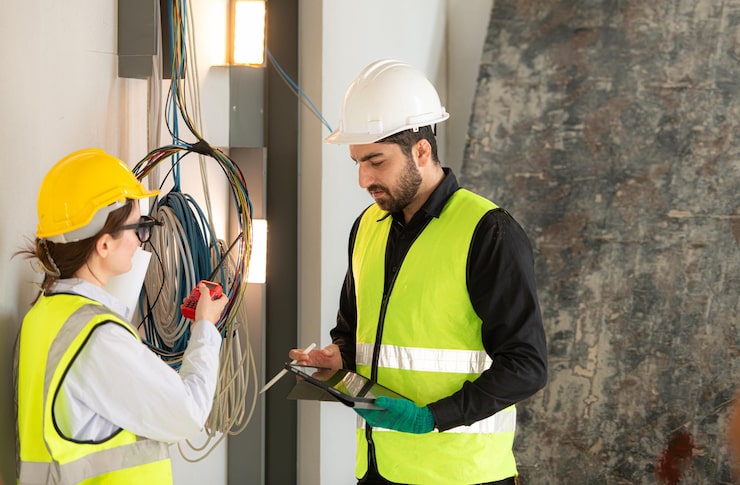
Microfiber cloths are essential for lens cleaning. Paper towels and regular rags scratch the surface and degrade image quality over time. A manual air blower removes dust without the moisture risk that comes with compressed air cans. For stubborn grime on outdoor cameras, use a lens cleaning solution formulated for optical surfaces, applied to the cloth first, never directly to the lens.
For cable and connector checks, a basic cable tester can confirm signal integrity across your structured cabling infrastructure. Corroded or loose BNC and Ethernet connections are a common cause of intermittent camera failures, especially in buildings with older wiring.
Signs Your System Needs Attention Before the Next Scheduled Check
Sticking to a schedule is important, but some problems don’t wait for the calendar.
Fuzzy or washed-out footage from cameras that previously delivered clear images usually means a dirty lens or a failing sensor. Intermittent recording gaps in the NVR timeline often point to a storage drive nearing the end of its life. Cameras that randomly go offline and come back could have a power delivery issue, especially if they’re running on Power over Ethernet from an aging switch. And if your system’s remote access becomes unreliable, that’s a potential network or firmware issue that needs attention right away.
What Happens If You Skip Maintenance Entirely
Blurry footage that can’t identify a face. Storage drives that filled up weeks ago and stopped recording. Cameras that lost their alignment and now point at a wall instead of the entrance. Firmware so outdated that it’s vulnerable to exploits that were patched two years ago.
Every one of those scenarios has happened to real businesses. And in most cases, the cost of the incident or the failed insurance claim far exceeded what regular camera maintenance would have cost over the life of the system. The businesses that invest in ongoing IT support and fold surveillance maintenance into their broader technology management strategy avoid these situations entirely.
Building a Maintenance Routine That Sticks
Start with a shared document or spreadsheet that lists every camera by location, model, and installation date. Assign monthly digital checks to someone on your IT or facilities team. Set quarterly calendar reminders for physical walkthroughs. And book your annual professional review at the same time every year so it doesn’t fall off the radar.
The goal of a commercial security camera maintenance schedule isn’t busywork. It’s a lightweight, repeatable process that keeps your commercial security system performing the way it did on day one. Because the only thing worse than not having cameras is having cameras that don’t work when it matters.


Recent Comments