Security

Zero Trust Physical Security for Corporate Offices, Converging IT and Building Access

A company can spend seven figures on zero trust for its network. Every session is authenticated, every device posture is checked, every access request is evaluated against real-time policy. Then a contractor walks into the lobby with a plastic badge issued three years ago, taps a reader that has not been re-verified since installation, and rides an elevator that grants access to every floor in the building. Physical security has not kept pace with what IT security teams now consider baseline hygiene.

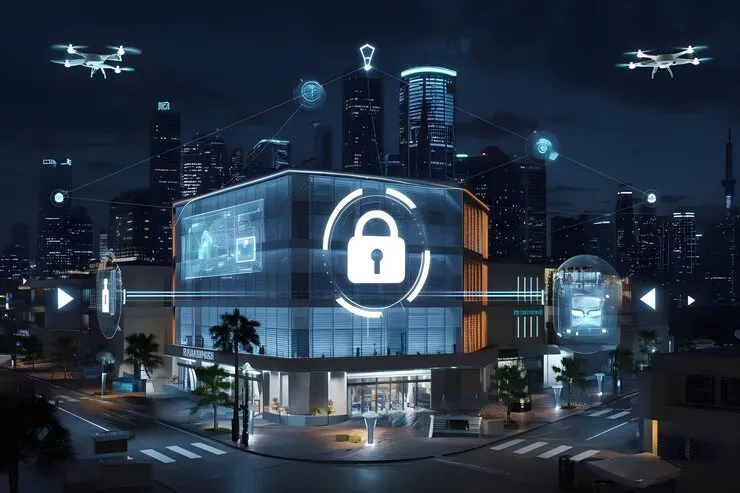
Zero trust physical security closes that gap. It applies the same principles of never trust, always verify, and least-privilege access to the doors, elevators, turnstiles, and secured rooms inside your building. What used to be a static badge system is being replaced by a cloud-connected model where identity, role, time, and context decide who gets through a door in real time. Cloud access control platforms now integrate directly with the identity providers already running your Microsoft or Google environment, and they can revoke a credential in under two minutes after HR flags a departure.

What Zero Trust Physical Security Means for a Corporate Building

Zero trust physical security is a framework that treats every physical access request as untrusted until it is verified against current identity data and policy. No badge, person, or credential is trusted by default, and access is limited to specific doors, specific times, and specific roles that are continuously re-evaluated. The model borrows directly from network security thinking, but the enforcement point is a door reader instead of a firewall.

AspectTraditional Access ControlZero Trust Physical Security
Trust modelBadge equals trusted once issuedEvery tap verified against current policy
Credential lifecycleActive until manually deactivatedTied to employment status, role, and time window
Access scopeBlanket access to assigned doorsLeast-privilege access with continuous review
Identity sourceLocal database on the access panelSynced from a corporate identity provider such as Entra ID or Okta
Revocation speedHours to days, often manualAutomatic within one to two minutes
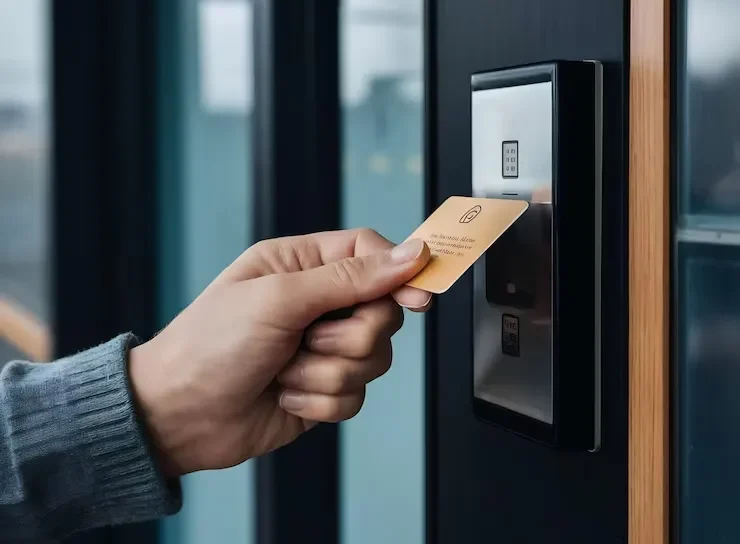
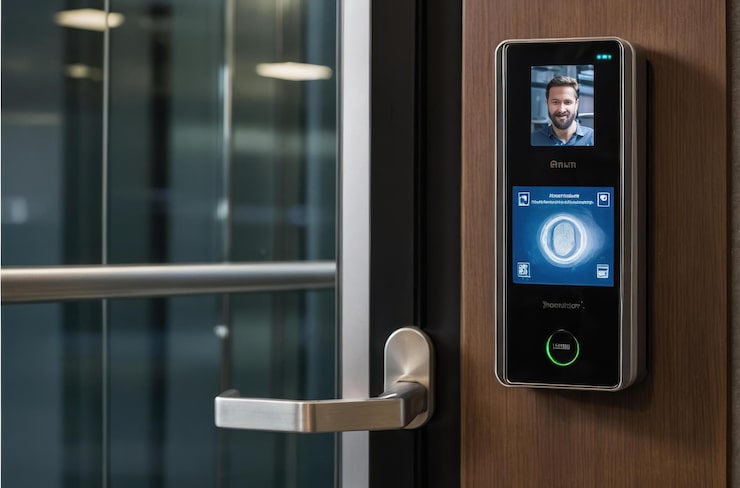
Authentication factorsBadge only in most casesBadge plus mobile or biometric for sensitive areas

The distinction sounds minor on paper, but it changes the operating model. Traditional systems treat a credential as a one-time approval. Zero trust asks whether that person should get through that door right now. That matters when planning access control for a new corporate office, especially in spaces shared by employees, contractors, and vendors.

How to Implement Zero Trust for Building Access in Practice

Cloud access control platforms enable zero trust by connecting each door reader to a cloud-based policy engine that pulls identity data from your corporate directory, applies role and time-based rules at every tap, and provisions or revokes credentials automatically. Legacy on-premise systems cannot do this because the identity data lives locally on a controller, disconnected from HR and IT workflows.

The Four Moving Parts of a Zero Trust Access Architecture

The architecture has four moving parts. An identity provider such as Microsoft Entra ID, formerly Azure AD, along with Okta or Google Workspace, serves as the source of truth for every employee, contractor, and vendor. A SCIM connector syncs those user records to the access control platform, so changes made in HR flow through the identity provider and land in the door system without a security manager touching anything. A cloud policy engine evaluates each access request against role, department, time window, and location. Mobile credentials replace or supplement physical badges, which turns revocation into a software action rather than a hunt for a plastic card.

What a Real Termination Workflow Looks Like

An employee is terminated at 2:00 PM on a Tuesday. HR marks them inactive in Workday. That change syncs to Entra ID within a few seconds. Entra ID pushes the deprovisioning event through SCIM to your cloud access control platform. Within roughly a minute, the terminated employee’s badge, mobile credential, and parking garage access are all invalid. If they try to tap into the building later that evening, the reader denies them and the security team receives an alert. No one has to remember to make a phone call to building security.

Which Cloud Access Control Platforms Support Identity Provider Integration

Zero trust access control for corporate offices in NYC usually runs on one of five cloud-native platforms. Brivo, Verkada, Rhombus, Avigilon Alta, formerly Openpath, and Genetec ClearID all integrate with Entra ID and Okta, all support SCIM provisioning, and all offer mobile credentials as a first-class option rather than an add-on. Where they differ is in pricing, biometric support, and how deeply they integrate with video and building automation.

PlatformIdentity Provider IntegrationSCIM SupportMobile CredentialsMulti-Factor OptionsStarting Price per Door
BrivoEntra ID, Okta, GoogleYesBrivo Mobile PassBadge plus mobileAround $5 per month
VerkadaEntra ID, Okta, GoogleYesVerkada PassBadge plus faceAround $10 per month
RhombusEntra ID, OktaYesYesBadge plus mobileAround $8 per month
Avigilon AltaEntra ID, Okta, GoogleYesWave to UnlockBadge plus mobile plus PINAround $7 per month
Genetec ClearIDEntra ID, OktaYesYesBadge plus mobile plus biometricCustom quote

What Happens With Legacy Lenel, CCURE, and Software House Deployments

Many NYC office buildings still run legacy on-premise systems. Lenel OnGuard, CCURE 9000, and Software House C-CURE were designed years before cloud identity providers became standard, and they do not natively support SCIM or continuous verification. Bridging them into a zero trust model is possible with middleware such as Brivo’s Legacy Bridge or a third-party SCIM connector, and even then the integration is partial. You get automated user syncing, but you do not get real-time policy evaluation at every reader.

For most companies with legacy systems, the honest calculation lands between spending on middleware to buy time or planning a phased replacement during the next lease renewal or floor renovation. Legacy access control still works. It is not broken. It simply cannot deliver the same identity-driven, policy-aware experience that a cloud-native platform can, which is why full zero trust in physical security tends to be a project rather than a purchase.

How to Implement Multi-Factor Authentication for Physical Access

Multi-factor authentication at a door requires a person to present at least two verification factors before the reader unlocks. The most common combinations are a badge plus a phone confirmation, a mobile credential plus a facial scan, or a badge plus a PIN. The goal is not to add friction everywhere. The goal is to raise the bar for the areas that hold the most sensitive assets.

MFA at the door level should follow risk. Server rooms and data closets should require two factors. Executive floors and finance areas may need it after hours. General office entry usually stays badge-only, because too much friction leads to propped doors. For higher-sensitivity access, pairing the reader with NYC office camera coverage gives security teams a video-verified record of each tap.

How Fast Automatic Credential Revocation Really Works

With SCIM integration correctly set up between an identity provider and a cloud access control platform, revocation runs within roughly 30 to 120 seconds after an account is deactivated in the directory. That is measured from the moment HR closes the account to the moment the badge stops working at a reader. Traditional systems that rely on manual notification often take hours or days, and in high-turnover industries the delay can be longer. The workflow looks like this end to end.

  1. HR terminates the employee in the HRIS such as Workday or BambooHR.
  2. The HRIS syncs to the identity provider, and the account is disabled.
  3. The identity provider pushes the change through SCIM to the access control system.
  4. The access control platform revokes the badge, mobile, and PIN credentials.
  5. The next attempted tap by that person is denied at every reader on the network.
  6. The security team receives an alert that a revoked credential was presented.

The largest physical security exposure during a termination is the gap between the HR action and the moment the door credential stops working. In an environment that still runs on paper handoffs and phone calls, that gap can be hours. In an office with active turnover, contract workers, and shared amenities such as gyms or lounges, the same gap can go unnoticed for days. This is the specific weakness that keeps coming up in NYC industries with high turnover, especially media, agencies, and technology, where companies often accumulate dozens of active badges for employees who left months ago.

Micro-Segmentation for Physical Spaces and Least Privilege at the Door

Physical micro-segmentation gives each person access only to the doors and areas their role requires, then adjusts that access when the role changes. It follows the same logic as network segmentation: limit movement, separate sensitive areas, and review permissions regularly. Instead of giving the whole engineering team access to floors 3 through 5, one engineer might get weekday access to their lab, the shared kitchen, and the parking garage.

The benefits are practical. Contractor access can expire when a project ends. Visitor access can stay limited to one meeting floor or elevator zone. Meeting room access control can also tie room entry to the booking system, so a calendar invite acts as a temporary credential during the meeting window.

Why This Gets Complicated in a Multi-Tenant NYC Building

NYC multi-tenant buildings split access control across two owners. The property manager runs lobby entry, turnstiles, and elevator dispatch, while each tenant runs the doors on their own floors. Zero trust needs to span both layers, which means the base building access control and the tenant floor system need to share credentials, or at least coordinate policy, so an employee is not carrying two badges and a mobile credential for the same building.

Coordinating the two layers is where many rollouts stall. The building may run legacy Lenel or CCURE, while the tenant uses Brivo or Verkada with Entra ID. Bridging them takes a shared reader protocol, mobile credentials both systems support, or elevator dispatch integration that turns the elevator into the trust boundary between the lobby and tenant floors. Property management should be involved before any panels are ordered.

Why IT and Physical Security Are Converging Right Now

IT and physical security are converging because access control platforms now run on the same IP networks, use the same identity providers, and generate telemetry that flows into the same security operations tools. The two functions used to live in separate corners of the organization. That separation is becoming difficult to defend when both teams are managing shared risk from a shared attack surface, and physical security cyber convergence has moved from an industry talking point to a baseline expectation from auditors and insurers.

Several forces are pushing this together at once. Compliance frameworks including SOC 2, ISO 27001, and NIST 800-207 now expect physical access controls that align with information security policy. NYDFS 23 NYCRR 500, which applies to financial services firms operating in NYC, has folded physical access controls into its cybersecurity requirements. Cyber insurance underwriters have started asking specific questions about badge revocation timing and MFA at server rooms during policy renewals. And the fact that shared identity now covers both a network login and a door tap means an incident in either domain has direct implications for the other.

The Organizational Challenge Behind the Technology

Most companies still split IT under the CIO and physical security under facilities or a CSO. Zero trust physical security asks those teams to share policies, platforms, and often the same project budget. That is more of a cultural shift than a technology shift. Rollouts move faster when the CIO and CSO plan together before an office move or floor build-out, using a shared relocation infrastructure checklist to align network, access, cabling, and security decisions early.

Closing Thoughts on Building a Zero Trust Physical Security Architecture

Zero trust physical security is not a product on a purchase order. It is an architecture that connects identity, cloud access control, and policy, so every door tap is checked against current data. The technology exists today. Brivo, Verkada, Rhombus, Avigilon Alta, and Genetec ClearID can all work in Manhattan offices with Entra ID or Okta. The harder part is getting IT and physical security teams to operate from the same policy set.

For NYC corporate offices managing sensitive data, high-value assets, or regulated information, this is where the industry is going. Teams planning a new office footprint or full-floor relocation should handle cloud access control installation during design, before conduit is pulled and readers are ordered.

Integrating Access Control with Elevator Destination Dispatch Systems

An employee taps a badge in the lobby, a screen sends them to elevator car C, they ride up, then reach for a second credential to get through the suite door. For anyone running a corporate office in a NYC high-rise, that disconnect is familiar and frustrating. The fix is access control elevator destination dispatch integration, which links your tenant security system to the building’s elevator dispatch so one credential moves a person from the street to their desk.

This guide explains how that integration works, why the “two-badge problem” shows up in NYC Class A buildings, and what facilities managers and IT directors should plan for before signing off on a build-out.

What Elevator Destination Dispatch Integration Means

Elevator destination dispatch integration connects your office access control system to the building’s destination dispatch elevators, so an authorized credential calls the correct car and authorizes the rider’s floor in a single action.

Destination dispatch is the lobby setup where a rider enters or scans a destination before boarding, and the system groups people heading to similar floors into the same car. Traditional elevators rely on up and down buttons inside the cab. Dispatch elevators remove that step and assign a car in advance, which trims wait times in tall towers with heavy morning traffic.

Integrating access control with the elevator system adds identity to that flow. Rather than letting anyone select any floor, the dispatch panel reads a tenant credential and releases only the floors that person is cleared for. Office security and vertical transportation stop behaving like two separate worlds.

Solving the “Two-Badge Problem” in NYC Class A Buildings

The two-badge problem happens because the base building and the tenant run separate access systems, leaving employees to carry one credential for the lobby turnstile and elevator and another for their office suite.

In many Midtown and Hudson Yards towers, the landlord controls the lobby turnstiles and elevator dispatch, while each tenant installs its own door hardware upstairs. Two systems, two credentials, two databases. Employees end up fumbling for the right card at the wrong reader, and IT teams handle onboarding and offboarding in two places.

Closing the two-badge problem in NYC means unifying credentials across both layers. With a connected setup, one mobile or card credential clears the turnstile, books the elevator car, and unlocks the suite. Coordinating that usually takes agreement between the property manager and the tenant’s security integrator, since both sides touch the same rider.

Standalone vs Integrated Elevator Access Control

A standalone elevator reader controls floor access on its own, while an integrated system shares credentials and permissions across turnstiles, elevators, and office doors from one platform.

The difference shows up in daily management and in how fast you can pull access after someone leaves.

FactorStandalone elevator controlIntegrated destination dispatch
CredentialsSeparate card or PIN for the elevatorOne credential across lobby, elevator, and doors
Floor logicManual floor lockoutsAutomatic, tied to the rider’s profile
OffboardingUpdated in each systemRevoked once, applied everywhere
Visitor handlingFront desk escorts or temp cardsPre-issued passes mapped to a floor
ReportingSiloed elevator logsUnified audit trail across entry points

Integration costs more upfront and leans on cooperation from base building management, but it lowers the long-term overhead of running parallel systems.

Credential Models That Work With Destination Dispatch

Credential Models That Work With Destination Dispatch

Most corporate integrations rely on one of three credential models, and the right fit depends on tenant size, security posture, and how much wiring the floor already has.

Mobile credentials

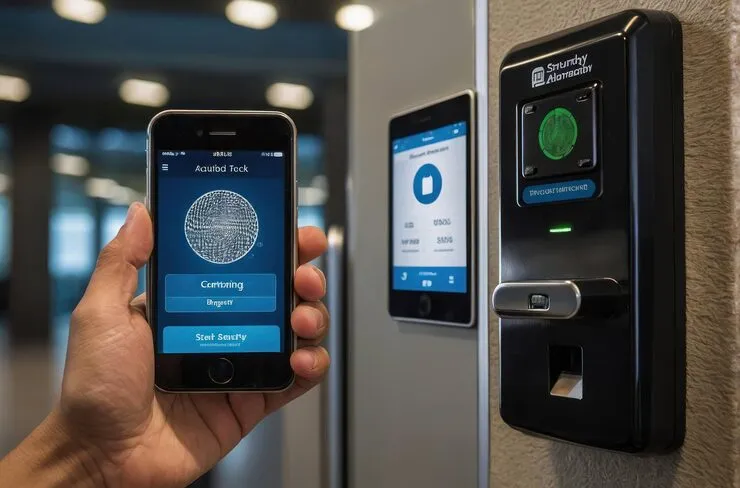
Mobile credentials store the access token on a smartphone and authenticate over Bluetooth or NFC at the dispatch panel. They are the strongest option for corporate teams that want touchless elevator access control, since tokens are harder to clone than a card and can be issued or pulled remotely the same day someone joins or leaves.

Card and fob readers

Card and fob readers stay common because they are inexpensive and familiar. The tradeoff is sharing and loss. A misplaced fob can reach restricted floors until someone reports it, and large card deployments often need heavier cabling at each reader.

PIN and keypad entry

Keypads skip physical credentials and suit smaller tenants watching budget. They slow the morning rush, though, since each rider types a code, and shared PINs erode floor-level control over time.

How Mobile Credentials Connect Lobby Turnstiles to Elevators

A unified credential ties the lobby turnstile, the dispatch panel, and the elevator controller together, so one authentication event releases the turnstile and assigns a car bound for an approved floor.

The flow starts at the turnstile, where the reader validates the credential against the access platform. That same event passes the rider’s floor permissions to the dispatch controller, which selects a car and shows the assignment on a screen. The cab then accepts only the cleared floor, with no open button panel to override the rule.

Building this path cleanly is far easier during construction, before walls close and while conduit, low-voltage runs, and panel locations can still be mapped. Planning the new construction IT infrastructure around both the base building risers and the tenant floor avoids costly rework once the space is occupied.

Security Benefits of Floor-Level Access Restrictions

Floor-level restrictions limit each credential to the floors a person needs, which shrinks the area an intruder or former employee can reach inside a multi-tenant tower.

A lobby turnstile alone proves someone belongs in the building, not that they belong on the 14th floor. Tying identity to the elevator adds a second checkpoint between the street and sensitive space such as server rooms, executive suites, or research areas. For regulated tenants in finance or healthcare, that layered control also supports audit requirements, since the platform records who reached which floor and at what time.

Pairing dispatch integration with well-designed commercial access control systems at the suite doors gives security teams a continuous record from entrance to office, rather than scattered logs that are hard to reconcile after an incident. It also narrows the risk window during staff turnover, since one revocation removes a person from the lobby, the elevators, and every interior door at once.

Coordinating Tenant Security with Base-Building Management

Solid integration depends on early coordination between the tenant’s IT and security team and the building’s property management, since both control hardware that the unified credential has to pass through.

Landlords often standardize on a specific elevator and dispatch manufacturer, so the tenant’s access platform has to support that system’s integration protocol. Sorting out compatibility, credential formats, and who administers shared permissions belongs in the planning phase, not after install. Tenants moving onto a new floor should raise these points during lease negotiation and loop in their integrator early, while the base building team still has room to accommodate the connection.

Handled well, the result is one credential that carries an employee from the sidewalk to their desk, with security and daily convenience drawing from the same source.

Security Camera Repair & Maintenance NYC

Security Camera Repair & Maintenance Services in NYC: What Every Property Owner Should Know

NYC IT Tech provides security camera repair, troubleshooting, and ongoing maintenance services across all five NYC boroughs. Whether you’re dealing with a camera that’s gone offline, blurry footage, a failed NVR, or a system that hasn’t been updated in years, their technicians diagnose and resolve issues on-site. The company also offers preventive maintenance plans that include firmware updates, lens cleaning, connection checks, and storage health monitoring, designed to catch problems before they result in gaps in your surveillance coverage.

Why Does Your Security Camera System Need Regular Maintenance?

A security camera system isn’t a set-it-and-forget-it investment. In New York City especially, cameras are exposed to conditions that degrade performance over time: dust and grime accumulation on lenses (construction dust is constant in NYC), spider webs triggering false motion alerts, firmware that becomes outdated and vulnerable to security exploits, hard drives that fill up or fail silently, and network configuration changes that knock cameras offline without warning.

The most dangerous failure mode is the one you don’t notice. A camera in your lobby might show a live image on the monitor but stopped recording three weeks ago because the NVR hard drive failed. A parking garage camera might be technically online but delivering footage so blurry from lens grime that it’s useless for identification. Regular maintenance catches these silent failures before they matter, before an incident happens and you discover your system wasn’t actually protecting anything.

What Are the Most Common Security Camera Problems in NYC?

After years of servicing surveillance systems across Manhattan, Brooklyn, Queens, and the Bronx, these are the issues NYC IT Tech’s technicians see most frequently:

  • Camera offline / no signal, Usually caused by a loose Ethernet connection, a failed PoE (Power over Ethernet) port on the switch, or a cable damaged during building maintenance. This is the most common service call and typically resolves in under an hour on-site.
  • Blurry or foggy footage, Lens contamination from dust, moisture condensation (common on outdoor cameras during NYC’s humid summers), or a camera that’s been bumped out of focus. Cleaning and recalibration restores clarity.
  • NVR hard drive failure, Hard drives have a limited lifespan, especially when recording 24/7. A failed drive means no footage is being stored even though cameras appear to be working. Proactive replacement every 3–4 years prevents this.
  • Night vision not working, IR LEDs burn out over time, particularly on cameras that run in night mode for extended hours. Replacement LEDs or a camera swap restores nighttime coverage.
  • Cannot access cameras remotely, Network changes (new router, updated firewall, ISP switch) can break remote access configurations. This requires reconfiguring port forwarding or DDNS settings.
  • False motion alerts, Spider webs, swaying tree branches, or headlights triggering motion detection. Adjustment of detection zones and sensitivity settings resolves most cases without hardware changes.

What Does a Professional CCTV Maintenance Plan Include?

A comprehensive maintenance plan from a company like NYC IT Tech typically covers both scheduled preventive visits and on-demand repair calls. Here’s what a proper maintenance program should include:

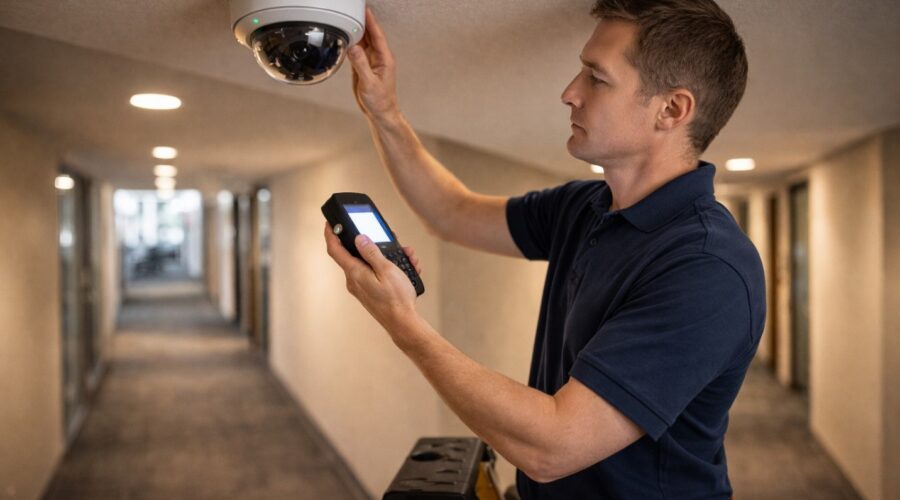
  • Physical camera inspection, Checking mounting brackets for stability, cleaning lenses, verifying camera angles haven’t shifted, and inspecting housings for weather damage (critical for outdoor cameras in NYC).
  • Firmware and software updates, Keeping camera firmware and NVR software current is essential for both performance and cybersecurity. Outdated firmware is the #1 entry point for network breaches through surveillance systems.
  • Storage health check, Monitoring hard drive health indicators (SMART data), verifying recording schedules are running correctly, and confirming footage retention meets your required timeframe (typically 30 days for NYC buildings).
  • Network connectivity audit, Testing every camera’s connection, checking PoE switch performance, verifying bandwidth allocation, and confirming remote access is functioning.
  • Cable and connection inspection, Checking junction boxes, weatherproof connectors, and cable runs for damage, especially important in NYC where building renovations and construction can inadvertently damage surveillance cabling.

Maintenance frequency: For most NYC properties, quarterly maintenance visits are the sweet spot. Monthly is ideal for high-security commercial properties. Annual-only is risky, too many things can fail silently over 12 months.

Should You Repair Security Cameras Yourself or Hire a Professional?

Some basic troubleshooting is fine to do yourself: restarting a camera, checking if a cable came loose, or cleaning an accessible lens. But for most repair scenarios in NYC, professional service is the practical choice for three reasons.

First, access. Many camera installations in NYC buildings involve cameras mounted at height, in ceilings, on building exteriors, or in locked utility rooms. Reaching them safely requires ladders, lifts, and building access coordination that a property manager shouldn’t be doing alone. Second, diagnostics. When a camera goes offline, the problem might be the camera itself, the cable, the PoE switch, the NVR, or the network configuration. A technician with diagnostic tools isolates the issue in minutes; without them, you’re guessing and swapping parts. Third, liability. In commercial buildings and apartment complexes, a surveillance gap caused by an amateur repair attempt can create liability issues if an incident occurs during the downtime.

Expert Tips for Maintaining Your NYC Security Camera System

  • Set a calendar reminder for lens cleaning. NYC air quality means exterior camera lenses accumulate grime faster than suburban installations. A simple lens wipe every 2–3 months dramatically improves footage clarity. For building staff with access, this takes 30 seconds per camera.
  • Monitor your NVR’s hard drive health proactively. Don’t wait for the drive to fail completely. Most NVR systems have health monitoring built in, enable email alerts for drive warnings. Replace drives every 3–4 years regardless of apparent condition.
  • Keep a log of your system’s IP addresses and passwords. When a technician arrives for a service call, not having login credentials wastes an hour of billable time. Maintain a secure document with all camera IPs, NVR login, network credentials, and remote access settings.
  • Upgrade firmware quarterly, not annually. Camera manufacturers release firmware updates that patch security vulnerabilities. In NYC’s dense network environment, an unpatched camera is a cybersecurity risk for your entire building network.

Frequently Asked Questions (FAQs)

NYC IT Tech provides help desk and on-site support across all five boroughs. Response times depend on location and urgency, but the company prioritizes security system issues because surveillance downtime creates immediate risk. Contact them at 212.671.3330 for current availability.

Yes. NYC IT Tech services and repairs surveillance systems regardless of the original installer. They work with all major camera brands and NVR platforms. During the repair visit, they’ll also assess the overall system health and flag any issues that need attention.

Repair costs depend on the issue. Simple fixes like cable reconnection or camera restart may be resolved quickly, while hardware replacements (failed camera, NVR drive, PoE switch) involve parts costs on top of labor. NYC IT Tech provides a diagnosis before any billable repair work begins, so you know the cost upfront.

Yes. Ongoing maintenance contracts are available for residential buildings, commercial properties, and multi-site portfolios. These typically include quarterly on-site visits, priority response for repair calls, firmware management, and storage health monitoring. Contact NYC IT Tech for a customized maintenance proposal.

Gradual footage degradation is almost always lens contamination (dust, grime, moisture film) or a camera that’s been physically bumped and shifted out of optimal focus. Less commonly, it can be a network bandwidth issue compressing video quality. A maintenance visit resolves all three causes.

Need a Security Camera Repair or Maintenance Plan?

Fast response. All five boroughs. Licensed & insured.

The Complete Pre-Wire Checklist for Your New Home Build in 2026

Building a new home means making hundreds of decisions before the drywall goes up. Your low-voltage wiring plan is one of the most important choices you will make during this process. Getting it right now saves you from expensive retrofits later.

This smart home wiring checklist will help you have a productive conversation with your builder and technology integrator. Print it out, bring it to your next meeting, and go through each section together. The goal is simple. Make sure no critical infrastructure gets overlooked while the walls are still open.

Why Pre-Wiring During Construction Matters

Running cables after drywall is installed can cost three to five times more than doing it during the framing stage. In some multi-story homes with fire breaks between studs, adding wire later is impossible. The labor to pull Cat6A cable through open framing takes a fraction of the time compared to fishing wire through finished walls.

Even if you do not plan to use every cable right away, having them in place means you are ready for whatever technology comes next. The wires will sit there waiting until you need them.

Setting Up Your Central Wiring Location

Every connected home needs a single spot where all systems come together. Some builders call it a distribution center or media closet. This is where your network equipment, patch panels, and amplifiers will live.

Look for a location that stays at a moderate temperature and has good airflow. It should sit close to where your internet service enters the home and have easy access from the main floor. A spot above the basement or crawlspace makes cable runs much simpler. Plan for plenty of electrical outlets and enough wall space for at least one equipment rack.

Infrastructure Basics

  • Dedicated closet or cabinet space for network equipment with ventilation
  • At least two 1.5-inch conduits running from the closet to the attic and basement
  • A clear path from where your internet provider enters the home to the equipment location
  • Whole-home surge protection at the electrical panel
  • Space and power for a battery backup unit

Understanding the Cables You Will Need

Knowing what each cable type does helps you communicate with your contractor and avoid confusion on site.

  • Cat6A is the standard for network wiring in new construction. It handles high-speed data, supports Power Over Ethernet for cameras and access points, and will meet your needs for years to come. The installation labor is identical to older cable types and the cost difference per foot is minimal.
  • RG6 Coaxial is still useful for over-the-air TV antennas and certain cable services. Run it alongside Cat6A at media locations.
  • Speaker Wire in 16-gauge runs back to your distribution center for connection to amplifiers. You will need it for any in-wall or in-ceiling audio.
  • Low-Voltage Wire handles motorized shades, contact sensors, and other smart home components that do not require network connectivity.

Living Spaces and Entertainment Areas

Your living room and family room will likely have the most technology. Plan for multiple network drops at TV locations to support streaming devices, gaming consoles, and future equipment you have not thought of yet.

  • 2-4 Cat6A drops at the primary TV location
  • 1 RG6 Coaxial drop at the TV location
  • 1 speaker wire run for a soundbar
  • 5-7 speaker wire runs for surround sound
  • 1 Cat6A drop in the ceiling for a Wi-Fi access point

Home Office Wiring for Remote Work

A home office benefits from hardwired connections more than any other room. Wi-Fi works fine for casual browsing, but video calls and large file transfers perform better over Ethernet.

  • 2-4 Cat6A drops at the desk location
  • 1 RG6 Coaxial drop
  • 1 Cat6A drop for a network printer
  • Additional drops behind desk areas for future devices

Bedroom and Hallway Runs

Each bedroom needs basic media connectivity. A central hallway location works well for a Wi-Fi access point that covers multiple rooms.

  • 2 Cat6A drops at the TV or media location in each bedroom
  • 1 RG6 Coaxial drop in each bedroom
  • 2 speaker wire runs for in-ceiling audio in the primary bedroom
  • 1 Cat6A run in a central hallway ceiling for Wi-Fi coverage

Kitchen and Laundry Room Considerations

Smart displays, small TVs, and in-ceiling speakers are common in kitchens. Running network cable behind appliance locations is speculative but forward-thinking. Future refrigerators and ovens may connect directly to your network instead of relying on Wi-Fi.

  • 1 Cat6A drop for a smart display or small TV
  • 2 speaker wire runs for in-ceiling music
  • 1 Cat6A behind the refrigerator location
  • 1 Cat6A behind the oven location
  • 1 Cat6A behind the washer in the laundry room
  • 1 Cat6A behind the dryer location

Bathroom Audio Integration

Speaker wire to bathrooms lets you extend your whole-home audio system into spaces where you might want music during morning routines.

  • 2 speaker wire runs for in-ceiling speakers in the primary bathroom
  • 1 speaker wire run for guest bathrooms
  • 1 Cat6A drop if you plan to install a smart mirror

Garage Connectivity and Access

The garage often gets overlooked during wiring planning. Security cameras, Wi-Fi coverage, and smart garage door integration all require network connectivity.

  • 1 Cat6A drop for a security camera at the garage entrance
  • 1 Cat6A drop for a Wi-Fi access point
  • 1 Cat6A drop near the garage door opener
  • 1 RG6 Coaxial drop if you plan to mount a TV

Outdoor and Landscape Wiring in NYC Homes

Outdoor spaces need network and audio infrastructure too. Running conduit from the attic to outer foundation walls gives you flexibility to add irrigation controls, landscape lighting, or additional speakers later. For homes across NYC, Brooklyn, and Queens, rooftop and patio entertainment systems are increasingly popular.

  • 1 Cat6A drop for an outdoor Wi-Fi access point
  • 2-4 outdoor-rated speaker wire runs for landscape audio
  • 1 Cat6A and power for an outdoor TV location
  • Conduit to the yard for future irrigation or lighting controls

Climate Control and Thermostat Wiring

Smart thermostats perform better with network connectivity than Wi-Fi alone. If your HVAC system supports zoned climate control, plan for multiple thermostat locations.

  • Cat6A drop at each thermostat location
  • Verify HVAC compatibility with smart home platforms
  • Consider wiring for zoned control if your system supports it

Smoke and Carbon Monoxide Detection

Hardwired smoke and CO detectors that interconnect throughout the house provide better safety than battery-powered units. An alarm in the basement will trigger alerts on every floor.

  • Hardwired power to all smoke detector locations
  • Hardwired power to CO detector locations near bedrooms and fuel-burning appliances
  • Cat6A drops near detectors for smart monitoring integration

Irrigation and Landscape Automation

Smart sprinkler controllers need either network or low-voltage wire at the installation location. Running conduit to the yard now means you can add soil moisture sensors or expand the system later.

  • Cat6A or low-voltage wire to the irrigation controller location
  • Conduit from the house to the yard for future expansion

Security Camera and Sensor Placement

Plan camera locations at every corner of the house, front door, back door, and garage. Running two cables to each location instead of one gives you room to add coverage later without pulling new wire. Power Over Ethernet cameras receive both data and power through a single Cat6A cable, which simplifies installation significantly. If you are planning integrated security systems with access control and monitoring, discuss additional wiring needs with your integrator.

  • Cat6A to all potential camera locations
  • Wire runs to windows and doors for contact sensors
  • Wire run for the main security panel and keypads
  • Consider doubling camera drops for future expansion

Smart Lighting and Motorized Shade Wiring

Smart switches require a neutral wire at each switch location. Confirm this with your electrician during the rough-in phase. Motorized interior shades can run on battery power, low-voltage wire, or Power Over Ethernet depending on the manufacturer.

  • Confirm neutral wire availability at all switch locations
  • Low-voltage wire to each window for motorized shades
  • Direct electrical wiring for exterior motorized shades

Home Automation Touchscreens and Control Systems

In-wall touchscreens from manufacturers like Savant and Control4 need network connectivity. If you are planning for whole-home audio and video distribution, discuss the specific wiring requirements with your integrator early in the design process.

  • Cat6A to each planned in-wall touchscreen location
  • Additional drops for future control panel expansion

Planning for Technology That Does Not Exist Yet

The cables you install today need to support devices that have not been invented. Run more cable than you think you need. Drop two network cables to camera locations instead of one. Pull speaker wire to every room where you might want music someday, even if you do not plan to install speakers right away.

Conduit is your best tool for future flexibility. PVC pipe between the attic and equipment rack lets you pull new cable types as technology evolves. The cost of extra materials during construction is minimal compared to the expense of opening walls later.

Using This Checklist With Your Builder

Print this list and bring it to your next meeting with your contractor and technology integrator. Go through each section room by room. Mark what applies to your home and note any questions that come up.

Every home is different. This checklist covers the most common needs for a new home pre-wire in 2026, but your specific situation may require additional planning. Use it as a starting point to create a professional new construction cabling plan that fits your family and how you live.

Cat6A or Fiber Optic Cabling for Your New NYC Office Build

You’ve signed the lease on a new commercial space in Manhattan. The walls are bare, the floor plan is wide open, and every decision you make now will shape how your business operates for the next decade. The infrastructure hidden inside your walls will have a far greater impact on daily productivity than most people realize.

If you’re wondering whether to use Cat6A or fiber for your office network, you’re already thinking about this the right way. This guide breaks down both options so you can make an informed choice for your new construction cabling project.

How Cat6A and Fiber Optic Cables Transmit Data

Before diving into comparisons, it helps to understand what each cable type does and how it transmits data.

Cat6A Copper Cabling

Cat6A, or Category 6 Augmented, represents the current standard in copper Ethernet cabling. It supports speeds up to 10 Gbps across distances of 100 meters. Think of Cat6A as a newly expanded 10-lane highway for your data. It handles everyday office tasks like email, cloud applications, VoIP calls, and video conferencing without breaking a sweat.

The “A” stands for Augmented, meaning it offers better shielding against crosstalk compared to standard Cat6. This makes it more reliable in environments where multiple cables run close together.

Fiber Optic Cabling

Fiber optic cables transmit data using pulses of light rather than electrical signals. This allows them to achieve speeds of 40 Gbps, 100 Gbps, and beyond. If Cat6A is a highway, fiber optics is a dedicated bullet train with no speed limit.

One major advantage is distance. Light signals can travel for miles without degradation, while copper cables max out at about 328 feet. Fiber is also completely immune to electromagnetic interference, which becomes important in buildings with heavy electrical equipment or elevator shafts.

Comparing Cat6A and Fiber Optic for Commercial Buildings

When evaluating Cat6A vs fiber optic for a commercial building project, five key factors typically drive the decision.

FeatureCat6AFiber OpticBusiness Consideration
Speed and BandwidthUp to 10 Gbps40 Gbps to 100+ GbpsCat6A handles most office workloads. Fiber suits data-heavy industries like video production or financial trading.
Distance100 meters maxMiles without signal lossLarge floor plates or multi-floor buildouts may exceed Cat6A limits. Fiber connects separate floors or buildings easily.
InterferenceSusceptible to EMIImmune to EMIDense buildings with heavy electrical systems benefit from fiber’s immunity to interference.
Installation CostLower upfront, easier terminationHigher upfront, requires more trainingBudget-conscious startups often choose Cat6A. Long-term flagship offices may justify fiber’s cost.
DurabilityRugged and flexibleMore fragile, needs careful handlingCopper withstands rough construction environments better, though both require quality installation.

For businesses wondering which cable is better for 10Gb network speeds, Cat6A delivers that capability at a lower cost. Fiber becomes necessary when you need speeds beyond 10 Gbps or cable runs longer than 100 meters.

Why Fiber Offers Better Network Security

For businesses handling sensitive data, fiber optic cabling offers a security advantage that copper cannot match. Electrical signals traveling through copper cables emit small amounts of electromagnetic radiation that can potentially be intercepted with the right equipment. Fiber transmits light pulses contained entirely within the glass strand, making it virtually impossible to tap without physically cutting the cable and disrupting service.

Law firms, financial institutions, healthcare providers, and government contractors often specify fiber for this reason alone. If your business handles client financials, medical records, or proprietary information, the added security layer may factor into your decision beyond raw performance metrics.

Combining Cat6A and Fiber Optic for a Smarter Office Network Design

The Cat6A vs fiber debate doesn’t have to be an either/or decision. Many businesses use both technologies strategically, and this hybrid approach often makes the most sense for structured cabling in Manhattan offices.

A common setup runs fiber as the building’s backbone, connecting the main server room to different floors or zones. From there, Cat6A handles the horizontal runs to individual workstations, phones, and devices. This approach gives you the long-distance, high-bandwidth advantages of fiber where it matters most, while keeping costs manageable for individual connections.

The True Long-Term Cost of Cat6A vs Fiber Optic Cabling

The comparison table above addresses upfront installation costs, but the full financial picture extends further. Cat6A cables have a typical lifespan of 10 to 15 years before degradation affects performance. Fiber optic infrastructure can last 25 years or more with minimal maintenance, and the glass strands themselves don’t corrode or degrade like copper over time.

Fiber also requires less power to transmit signals over long distances, reducing energy costs in larger installations. And when bandwidth demands increase, fiber networks can often be upgraded by changing the equipment at each end rather than replacing the cables themselves. Cat6A running at its 10 Gbps maximum today has less headroom for future upgrades without recabling.

Matching Your Business Needs to the Right Cabling Infrastructure

Your specific situation will determine which cabling makes the most sense.

Cat6A Works Well For

Businesses operating primarily from a single floor under 10,000 square feet. Standard office applications like email, cloud software, and video calls don’t require fiber’s extreme bandwidth. Cat6A installation costs run significantly lower than fiber, making it attractive for startups watching their buildout budget.

Fiber Optic Works Well For

Data-intensive industries such as video editing, software development, or financial trading. Fiber also makes sense when connecting multiple floors or buildings. If you’re planning for substantial growth over the next 10 to 20 years, fiber’s virtually unlimited bandwidth protects your investment.

A Hybrid Setup Works Well For

Offices with a large footprint that need high-speed connectivity everywhere without overspending. A fiber backbone combined with Cat6A to the desktop gives you future-proof infrastructure where it counts.

Getting Your Cat6A vs Fiber Decision Right the First Time

Both Cat6A and fiber optic cabling are excellent choices for commercial networks. The right answer depends on your industry, office layout, budget, and anticipated growth. Taking time to analyze these factors now prevents costly retrofits later.

The network foundation you install during your buildout phase will affect operations for years to come. A professional structured cabling installation means whichever path you choose gets implemented correctly for maximum performance and reliability.

A Renter’s Guide to Apartment Security in NYC – NYC IT Tech

A Renter’s Guide to Apartment Security in NYC – NYC IT Tech

Keeping Your NYC Apartment Safe

Living in New York City comes with unique security challenges, from busy lobbies to frequent package deliveries. As a renter, it’s important to take proactive steps to enhance your apartment security in NYC. Start by assessing your entry points: doors, windows, and balconies are common targets for intruders. Strengthen your door with a heavy-duty deadbolt and make sure your landlord has provided at least one functioning lock and key. If your apartment door already has a peephole or chain, use them to verify visitors before opening the door. Even in a high-rise, simple measures like always locking doors and windows when you leave can deter opportunistic theft. NYC IT Tech Audio Video, CCTV And Surveillance Camera Installation recommends installing additional hardware like door jammers or window sensors to reinforce these points of entry.

Modern Renter-Friendly Security Systems

Today’s smart technology offers renters powerful, non-invasive security system options. Wireless alarm systems and cameras require no drilling and are designed for apartments, ideal for renter security systems. For example, systems like SimpliSafe and Cove offer stick-up cameras and entry sensors that attach without tools. These DIY kits often come with contract-free monitoring plans, giving renters flexibility when they move. A wireless video doorbell camera can track visitors at your door and alert you via smartphone, while smart locks let you lock doors remotely. Just be sure to disable any doorbell camera microphones in hallways: NYC law prohibits recording audio of others without consent. In short, renters can deploy modern security cameras and alarms inside their units, but should avoid pointing devices at neighbors’ windows or common hallways to respect privacy.

Professional vs DIY Installation

While DIY systems are popular, professional installation ensures your setup is secure and code-compliant. NYC IT Tech Audio Video, CCTV And Surveillance Camera Installation specializes in home security systems in NYC that fit city apartments. Our technicians install compact, wireless alarms and CCTV cameras that blend into small spaces. We coordinate with building management to meet co-op or lease rules, so you can upgrade security without risking your deposit. All wiring and equipment are compliant with NYC standards, and we offer monitored smoke and CO detectors that integrate with your alarm. By choosing a professional renter security system installer, you get robust coverage – from night-vision surveillance cameras to smart intercoms, plus clear documentation if you need management approval.

Legal and Lease Considerations

Understanding your rights as a tenant helps you secure your apartment legally. In NYC, you are entitled to install self-contained cameras or alarms inside your apartment without landlord consent. However, you cannot alter locks permanently or change them without permission. Landlords must provide a working deadbolt and key (and usually a peephole) by law, but adding a second lock or smart lock may require notification. Crucially, do not place cameras in hallways or point them at neighbors’ living spaces. Always check your lease and building regulations before installation. For example, NYC’s Housing Maintenance Code requires certain door locks, but it does not forbid you from adding renter-friendly features. When in doubt, give your landlord notice, permission is typically granted for removable devices like wireless cameras and alarms. By respecting privacy laws and lease terms, you can improve apartment security in NYC without legal issues.

Additional Safety Tips

In addition to locks and alarms, adopt habits that keep your home safe. Use timers on lights when you’re away, and have packages delivered to a secure location. Consider renters insurance to cover losses from theft or break-ins. NYC IT Tech also recommends regular safety reviews: test smoke and CO alarms monthly, and review your system’s alerts settings. If your building has an access control or concierge, use it but remain vigilant (buzz cards and electronic entry can be bypassed by determined criminals). Community vigilance matters too. Get to know your neighbors and watch out for each other’s apartments. By combining these practical measures with a solid renter security system, you’ll create a safe environment for your NYC home.

Why NYC IT Tech Is Your Security Partner

NYC IT Tech Audio Video, CCTV And Surveillance Camera Installation is a local security expert with a portfolio of trusted home security services in NYC and a commitment to NYC renters. Our team has installed hundreds of apartment systems in Manhattan, Brooklyn, Queens, and beyond. We provide personalized consultations to recommend the right solution, whether it’s a camera-only kit or a fully monitored alarm package. Call us at +1 212-671-3330 to discuss your NYC apartment security needs. Protect your home and peace of mind NYC IT Tech can help.

Frequently Asked Questions (FAQs)

Yes. Tenants are generally allowed to set up cameras inside their apartments for their own security. Ensure the camera is pointed at your entryways or windows, not at neighbors or common areas. Remember that NYC law forbids audio recording in hallways, so disable the microphone if your device might pick up outside sounds.

Not for most wireless, self-contained alarms or cameras. You cannot make permanent alterations without permission, but plug-and-play systems (cameras, stick-up sensors, motion detectors) are typically fine. To avoid disputes, inform your landlord of installations; many companies offer certificates of compliance which can simplify the process.

NYC landlords must supply a functional front door lock, at least one key, and a peephole in apartments with more than three units. Some older buildings also have chain latches. However, landlords are not required to offer additional locks on windows or advanced security devices. Renters can legally request reinforced doors or alarm systems, but landlords may ask for tenant agreement to restore any modifications.

Very effective as deterrents and alert systems when used properly. SimpliSafe, ADT DIY, and similar renter-friendly brands score highly for ease of install and wireless operation. A camera or video doorbell can capture evidence of a break-in or notify you of suspicious activity. Always choose a reputable brand to avoid hacks, and connect devices through a secure network. When integrated into a full security system, these smart solutions make apartment security in NYC much more manageable.

For professional apartment security system installation in NYC, call NYC IT Tech at +1 212-671-3330. Our team will schedule a consultation and walk you through options that fit your lease and lifestyle. Visit our website or Google Business Profile for reviews and service details. We look forward to helping you secure your home.

Act Now to Secure Your Home

Protecting your apartment is crucial. A few smart upgrades can make a big difference in safety and peace of mind. Don’t wait for a break-in to think about security. Call NYC IT Tech Audio Video, CCTV And Surveillance Camera Installation at +1 212-671-3330 today to get started. Our experts will recommend the best renter security system for your NYC apartment and handle installation smoothly. Secure your home reach out now!

Which Intercom System Works for a Classic New York Brownstone?

Classic brownstones define the character of neighborhoods across Brooklyn and Harlem, with their iconic stoops and architectural details dating back over a century. But the charm of these historic homes often comes with outdated entry systems that leave residents juggling keys, buzzing guests in blind, or dealing with broken equipment. Choosing the right intercom system for NYC brownstone properties means balancing modern functionality with respect for the building’s heritage.

Many brownstone owners face a unique challenge: their homes now serve as multi-unit dwellings, with garden-level and parlor-level entrances that both need coverage. The right system handles multiple tenants while fitting into the visual landscape of a protected historic facade.

From Buzzers to Video: The Evolution of the Brownstone Intercom

The original brownstone entry system was simple: a pull-bell at the door and somebody walking down four flights of stairs. Then came the mechanical buzzer, followed by basic audio intercoms in the mid-20th century. Today, video intercom systems have transformed what’s possible at your front door, allowing you to see visitors on your phone from anywhere instead of guessing based on a crackling voice.

Option 1: Simple Audio Intercoms

A basic audio intercom gets the job done without complications. You talk, they talk, you press a button to unlock the door. These systems work well for brownstones where visual verification isn’t critical and you just need reliable communication between the entrance and apartments upstairs. Audio-only setups cost less to install and often integrate with existing wiring in older buildings, which matters when you have tenants of varying tech comfort levels.

Video Intercom Options for Historic NYC Homes

Being able to see who’s at your door changes the security equation completely. A historic home video intercom adds that layer of visual confirmation without requiring you to walk down from the third floor every time the buzzer rings. Modern video units come in low-profile designs that blend with brownstone aesthetics, offering clear images even in low light when someone’s standing under your stoop. For brownstone owners looking to add smart technology to their historic properties, video intercoms represent one of the most practical upgrades.

Smart Integration Features

Many current video intercom models connect with home security systems to create a comprehensive approach to property protection. Some units save video clips automatically when someone rings, giving you a record of all door activity.

Option 3: Smart & IP-Based Intercoms

IP-based systems represent the biggest shift in entry technology for multi-family brownstones. These connect to your internet network, routing calls to smartphones instead of in-unit hardware. You can answer your door from work, vacation, or the subway, then remotely unlock it for trusted visitors. When searching for the best intercom for multi-family brownstone buildings, these systems often rise to the top because when someone moves out, you just remove their access through the app rather than rewiring or reprogramming physical units.

Preserving Your Facade: Aesthetic Considerations for Historic Homes

Mounting modern equipment on a landmarked or historic building requires careful planning. Low-profile mounting plates, custom bronze or brushed nickel finishes, and recessed installation techniques help new technology disappear into old architecture. Replacing old intercom systems NYC buildings have relied on for decades often means the existing rough opening doesn’t match current equipment dimensions. Professional installation makes the difference between an upgrade that enhances your building’s appearance and one that looks out of place.

Best Intercom Systems for Multi-Family Brownstones

Converting a single-family brownstone into apartments creates specific intercom needs that off-the-shelf residential systems can’t always handle. Buildings with three to six units often benefit from systems designed for small multi-tenant properties, offering programmable tenant buttons, different ring patterns for each apartment, and temporary access codes for guests or service providers. Finding an intercom system for NYC brownstone conversions means considering both your garden-level and main entrance if your property has multiple entry points.

Popular Intercom Brands for Historic NYC Buildings

  • Aiphone offers modular systems that adapt to unusual building layouts, with options for both audio and video.
  • 2N makes IP intercoms with customizable faceplates in finishes that complement historic buildings and work with existing access control installations.
  • Akuvox handles apartment building solutions with tenant management features and property management software integration.
  • ButterflyMX has become popular in Brooklyn brownstones for its smartphone-first approach.
  • Siedle provides high-end options with exceptional build quality for properties where aesthetics matter as much as function.

Replacing Your Old Intercom System in NYC Brownstones

Brownstones built before 1950 often have wiring that was adequate for basic buzzer systems but struggles with modern equipment demands. A proper assessment checks wire gauge, condition, and routing before recommending solutions. The building’s layout also affects system selection; a four-story walk-up with tenants on every floor needs different coverage than a two-family brownstone with a basement rental. Many property owners discover that replacing an old intercom system in NYC involves more than swapping out the front panel, particularly when bringing historic buildings up to current building codes.

Making the Right Choice for Your Property

Start by identifying your priorities: budget, security level, ease of use, and aesthetic concerns all factor into the decision. The right system often combines elements from different categories. You might choose video at the main entrance with simple audio at a rear gate, or install a smart system for yourself while giving tenants basic audio units. Working with experienced installers familiar with NYC building requirements helps navigate these choices and avoid costly mistakes.

Control4 vs Crestron vs Savant for Manhattan Homes

Planning a luxury renovation or new construction in Manhattan means making decisions that become permanent parts of your home. The smart home system falls into that category. Consumer products like Nest thermostats or Amazon Echo handle basic tasks, but they won’t create the seamless automation experience that high-end properties demand. The best high-end home automation system requires looking past consumer devices to professional platforms designed for luxury living.

Three companies lead the professional automation market. Control4, Crestron, and Savant each handle lighting, climate control, multi-room audio, video, and security cameras throughout your space. The real question when comparing Control4 vs Crestron vs Savant isn’t which one works better, but which one matches your priorities and lifestyle.

Why High-End Home Automation Systems Work Differently

Consumer smart devices and professional systems differ in how deeply they integrate. Individual smart products create a fragmented experience with multiple apps and inconsistent control. Integrated home automation systems unite everything under one interface.

Luxury properties in Manhattan come with specific challenges. You might have building-wide security systems to coordinate with, complex lighting scenes for skyline views, or climate control needs for valuable art collections. These situations need automation that handles sophisticated programming while staying simple for everyday use.

Understanding the Big Three Platforms

Control4 built its name on interfaces anyone can use and reliable performance at accessible prices. The company developed its own lighting control and maintains strong dealer networks nationwide.

Crestron sits at the premium end with nearly unlimited customization options. The platform handles commercial installations and ultra-luxury residential projects where off-the-shelf solutions won’t cut it.

Savant attracts homeowners who care about design, especially those already invested in Apple products. The system balances elegant interfaces with serious control capabilities. If you’re looking at Savant home automation installation in NYC, it works particularly well in Manhattan condos where appearance matters as much as performance. The platform also excels at audio-visual control.

How Control4 vs Crestron vs Savant Compare for NYC Living

FeatureControl4CrestronSavant
User InterfaceSimple, consistent, easy for anyone to useHighly customizable, can be complexApple-centric, elegant, intuitive
CustomizationLess flexible, more templatedLimitless. If you can dream it, Crestron can do itGood balance, but favors its own ecosystem
CostMost affordable of the threeHighest price point, premium investmentMid-to-high, depends on configuration
Best ForFamilies, ease of use, projects with a defined budgetUltimate luxury, unique requirements, commercial-grade reliabilityApple users, design-focused projects, excellent AV control

Interface Design

Control4 uses large, clear icons that anyone picks up quickly. The 2020 update cleaned up the visual design while keeping the straightforward navigation people appreciate.

Savant built its interface around photography and elegant layouts that appeal to visually-driven users. It takes slightly longer to learn than Control4, but the polish matches what you’d expect in a luxury interior.

Crestron takes a different approach. Your programmer creates the interface from scratch. A talented team delivers something beautiful and functional. An inexperienced one gives you complexity without usability. Review interface examples before you commit. Working with an experienced Crestron dealer in NYC who can show you their custom interface work makes all the difference.

Lighting Control

Each platform handles whole-home lighting differently. Control4’s keypads include ambient light sensors that adjust backlighting based on room brightness. The keypads also change color to show alarm status or alert you to open garage doors.

Savant typically pairs with Lutron lighting systems, giving you access to their extensive switch and faceplate color options. Crestron developed its own lighting that mirrors what Lutron offers, though with fewer finish choices.

Pre-war buildings add another layer of complexity when you’re planning structured cabling installations. Your installer’s familiarity with Manhattan properties becomes important here.

Music and Entertainment

Multi-room audio gets used constantly in smart homes. Control4 includes streaming services like Spotify, Tidal, Qobuz, Pandora, and iHeartRadio built right into the system. Professional audio video installation affects how well these streaming services integrate across zones. Savant took a similar approach with its own integrated streaming platforms.

Crestron added native streaming more recently after relying on third-party solutions like Autonomics for years. How well it works depends on your programmer’s skill. For conference room AV setups, Crestron often leads in commercial spaces.

Security Integration

Each platform connects with professional alarm systems, cameras, and electronic locks. Control4 currently supports the widest range of smart lock brands with complete native integration.

Video intercom systems work differently across the three platforms. Control4’s video intercom appears automatically on wall panels and touchscreens. Savant and Crestron need additional programming to achieve similar results.

Which System Fits Your Manhattan Property

Control4 makes sense when you want an intuitive operation that family members and guests can use without explanation. The platform works well for families with children and projects with defined budgets. A certified Control4 dealer can build sophisticated automation without Crestron’s premium pricing.

Crestron fits properties with unique requirements that template systems can’t handle. Think penthouses with commercial-grade security systems, properties that need building management integration, or homes where commercial reliability justifies the investment.

Savant appeals to homeowners deep into the Apple ecosystem who want automation that reflects contemporary design. The platform shines in smart home audio-visual projects where AV control plays a central role. When you’re weighing Savant vs Control4 for a Manhattan condo, Savant typically wins with owners who prioritize sleek design and Apple integration. Control4 appeals more to families valuing ease of use and broader accessibility.

Choosing Your NYC Installer Matters Most

The system matters less than the team installing it. A skilled programmer can make Control4 handle complex scenarios. A weak implementation undermines even Crestron’s capabilities. Finding the right balance between the best high-end home automation systems comes down to matching technology, user experience, and installer expertise to your Manhattan property.

Look at completed projects in buildings similar to yours. Ask about security licensing, ongoing support, and experience with pre-war building installations. The best installers understand co-op board requirements and building code compliance. Your automation platform becomes permanent infrastructure in your home. Pick an integrator you trust for long-term support, not just installation. The relationship extends years past the initial project.

Renovating Your Co-op? A Guide to the NYC Co-op Alteration Agreement for Tech Upgrades

Planning to install a home theater system, smart home controls, or new security cameras in your co-op? The excitement about upgrading your space often hits a wall when you hear about the alteration agreement.

This document protects the building and every resident who calls it home. Your neighbors share walls, floors, and ceilings with you. Getting your renovation approved by the co-op board starts with understanding this process and what documentation you need.

What is an Alteration Agreement and Why Does Your Co-op Require It?

An alteration agreement serves as a contract between you and your building’s board. It spells out what work you can do, when you can do it, and what protections you must have in place. Most NYC co-ops use a version based on the NYC Bar Association’s standard form.

The board reviews every detail because they’re responsible for maintaining structural integrity and keeping all residents comfortable. Poor installation work could damage shared infrastructure. The agreement creates boundaries that protect everyone while letting you move forward with your tech upgrade.

Before You Begin with Your Pre-Submission Checklist

Getting organized before you submit anything speeds up the approval process. Start by reviewing your building’s house rules and the standard alteration agreement form. Many boards provide these through the managing agent or on resident portals.

Your preparation checklist includes

  • Review building house rules and alteration agreement requirements
  • Hire a licensed contractor with required insurance coverage
  • Prepare detailed plans showing equipment locations and wiring paths
  • Create specifications for equipment going into walls or ceilings
  • Build a timeline respecting permitted work hours

Buildings typically restrict renovation work to weekdays between 9 AM and 5 PM. Some prohibit work during summer or holiday periods. If you’re planning security camera installations or looking to get co-op board approval for smart home technology, knowing these limitations helps you build realistic timelines.

Understanding Key Sections of the NYC Co-op Alteration Agreement for Tech Projects

Scope of Work

This section needs a clear description of every change you’re making. Don’t just write “install speakers.” Spell out how many speakers, where they’ll go, what wiring routes you’ll use, and how you’ll patch openings. Detailed documentation means fewer questions later.

Insurance Requirements

Your contractor must carry general liability insurance. Buildings in NYC typically ask for coverage between $1 million and $2 million, with some luxury buildings demanding up to $5 million. The contractor also names the building as an additional insured party. When you work with a licensed AV installer for NYC co-op buildings, they come prepared with this documentation.

Permits and Approvals

Any electrical work requires a Department of Buildings permit. Running new circuits for home or adding dedicated lines for AV equipment both fall into this category. Your contractor pulls these permits, but the alteration agreement often asks you to submit copies to the managing agent before work begins.

Low-voltage work like structured data cabling or intercom systems might not need DOB permits, but you still need board approval through the alteration agreement.

Indemnification Clause

This section protects the building from liability if something goes wrong during your project. You agree to cover any damages your renovation causes to common areas or neighboring apartments. The language sounds intimidating, but your contractor’s insurance handles most scenarios this clause covers.

Common Pitfalls When Getting Your Renovation Approved by the Co-op Board

Starting before approval arrives is the biggest misstep. Boards can stop your project mid-installation and fine you for unauthorized work. Wait for the signed agreement before beginning work, even for something as simple as installing a smart alarm system.

Working outside approved hours creates problems fast. Violating time restrictions puts your entire project at risk. Boards take these rules seriously.

Using unlicensed contractors causes immediate issues. Boards verify credentials, and unlicensed workers create liability problems for the building.

Working with a Licensed AV Installer for Your NYC Co-op Project

Experienced installation companies handle alteration agreements regularly. They know what documentation boards expect and how to present technical information clearly.

The right installer prepares detailed floor plans, equipment specifications, and installation methods that answer board concerns upfront. They talk directly with managing agents and building engineers, handling technical questions you might not know how to address.

Companies that have worked in hundreds of NYC buildings understand what different boards care about. Some scrutinize every wire path for audio video installation projects. Others focus on noise control and work schedules.

When you’re planning surveillance upgrades, professional installers adapt their proposals to match each building’s priorities for quick approval and smooth installation.

Beat the Heat: How Motorized Shades Can Cut Your ConEd Bill This Summer

Running your air conditioner full blast during a New York summer gets expensive fast. ConEdison bills climb higher every year, and if you live in a glass-walled high-rise in Hudson Yards or Long Island City, your apartment probably feels like a greenhouse by mid-afternoon.

The best motorized blinds for NYC apartments give you a smarter way to manage heat without losing natural light or your view. Set them up right, and they cut cooling costs while protecting furniture and keeping your home comfortable all day.

The Greenhouse Effect in Your High-Rise

South-facing and west-facing apartments take the worst of summer sun. Those large windows that make Manhattan living so appealing turn your space into a solar oven during peak hours. Direct sunlight pushes indoor temperatures up by 10-20 degrees in exposed rooms, forcing your HVAC to run nonstop.

High-rises with floor-to-ceiling glass create serious cooling challenges. They look stunning from the street, but all that architectural glass adds hundreds to your cooling costs when your AC fights constant solar heat.

How Much Do Smart Shades Save on Cooling

Different Fabrics Block Different Amounts of Heat

Solar shades filter sunlight while maintaining your view, blocking up to 90% of UV rays and cutting thermal gain significantly. These fabrics reflect solar energy before it enters your home, stopping heat right at the window.

Blackout shades give you maximum heat blocking when rooms get intense direct sun. Close them during peak hours and they create an insulating barrier that keeps warmth out. Dual-layer options let you switch between light filtering and room darkening based on what you need.

Why Automation Changes Everything

Manual shades only work when you remember to close them. Motorized systems run on schedules or respond to temperature sensors, adjusting all day without you lifting a finger. That’s how you get real motorized shades of energy savings instead of just hoping you remembered to close the blinds before the afternoon sun hit.

The Real Numbers Behind Motorized Shade Savings

The Department of Energy says smart window treatments can cut heat gain by up to 77 percent. Your actual savings depend on which direction your windows face and how much sun they get.

Window ExposurePotential Summer Cooling Savings
South-FacingUp to 30%
West-FacingUp to 25%
East-FacingUp to 15%

A typical two-bedroom Manhattan apartment with south and west windows could save $300-500 each summer on cooling. Over the years your shades last, that adds up to thousands in lower ConEdison bills. Most installations pay for themselves in 3-5 years.

Motorized Shades Energy Savings NYC Goes Beyond Lower Bills

What Else You Get Besides Cheaper Cooling

  • UV Protection keeps expensive furniture, hardwood floors, and artwork from fading. Sun damage can cost thousands to repair or replace.
  • Glare Reduction means morning and evening sun won’t make your TV unwatchable or create harsh reflections on your computer screen.
  • Privacy Control happens automatically when you schedule shades to close at sunset, no walking through every room needed.
  • Convenience from anywhere with your phone, even when you’re traveling. Your home looks occupied even when you’re away.

Connecting Motorized Shades to Your Smart Home

Lutron Shades vs Somfy NYC?

When you’re picking motorized blinds for a NYC apartment, Lutron and Somfy are the two names that come up most. Both work well, just in slightly different ways.

Lutron systems connect easily with most smart home platforms and let you schedule based on sunrise and sunset times. If you’re already looking at Lutron lighting and shading for your home, everything runs through one interface.

Somfy brings solid motor technology with whisper-quiet operation, which matters in apartments where sound carries through walls. Both brands let you build scenes that combine your lighting, temperature settings, and shade positions. Wake up to shades that slowly open with the sunrise, or set an away mode that closes everything when you head to work.

Before installation, owners should check if they need getting approval for smart home installations in NYC co-ops, as some buildings require documentation for electrical work.

Setting Up Advanced Automation

Connect your shades to temperature sensors and weather data for hands-off operation. When indoor temps climb above your target on sunny afternoons, shades close on the right windows automatically. Cloudy days? They stay open for natural light.

This works even better when you add smart home automation that brings your shades, thermostat, and other systems together. The setup learns what you like and adjusts itself, finding the sweet spot between comfort and energy efficiency. Add voice control through Alexa or Google and you can tweak things from the couch.

When choosing between Control4, Crestron, and Savant for whole-home automation, each platform handles shade integration differently but all can centralize your climate, lighting, and security controls.

Start with your south and west-facing windows if you want the biggest drop in summer cooling costs. Those are the ones taking the hardest hit from afternoon sun, so that’s where you’ll see the impact fastest on your energy bills.