Month: September 2026

Mobile Access Credentials vs Key Cards for NYC Offices

If you’re planning a mobile access control installation in NYC, mobile credentials can reduce card handling and make access easier to issue or revoke. Key cards remain familiar, widely supported, and independent of a personal phone. The better choice depends on your existing system, workforce, privacy policies, building requirements, ongoing costs, and fallback plan. For many offices, using both is the most practical approach.

Mobile Credentials vs Key Cards: Which Fits Your Office Better?

Neither option is automatically better.

Mobile credentials work well for employees using supported smartphones and can simplify enrollment, permission changes, and revocation. Key cards remain straightforward for visitors, contractors, temporary staff, and employees who cannot or prefer not to use a personal phone.

The decision should start with what is already installed and how people actually enter the office. Reader compatibility, user groups, privacy expectations, building access, recurring costs, and fallback procedures matter more than choosing the newest credential format.

How Mobile Credentials Work for Office Access

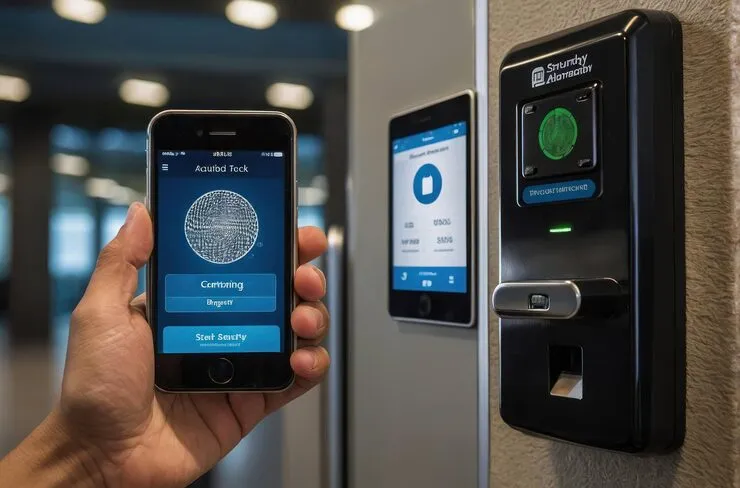
A mobile credential is a digital access credential stored on a supported smartphone, app, or mobile wallet. The phone communicates with a compatible reader, while the access-control platform decides whether that person has permission to enter.

The phone is only one part of the system. Readers, controllers, permissions, identity records, and management software still need to work together. If mobile credentials require new readers, panels, wiring, or integrations, the project becomes part of a wider access control upgrade or installation rather than a simple credential change.

Mobile Credentials vs Key Cards at a Glance

The difference becomes clearer when you compare how each option works across the full access-control system.

Decision area Mobile credentials Key cards What to decide
Compatibility Depends on reader, platform, phone, app or wallet, and licensing Depends on card technology, reader, and encoder Upgrade, keep both, or stay with cards
Users Convenient for supported employee phones but requires enrollment and an opt-out plan Familiar for employees, visitors, and contractors Match the credential to each group
Security and privacy Adds device and identity controls but introduces phone and privacy policies Depends heavily on card technology and administration Review the whole system
Cost May include subscriptions, licensing, support, and hardware upgrades Includes cards, printers, stock, and replacements Compare long-term cost
Resilience Needs a dead-phone, lost-phone, and replacement process Needs lost-card and replacement procedures Keep a tested fallback
Migration Works well with phased enrollment and pilots Can remain active during transition Avoid a hard cutover

Are Mobile Credentials More Secure Than Key Cards?

They can be, but mobile does not automatically mean more secure.

Security still depends on the credential technology, reader communication, platform configuration, user permissions, device protection, revocation, and day-to-day administration. Older proximity cards can carry greater cloning risk than modern smart cards or properly configured mobile credentials.

Changing the credential also does not stop someone from following an authorized employee through a controlled door. Offices dealing with that problem may need tailgating controls alongside stronger credentials.

For organizations connecting building access with IT identities and user permissions, credential management can also become part of a wider zero-trust physical security model, where access is tied more closely to the person, role, and current authorization.

Will Mobile Credentials Work With Your Current Access Control System?

Possibly. Compatibility needs to be checked before planning the rollout.

Start with the reader models, panels, controllers, management platform, current card technology, licensing, supported phones, and any access points controlled by the building.

Some readers can support mobile credentials through configuration or firmware changes. Others need to be replaced, while older systems may require a wider upgrade.

Existing cabling can affect the scope too. Some doors may be able to reuse what is already installed, while others may need new runs or pathways as part of the office’s structured cabling infrastructure.

Also confirm who owns the current management account and whether your team has administrator access, licensing records, and current system information. Those gaps can delay a migration even when the physical equipment is usable.

Apple Wallet, Google Wallet, Apps, NFC, or Bluetooth?

Mobile credentials can work in several ways, and they are not interchangeable.

Native wallet credentials can provide a simple tap experience when the access-control platform and readers support them. Vendor apps may work across more device types but require employees to install and maintain another application.

NFC usually works at close range. Bluetooth can support longer-range or hands-free entry when the reader and platform are designed for it.

The best option depends on your current platform, reader support, employee devices, licensing, enrollment process, and how much ongoing support your IT team wants to manage.

What Employees Need to Know About Mobile Access and Privacy

If employees are expected to use personal phones for office access, the policy should be clear before enrollment begins.

Employees should know what the access app or wallet can access, what information is recorded, what happens when a device is lost, and how access is removed when they leave the company.

If mobile device management is required, explain what that profile can and cannot control.

There should also be another way to enter for employees who cannot or do not want to use a personal device. A physical card, fob, or another approved credential can remain available, which is one reason a hybrid setup often works better than requiring every employee to use a phone.

What Happens When a Phone Is Lost, Dead, Offline, or Replaced?

Every mobile access rollout needs a fallback plan.

Phones get lost, batteries die, devices are replaced, and networks sometimes go down. The response should already be defined before employees depend on mobile access every day.

A practical plan should cover:

  • revoking a lost or stolen credential
  • access when a phone has no usable battery
  • network outages
  • enrollment on a replacement phone
  • employee departures
  • temporary access when mobile entry is unavailable

Device behavior varies, so a temporary badge or staffed fallback should remain available rather than relying on the phone to work in every situation.

What Does Mobile Access Cost Over Time?

Mobile credentials do not automatically cost more or less than key cards. The costs move into different areas.

An office may need to budget for:

  • reader or controller upgrades
  • mobile credential licensing
  • platform subscriptions
  • wallet or integration fees
  • employee enrollment
  • help-desk support
  • replacement and re-enrollment
  • physical cards retained during a hybrid rollout

Key cards also carry ongoing costs through card stock, printers, replacements, inventory, and administration.

For businesses with several offices, licensing and account ownership deserve extra attention. A system that is manageable at one location can become harder to administer when users and credentials span several properties.

How to Move From Key Cards to Mobile Credentials Without Disrupting Access

Moving from key cards to mobile credentials works best in stages.

1. Inventory the current system

Document readers, panels, credentials, software, integrations, and active users.

2. Decide who will use mobile access

Define which employees, devices, and user groups will receive mobile credentials and who will continue using cards or fobs.

3. Confirm compatibility

Check readers, controllers, platforms, licensing, phones, and building-controlled access before enrollment begins.

4. Start with a pilot

Choose users with different phone types, roles, permissions, and daily entry patterns.

5. Keep cards active during testing

Allow pilot users to enter with either credential while enrollment, access, revocation, and fallback procedures are tested.

6. Expand gradually

Move to the next group only after the process works reliably.

Old cards should be retired only after active permissions have been compared with the current employee and contractor roster.

When a Hybrid Mobile and Card Setup Makes More Sense

A hybrid setup can remain useful long after the initial migration.

Employees with supported phones might use mobile credentials, while visitors, contractors, temporary staff, and employees who opt out continue using cards or fobs.

Both should connect to the same identity and permission records. If mobile credentials are managed in one place while physical cards are tracked separately, permission changes and offboarding become much harder to control.

How NYC Building Access Affects Mobile Credentials

In many NYC office buildings, the tenant does not control every access point employees use.

Your organization may manage the office suite while the landlord controls the lobby, turnstiles, elevators, garage, or other shared spaces. Before choosing a mobile credential platform, confirm what the building supports and who manages each part of the entry process.

Otherwise, employees may end up using their phone for the office while still carrying a separate building card.

This becomes especially important when credentials also control elevator permissions. In buildings using destination dispatch, elevator access and employee credentials need to work together so lobby entry, floor permissions, and elevator routing do not become disconnected systems.

Guests create a similar handoff between landlord and tenant systems. If visitors are invited digitally but still need lobby approval or temporary access, visitor registration and building access should follow one clear process from arrival to the office suite.

How to Test Mobile Credentials Before a Full Rollout

A useful pilot tests the whole experience, not only whether one phone can open one door.

Use employees with different supported devices, roles, and access levels. Test the doors they use during a normal workday, including turnstiles or elevators if those systems are involved.

Test:

  • enrollment
  • permission changes
  • everyday entry
  • lost or replacement phones
  • dead batteries
  • network interruptions
  • credential revocation
  • employee opt-out
  • temporary access
  • audit records
  • support procedures

Set the criteria for a successful pilot before it begins. That gives the team a clear basis for deciding whether to expand the rollout or adjust the setup first.

Planning Mobile Access During a New NYC Office Build

If you are building a headquarters or renovating an entire floor, credential decisions should happen while doors, access points, landlord requirements, and technology infrastructure are still being planned.

Reader locations, door hardware, credential types, elevators, and building access all affect one another. Including mobile credentials while planning access control for a new corporate office reduces the risk of installing hardware that does not support the access model you eventually want to use.

It also gives security, IT, facilities, the general contractor, and the landlord time to agree on responsibilities before the office opens.

Frequently Asked Questions (FAQs)

Often, yes. Scheduling depends on building rules, contractor access, security procedures, and whether wiring or door work is required.

Sometimes. It depends on the readers, credential technology, access-control platform, and landlord systems used at each property.

Yes. Offices can start with priority entrances or floors and expand later if the system is planned for additional doors and users.

Temporary or scheduled credentials can limit access by door, time, or date without giving temporary users the same permissions as employees.

A new building may use different readers, landlord systems, and entry rules, so credential planning should be included in the wider office relocation process before employees move in.

Not necessarily. Existing wiring may be reusable if it supports the new hardware and is still in suitable condition. A site review can identify which doors can stay as they are and where new infrastructure is needed.

Choosing the Right Credential Setup for Your Office

Before replacing key cards, start with the readers, panels, management platform, employee needs, building access, and policies you already have.


A credential compatibility and migration assessment can identify what can stay, what needs to change, and whether mobile-only or hybrid access makes more sense for the office.


If you’re considering mobile credentials or a wider office access control upgrade, contact our team to review your current system and plan the next steps around what is already installed.

How Early Should You Order Business Internet for an NYC Office Move?

Start checking business internet as soon as a new NYC office becomes a serious option. Place the order once the address, service, demarc location, building pathway, commercial terms, and project responsibilities are clear.

There is no single business fiber lead time that works for every office. Building access, riser work, construction, cross-connects, equipment, permits, and carrier scheduling can all affect when the circuit is truly ready.

The important distinction is simple: the internet being available at an address does not mean it will be ready for employees on move day.

Why Business Internet Lead Times Vary for NYC Office Moves

A carrier may give you an estimated installation window, but that estimate depends on what has to happen inside and outside the building.

A straightforward installation may already have fiber in the building, an accessible demarc, an approved pathway to your suite, and no major construction. Another office may require riser work, a cross-connect, new conduit, landlord approval, or outside construction before the circuit reaches your equipment room.

A realistic business internet installation timeline depends on three things:

  • The carrier can deliver the service you ordered.
  • The building can support the physical path to your office.
  • Your IT team can configure and test the connection before employees arrive.

That is why internet planning should sit inside the wider office relocation and new-office setup process rather than being treated as a separate utility order.

“Serviceable” Does Not Mean Ready for Move Day

New office internet serviceability is only the beginning. A circuit normally moves through several stages before your staff can rely on it.

  • Address appears serviceable. A carrier lookup shows that service may be available.
  • Service is quoted. A specific product and bandwidth are offered for the address.
  • Order is accepted. The carrier has entered the order into provisioning.
  • Site survey or design is complete. The route from the building connection point to your suite has been reviewed.
  • Required construction is complete. Fiber, copper, conduit, riser work, or cross-connects are in place.
  • Carrier turn-up is complete. The provider activates and tests its handoff.
  • Your team accepts the circuit. Routing, firewalls, VPNs, voice, applications, and other business systems have been tested.

Knowing which stage you are in helps you ask the right question. “Is the building serviceable?” and “Can employees work from this circuit tomorrow?” are very different questions.

Confirm Fiber Serviceability Before You Sign the Lease

If reliable connectivity matters to the business, investigate it while evaluating the office rather than after the lease is signed.

Start by checking which carriers and services are available. Then confirm with the building manager or riser provider what is physically installed in the property and how a new connection would reach your suite.

Useful questions include:

  • Which carriers already have live service in the building?
  • Where is the demarc or meet-me room?
  • Is there an existing pathway to the suite?
  • Is additional riser or conduit work required?
  • Are there building fees or restrictions for telecom work?
  • Does the building have enough pathway capacity for the planned connection?
  • Can an existing tenant circuit be reassigned or extended?

If the office will also undergo construction, these answers should feed directly into new-office IT infrastructure planning so carrier work, electrical work, pathways, cabling, and equipment-room requirements are coordinated before ceilings and walls are closed.

What You Need Before Ordering a Business Internet Circuit

Having the basic project information ready can prevent the order from getting stuck before provisioning even starts.

Carriers commonly need:

  • Legal customer and billing information
  • Full service address, floor, and suite
  • Requested service and bandwidth
  • Handoff and public IP requirements
  • Contract term
  • Preferred demarc or equipment location
  • Building and riser contacts
  • Site-survey contact and access requirements
  • Target ready-for-service date
  • Letter of authorization or similar documentation when an existing circuit is being transferred or extended

The earlier these details are settled, the easier it is to separate a real installation issue from a paperwork delay.

NYC Demarc, Riser and Landlord Requirements to Plan Early

The demarcation point is where the carrier’s network hands off to the tenant network. In many NYC commercial buildings, that handoff begins in an entrance facility or shared telecom room rather than inside your office.

Getting the connection from there to your suite may involve the landlord, building engineer, riser manager, house cabling vendor, general contractor, electrician, carrier, and your own IT team.

Confirm the following before installation work begins:

  • Demarc and building entrance location
  • Riser or house vendor requirements
  • Cross-connects and pathway requirements
  • Conduit, sleeves, cores, or innerduct
  • Certificates of insurance
  • Building access and escort rules
  • Freight elevator or after-hours scheduling
  • Power, grounding, and rack space
  • Telecom room access

The key is knowing who owns each part of the work. A carrier can finish its portion while the circuit remains unusable because the final pathway into the suite was never completed.

For a multi-floor office, carrier termination also has to fit the wider network layout. IDF locations, vertical pathways, and inter-floor cabling should already be mapped as part of the IT infrastructure planning for a multi-floor relocation.

Business Internet Installation Milestones Worth Tracking

Instead of managing the carrier order around one expected completion date, track the milestones that lead to a usable connection.

Office Internet Readiness Milestones

Milestone What you should have Main owner What happens next
Service qualified Confirmed service, address, suite and known dependencies IT or telecom lead Approve the order
Building path approved Demarc, riser, pathway, access and construction plan Building, carrier and project team Release required work
Carrier turn-up Circuit ID, handoff, addressing and carrier test Carrier and network team Begin internal testing
Tenant acceptance Firewall, routing, DNS, VPN, voice, SaaS and monitoring tests IT team or MSP Approve production use
Cutover protected Backup, rollback, escalation and old-site shutdown plan Relocation PM and IT Move users

This makes project meetings much more useful. Instead of asking whether the internet is “on schedule,” you can see exactly what has been completed, what is still blocking the circuit, and who owns the next step.

Test the New Internet Circuit Before Employees Move In

Carrier turn-up confirms that the provider can deliver service to the handoff. It does not confirm that your business systems work correctly through the new connection.

Your team should test the full environment before move day.

That may include:

  • Port speed and negotiated bandwidth
  • Public IP addresses
  • Static routes and DNS
  • Firewall policies
  • VPN connections
  • Zero-trust or SASE services
  • Hosted voice
  • Video conferencing
  • Business-critical SaaS applications
  • Latency, packet loss, and jitter
  • Monitoring and alerts
  • Carrier escalation procedures

The connection also needs to work through your actual LAN, firewall, switching, and WAN environment, which is where network design and installation becomes part of the cutover rather than a separate technical project.

Record the test results before users move. If something changes later, you have a clear baseline for troubleshooting with the carrier.

Testing should also be placed in the wider move sequence. The IT checklist for moving an NYC office without losing a workday helps connect internet acceptance with equipment moves, user readiness, vendor coordination, and the final cutover.

Should You Keep Both Office Internet Circuits During the Move?

When possible, keeping the old and new connections active at the same time can reduce cutover risk.

That overlap gives your team time to test the new office with real systems before the old connection disappears. It can also allow services to move in stages instead of forcing every dependency into one cutover window.

During the overlap, confirm:

  • Critical systems work from the new location.
  • Firewalls, VPNs, voice, and public IP dependencies are mapped.
  • DNS and third-party allowlist changes are prepared.
  • The fallback path has been tested.
  • Everyone knows what would trigger a rollback.
  • The old circuit has a clear shutdown point.

How much overlap you need depends on the complexity of the office, carrier contracts, lease timing, and the operational impact of an outage.

Diverse Carriers vs. Diverse Paths: What’s the Difference?

Two different internet providers do not automatically give you true redundancy.

Both circuits may still enter through the same part of the building, use the same riser, share the same street conduit, or follow the same upstream route. One physical failure could then affect both services.

If connectivity is business-critical, ask what is physically different between the two paths.

Look for differences in:

  • Building entrances
  • Risers
  • Demarc rooms
  • Last-mile routes
  • Carrier infrastructure

Your internal design matters too. Firewalls or SD-WAN equipment need a clear failover policy, and the backup connection has to support the applications that must stay online.

Those decisions also affect the physical build. Commercial structured cabling may need separate routes from each demarc to the network rack so two carrier circuits do not become dependent on the same internal pathway.

What If the Permanent Internet Circuit Is Delayed?

A temporary connection can help keep part of the office operating while the permanent business fiber installation is completed.

Possible options include:

  • Managed cellular connectivity
  • A faster-to-install alternate wired service
  • Limited onsite staffing
  • A temporary network designed around essential applications

Before relying on temporary internet, check whether it can handle your real workload. Email and light cloud applications may be manageable while large file transfers, frequent video meetings, static-IP systems, hosted services, or VPN-heavy environments may be more demanding.

Temporary connectivity should also have a clear migration plan. Once the permanent circuit passes acceptance testing, the temporary service should be removed from production rather than quietly becoming the long-term setup.

NYC Building Conditions That Can Delay Internet Installation

Business internet installation in an NYC office often depends on much more than the carrier technician.

Building requirements can affect when work happens and who is allowed to perform it.

Common dependencies include:

  • Landlord or managing-agent approval
  • Riser vendor scheduling
  • Certificates of insurance
  • Security and escort requirements
  • Freight elevator reservations
  • After-hours access
  • Street or building-entrance construction
  • Electrical readiness in the telecom room
  • Work through occupied floors
  • Multi-floor telecom pathways

These items are easier to manage when they are part of the relocation schedule early rather than discovered when the carrier is ready to install.

They also overlap with the broader logistics of moving an NYC office, where building access, contractors, equipment delivery, construction schedules, and IT work all have to line up before employees arrive.

Build the Business Internet Timeline Into the Full Office Move

Business internet for an NYC office relocation is not one order with one completion date. It is a series of connected steps, from serviceability and building access to construction, turn-up, internal testing, backup, and final cutover.

Start investigating connectivity while evaluating the location. Confirm the physical path before relying on a carrier quote. Test the completed circuit before employees arrive. Keep a fallback option until the new connection has proven it can support the business.

When carrier work, cabling, network setup, equipment, and move-day support all need to happen on the same schedule, coordinating them through one office IT relocation plan reduces the chance that one unfinished dependency delays the opening.

If you need the carrier timeline mapped against the building, construction schedule, and move date, request a connectivity and cutover plan built around the actual office and its technical requirements.

Frequently Asked Questions (FAQs)

Base bandwidth on your busiest periods, not employee count alone. Video meetings, cloud applications, VoIP, large uploads, backups, and guest WiFi can all increase demand, so look at simultaneous use and upload requirements before choosing a circuit.

Possibly, but don’t assume they will transfer. Confirm this with the carrier before cutover, and be prepared to update firewall rules, VPNs, DNS records, third-party allowlists, and any services tied to the old public IP.

Yes. If your business uses VoIP, coordinate the new office address with the phone provider so the registered or dispatchable location used for 911 service reflects where employees are working.

Circuit testing confirms the internet connection, but it does not tell you whether WiFi will perform well throughout the office. A WiFi site survey can identify coverage, capacity, interference, roaming, and access-point placement issues before employees begin using the space.

If the new office uses IP-connected or cloud-managed door systems, include them in network and move-day testing. Planning office access control installation alongside the network helps account for controller connectivity, credentials, cabling, and any remote-management requirements before the office opens.


Conference Room AV Standards for Multi-Room Corporate Offices

A conference room AV standard gives every meeting room a consistent way to join calls, share content, hear and see participants, and get support. It defines room types, approved equipment patterns, network and account requirements, testing, and exception rules. The goal is not identical rooms. It is a predictable experience across huddle rooms, boardrooms, training spaces, and multiple offices.

What Should Conference Room AV Standards Include?

A useful standard gives IT, workplace, facilities, and support teams one shared set of rules for how rooms should work. It should cover the user experience as well as the technology behind it.

Part of the standard What it controls
User experience Joining meetings, sharing content, audio, video, controls, and guest use
Room archetypes Huddle, small, medium, large, training, executive, and specialty rooms
Approved patterns Hardware, software, cabling, and configuration for each room type
Network and identity Connectivity, accounts, calendars, security, and device management
Acceptance testing What must work before a room is handed over
Support and lifecycle Monitoring, spares, updates, ownership, and approved exceptions

The standard should stay useful after installation. If no one owns firmware, spares, support, or exceptions, room consistency usually starts to break down over time.

Do All Meeting Rooms Need the Same Equipment?

No. Good meeting room hardware standards create the same user experience without forcing the same equipment into every space.

A six-person glass-walled huddle room does not have the same acoustic or camera needs as a large training room. Standardize the outcome first. Joining should be simple, voices should be clear at every seat, remote participants should be framed well, and content sharing should work for employees and guests.

The hardware can then change by room type while the experience stays familiar.

How to Define Huddle, Small, Medium, and Large Room Standards

Room archetypes should reflect how people use the space, not seat count alone. Capacity matters, but so do room shape, table layout, acoustics, lighting, viewing distance, and support needs.

For each room type, document:

  • Typical capacity and common use
  • Table layout and viewing distances
  • Display size and placement
  • Camera coverage and framing
  • Microphone and speaker coverage
  • Room controls, scheduling panels, and cabling
  • Acoustic, lighting, and accessibility needs
  • Support level and recovery expectations

A huddle room setup may use a compact all-in-one system, while an executive boardroom may need separate cameras, microphones, displays, and control hardware. Both can still follow the same rules for joining, sharing, testing, and support.

Training rooms, divisible rooms, executive rooms, and all-hands spaces usually need their own archetype rather than being treated as larger versions of a standard conference room.

Can Teams Rooms, Zoom Rooms, and BYOD Follow One Standard?

Yes. One corporate meeting room standard can support Microsoft Teams Rooms, Zoom Rooms, and BYOD, but each platform should have its own approved configuration.

For every supported platform, define the device families, resource accounts, calendar setup, licensing ownership, guest-join rules, update process, monitoring, and fallback path.

The platform decision also affects how those standards are built. Differences between Microsoft Teams Rooms and Zoom Rooms influence licensing, device management, guest access, calendar setup, and the user experience people see when they walk into a room.

BYOD belongs in the standard too. Spell out how laptop users connect, share content, use room audio and video, and recover if the dedicated room system is unavailable.

What Network, Identity, and Calendar Requirements Belong in the AV Standard?

Conference rooms rely on more than AV hardware. Network access, room accounts, calendars, security policies, and device management all affect how reliably a room works.

Assign clear ownership for:

  • Wired connectivity, switch ports, VLANs, and QoS where used
  • PoE capacity for cameras, panels, and other devices
  • Room resource accounts and calendar permissions
  • Device enrollment and access policies
  • Scheduling panel setup and licensing
  • Remote monitoring, alerts, and vendor access

Those requirements should be planned alongside the office’s network design and installation so AV devices are not added later to a network that was never designed around them.

Wireless conditions matter too, especially for guest access and wireless presentation. Glass walls, dense meeting-room layouts, nearby access points, and competing signals can all change performance, which is where a WiFi site survey for the office can help identify coverage and interference before rooms are standardized.

Conference Room Acceptance Testing Checklist for Teams and Zoom

Acceptance testing should follow real meeting tasks, not only confirm that devices power on. Test the room from both an employee and guest perspective before sign-off.

  1. Join a scheduled meeting from the room controls
  2. Start or join an ad hoc meeting
  3. Send and receive clear audio with a remote participant
  4. Check video framing across the full seating area
  5. Share wired content from an approved device
  6. Share wireless content where supported
  7. Connect and share from a guest laptop
  8. Check microphone pickup from every seat
  9. Restart the room system and confirm recovery
  10. Test the fallback path for a login or platform problem

Record the results against the room archetype so support teams know what was tested and what the room is expected to do.

For a new office or major renovation, AV testing should follow the same project schedule as cabling and technology infrastructure for the new space. That keeps cable paths, network connections, power, mounting locations, and room hardware aligned before final commissioning.

Who Owns Conference Room AV Support After Installation?

A standard only works if support ownership is clear. Users should not have to figure out which team owns the room each time something fails.

Define who handles first-line support, who receives AV or unified communications escalations, how rooms are monitored, which spare devices are kept available, and who approves firmware or platform updates.

The same applies to newer features. Intelligent framing, transcription, speaker tracking, and other AI-powered conference room features should follow the same approval, support, and lifecycle rules as the rest of the room system rather than being enabled independently from one room to the next.

How to Manage Exceptions Without Losing the Standard

Some rooms will need exceptions. The key is to document why the standard cannot be followed and what changes as a result.

Common reasons include:

  • Architectural limits on mounting or cable paths
  • Executive or specialty workflows
  • Accessibility requirements
  • Regional platform or compliance needs
  • Temporary substitutions during supply or product transitions

Each exception should record the business reason, the approved variation, the risks, how it will be tested, who approved it, and when it should be reviewed again.

That keeps a one-off room from quietly becoming the new default.

Conference Room AV Standards for Multi-Floor NYC Offices

Multi-floor NYC offices add practical constraints that should be built into the standard from the start. Glass walls and hard finishes can affect acoustics. Compact floor plates can limit display and camera placement. Ceiling systems, HVAC, lighting, and existing infrastructure can also change what works from room to room.

Project logistics matter too. Building COIs, freight elevator access, after-hours work windows, and riser rules can affect when cabling, racks, displays, and room systems can be installed.

Those decisions are much easier to control when conference room technology is planned before the room is built. Furniture, power, cabling, network connections, displays, cameras, and mounting locations can then be coordinated as one room plan rather than corrected later.

When Conference Room AV Standards Consulting Makes Sense

Conference room AV standards consulting becomes useful when room-by-room decisions are creating inconsistent meetings, repeated support issues, or extra work during every new rollout.

Common signs include:

  • Users have different joining or sharing experiences from room to room
  • Every new office starts its AV design from scratch
  • Support ownership for rooms is unclear
  • Firmware, spares, accounts, or monitoring have no consistent owner
  • Exceptions have become common but are not documented
  • Rooms pass installation checks but still cause problems in real meetings

Meeting room standardization services can bring those pieces into one operating framework before the next rollout adds more variation.

For offices planning several rooms, floors, or locations, the same standards can carry directly into conference room AV design and installation. That gives IT, facilities, workplace, and support teams one repeatable model instead of rebuilding the approach for every room.

Frequently Asked Questions (FAQs)

Cost depends on room count, room type, existing equipment, cabling, and construction needs. Conference room AV costs in NYC can vary widely between huddle rooms, standard meeting rooms, and executive spaces.

Yes. Displays, cabling, speakers, mounts, and other equipment may be reused if they still meet the new standard. Retrofitting AV in finished conference rooms can affect cost and scope.

No. Display height should reflect screen size, viewing distance, table layout, sightlines, camera placement, and accessibility.

Yes, if they are used across the office. Their placement, power, network connection, calendars, and room-booking system integration should be standardized too.

Sometimes. Glass and hard surfaces can increase reflections and affect microphone performance, so conference room acoustics may require different hardware or treatment.

Yes. Start with the target standard, audit existing rooms, then prioritize upgrades by room type, condition, and usage.

It depends on the number of rooms, existing infrastructure, equipment availability, building access, and whether new cabling or construction is needed.


Predictive vs On-Site vs Validation WiFi Site Surveys

Predictive, on-site, and validation WiFi surveys solve different problems. A predictive survey models coverage before installation. An on-site survey measures real wireless conditions inside the space. A validation survey checks how the finished network performs. Many NYC office projects use more than one, particularly when building materials, neighboring networks, device types, or business applications add uncertainty.

What Type of WiFi Site Survey Do You Need?

The right survey depends less on the label and more on what you need to learn.

A predictive WiFi survey helps plan a network before access points are installed. An on-site survey measures conditions inside the real space. AP-on-a-stick testing checks a proposed access point or placement before a full rollout. Post-installation validation tests the finished network. A troubleshooting survey investigates an existing problem.

You may also hear passive and active surveys mentioned. These describe how data is collected rather than when the survey happens:

  • Passive testing listens to the wireless environment without joining the network.
  • Active testing connects to the network and measures how a device performs.
  • Spectrum analysis looks for interference that may not come from another WiFi network.

A heatmap can show coverage, but it cannot tell you everything about roaming, video calls, capacity, or authentication. That is why the survey method needs to match the question you are trying to answer.

Predictive vs On-Site WiFi Surveys: What’s the Difference?

A predictive WiFi survey works from floor plans, building materials, expected users, applications, and the planned access-point model. An on-site WiFi survey replaces those assumptions with measurements from the actual space.

Predictive surveys are useful early, when walls may not be finished and hardware has not been ordered. They help determine likely access-point locations and give the project team something to design around.

This is also the stage when WiFi design should be coordinated with the office build, before cable routes, ceiling locations, and access-point positions become harder to change.

Once the space exists, an on-site survey can identify conditions a model cannot fully predict, including neighboring networks, unexpected signal loss, interference, and how the actual construction affects coverage.

For many commercial projects, the two work together. Predictive modeling guides the design. On-site testing confirms or adjusts it.

When Is a Predictive WiFi Survey Enough?

A predictive survey may be enough for early planning or a relatively straightforward office with accurate drawings and known materials. It becomes less reliable as uncertainty increases.

Good inputs matter. The model should reflect:

  • Scaled floor plans
  • Wall, door, and glass types
  • Ceiling heights
  • Planned furniture and room use
  • Expected users and devices
  • Access-point model
  • Important applications such as Teams, Zoom, or VoIP

A predictive model can estimate where access points should go and how coverage may behave. It cannot measure the neighboring RF environment, confirm that equipment was installed as designed, or prove that calls and other applications will perform correctly after installation.

If those questions matter, field testing or post-installation validation should follow.

When Is AP-on-a-Stick Testing Worth It?

AP-on-a-stick testing is useful when one part of the office carries enough uncertainty that you do not want to rely only on a model.

A representative access point is temporarily mounted in the proposed location so its behavior can be measured before permanent installation.

Typical problem areas include:

  • Glass conference rooms
  • Concrete or masonry cores
  • Atriums and high ceilings
  • Elevator shafts
  • Metal shelving
  • Unusual mounting positions
  • Multi-tenant floors with heavy neighboring WiFi

The temporary setup should be close to the planned installation in height, orientation, antenna, channel, power, and client device. Otherwise, the test can create a misleading result.

Full-height glass is a good example. In spaces with glass conference rooms, access-point placement often needs more careful planning because a relatively small change can affect call quality and connectivity inside the room.

Passive vs Active WiFi Surveys

Passive and active surveys measure different sides of wireless performance.

What a Passive WiFi Survey Shows

A passive survey listens to the wireless environment without connecting to the network. It can help identify:

  • Coverage
  • Signal quality
  • Channel use
  • Neighboring networks
  • Potential interference
  • Unexpected or unauthorized wireless devices

It is useful for understanding what is already happening across a floor before changing the network.

What Active WiFi Testing Adds

Active testing connects a device to the wireless network and looks at the experience a real client receives.

Depending on the scope, it can test:

  • Throughput
  • Latency
  • Packet loss
  • Roaming between access points
  • Authentication
  • Application performance

The client device matters. A high-end survey laptop may perform well in an area where an older phone, scanner, or other production device struggles.

For that reason, business-critical devices and applications should influence how the survey is run.

What Does a Post-Installation WiFi Validation Survey Check?

A post-installation WiFi validation survey answers a simple question: does the finished network perform the way it was designed to?

Validation can compare the installed access points, coverage, signal quality, channels, capacity, roaming, authentication, and application performance against the targets defined for the project.

Problems are then tied to specific locations and possible causes. After corrections are made, affected areas can be tested again.

This is particularly important when voice, video, roaming, or other real-time applications are part of normal work. A design may look correct on paper while the installed environment behaves differently.

What Information Should You Have Before a WiFi Site Survey?

A floor plan is a starting point, not the entire survey scope.

Useful project information includes:

  • Scaled CAD or PDF drawings
  • Current construction status
  • Wall, glass, door, and ceiling types
  • Furniture and expected occupancy
  • Users and devices by area
  • Peak-use patterns
  • Business-critical applications
  • Staff, guest, voice, AV, and IoT network requirements
  • Expected growth
  • Existing switches and PoE capacity

The wireless design also needs to work with the physical infrastructure behind it. If new access points require additional drops, relocated equipment, or changes to the wired network, those decisions should be coordinated with the office’s structured cabling before installation begins.

Unknown information does not necessarily stop the survey. It does need to be treated as an assumption or project risk rather than quietly built into the design.

What Should a Professional WiFi Survey Report Include?

A useful WiFi survey report should give your IT team and contractors enough information to act on the findings.

Depending on the survey type, that may include:

  • Survey purpose and method
  • Tools and client devices used
  • Floor-by-floor coverage and signal maps
  • Channel and RF findings
  • Planned or installed access-point locations
  • Access-point models and mounting details
  • Capacity, roaming, or application test results
  • Problems and exceptions
  • Recommended changes
  • Clear acceptance criteria where applicable

The report should explain what was measured, what assumptions were made, and what passed or failed.

That becomes especially important when survey findings lead to changes in switching, VLANs, access-point placement, or other parts of the corporate network design. The survey should give the implementation team enough context to carry those changes forward without guessing.

Which WiFi Site Survey Does a New NYC Office Need?

For most new offices, the survey process follows the stage of the project.

New Office Still in Design or Construction

Start with predictive modeling based on the current fit-out drawings.

If glass, unusual materials, ceiling conditions, or other high-risk areas could affect placement, add targeted AP-on-a-stick testing when the space becomes accessible.

After installation, validate the finished network.

Wireless planning should also be coordinated with the wider technology infrastructure for the new office, particularly before ceilings close and cable routes or mounting locations become difficult to change.

Existing Office Replacing Its WiFi

An on-site survey can first document the existing environment, including dead zones and neighboring RF conditions.

The new network can then be modeled around the proposed equipment and validated after installation.

This becomes especially relevant when the refresh involves WiFi 7 or WiFi 6E, because band support, channel use, client compatibility, and the wired network behind the access points can all influence the final design.

Office With Existing WiFi Problems

Start with troubleshooting rather than assuming the entire wireless network needs to be redesigned.

The problem may come from coverage, capacity, roaming, authentication, interference, a client device, or even something outside the wireless network.

Finding the cause first keeps the scope focused on the problem that needs fixing.

How NYC Office Buildings Affect WiFi Surveys

A WiFi site survey in NYC often needs to account for conditions that are easy to miss on a floor plan.

Manhattan towers and multi-tenant commercial buildings can have dense neighboring networks, concrete cores, elevator shafts, full-height glass, raised floors, unusual ceiling spaces, and signals traveling between floors.

User density matters too. A high-density office with 100 or more employees may need a very different access-point layout from a smaller workplace divided into private offices and corridors, even when the floor area is similar.

Building access can also affect the survey itself. Freight elevator schedules, restricted rooms, building management rules, occupied spaces, and after-hours access may all influence when testing can happen and how the project is scoped.

What Affects the Cost of a WiFi Site Survey?

WiFi site survey pricing depends on what needs to be measured and proven, not square footage alone.

Common cost factors include:

  • Floor area and number of floors
  • Construction stage
  • Survey type
  • Number and type of client devices
  • Application testing
  • AP-on-a-stick work
  • Spectrum analysis
  • After-hours or restricted access
  • Reporting requirements
  • Retesting after changes

A predictive survey for one office floor with accurate drawings is a very different scope from a multi-floor NYC project that needs field testing, application validation, and remediation retesting.

The scope should reflect the actual project rather than a simple price per floor.

WiFi Survey Types by Project Stage

Survey type Best used for What it can tell you What it cannot prove alone
Predictive survey Planning before installation Likely AP placement and expected coverage Real interference or final performance
AP-on-a-stick Testing uncertain locations How a proposed AP or placement behaves in the space Whole-office performance
Passive or active on-site survey Measuring an existing environment RF conditions and client behavior Conditions that do not exist yet
Post-install validation Checking the finished network Whether the installation meets agreed targets Every possible future usage condition
Troubleshooting survey Diagnosing a live problem What is causing a specific wireless issue Whether a complete redesign is needed until the cause is known

Choose the Survey Based on What You Need to Prove

A predictive survey helps answer where the network should start. Field testing reduces uncertainty before installation. Validation shows whether the finished network works as intended. Troubleshooting deals with problems after the network is already live.

The right combination depends on your office, construction stage, devices, applications, and the amount of uncertainty in the project.

For projects that need a closer look at actual coverage, interference, access-point placement, or post-install performance, a corporate WiFi site survey can be scoped around the specific questions the project still needs to answer.

Frequently Asked Questions (FAQs)

If problems appear during normal working hours, testing under real office load can help reveal capacity, interference, or performance issues that may not show up in an empty space.

Strong signal does not always mean good performance. Congestion, interference, roaming, client devices, or network configuration can still cause slow speeds and dropped calls.

Free tools are useful for basic checks, but they do not replace detailed access-point planning, roaming tests, application testing, or post-installation validation.

It depends on the number of floors, office layout, access, and testing required. For larger projects, multi-floor IT planning can help identify dependencies early.

Yes, if building access allows it. For office moves, survey timing can be coordinated with the wider IT relocation schedule.

Possibly. New walls, glass partitions, higher occupancy, or relocated access points can change wireless performance. If network drops move too, the changes should align with the low-voltage cabling plan.

You do not need to decide first. Share your office layout, project stage, and current WiFi issues, and the survey scope can be matched to the project.


How to Calculate a PoE Power Budget for an Office Network

To calculate a PoE power budget, add the manufacturer-rated maximum power for every powered device, group devices by the switch that supplies them, check each endpoint against its port limit, then compare the total with the switch’s usable PoE capacity. Add reserve for growth, simultaneous restarts, and the failure state the office needs to survive. Use live draw for monitoring, not as your only sizing number.

For NYC offices, this matters because WiFi access points, phones, cameras, conference room devices, and access control often share the same network closets and UPS systems. A budget that looks fine across the building can still overload one switch, stack, or floor.

What Is a PoE Power Budget?

A PoE power budget tells you how much power a switch or other Power Sourcing Equipment can provide to all connected PoE devices. It is different from both the maximum power available on one port and the electrical power the switch itself draws.

Keep these four numbers separate:

  • Device power requirement is the maximum power an access point, phone, camera, controller, or other endpoint may need.
  • Per-port power limit is the maximum power a specific switch port can supply.
  • Total PoE budget is the amount of power all PoE ports can share.
  • Switch electrical input includes the switch itself, PoE output, conversion losses, and the load placed on the UPS or building circuit.

The switch or injector supplying power is the Power Sourcing Equipment, or PSE. The access point, phone, camera, reader, or other endpoint receiving that power is the Powered Device, or PD.

Advertised PoE Capacity Is Not Always Usable Capacity

Do not size an office network from the largest wattage printed on a product page.

Available PoE capacity can depend on the exact switch model, installed power supplies, operating mode, stack or chassis design, and platform-specific limits. Use the manufacturer documentation for the equipment being installed rather than assuming the headline power figure is fully available.

How to Calculate a PoE Power Budget Step by Step

The easiest way to avoid mistakes is to treat the calculation like a worksheet you can update whenever devices are added or replaced.

Required PoE capacity = total device design load + reserve, tested against per-port limits and failure-state capacity.

A spreadsheet can work as a simple PoE power budget calculator as long as the assumptions behind each number are documented.

Step 1. List Every Device That Will Use PoE

Start with everything drawing power from a network port, including:

  • WiFi access points
  • VoIP phones
  • Security cameras
  • Conference room controllers and schedulers
  • Access control readers and controllers
  • Digital signage
  • Sensors and other networked office devices

For a WiFi refresh, do not estimate the access point count simply to complete the power calculation. Start with the AP count established during the wireless site survey, then calculate the power those devices will require.

Step 2. Record the Maximum Requirement for Each Device

Use manufacturer data for the exact model.

For each endpoint, record its required IEEE PoE standard, maximum power input, and any connected components that can increase the load.

A camera with PTZ or heating can require more power than a basic indoor camera. An access control device may also feed other hardware downstream.

Step 3. Group Devices by the Switch That Powers Them

Do not calculate only one total for the entire office.

PoE capacity has to work at the individual switch, stack, chassis, or network closet level. A multi-floor office may have plenty of power overall while one IDF is close to its limit.

Group the device inventory by its actual power source before adding anything together.

Step 4. Add the Design Load for Each Switch


Multiply the quantity of each device by its maximum design wattage, then add the subtotals.

For example:

  • 20 access points × 30W = 600W
  • 60 phones × 6W = 360W

Continue until every powered device connected to that switch is accounted for.

Step 5. Check the Per-Port Limits

A switch can have plenty of total PoE capacity and still be unable to power a particular endpoint.

Each device must fit the power standard and limit of the individual port it uses. Check the port configuration and any platform-specific limits before relying on the total switch budget.

Step 6. Add Reserve for Growth and Startup Demand

Do not design the network so the connected devices consume every available watt on day one.

Reserve should reflect the office’s expected growth, higher-draw replacement devices, simultaneous restarts, future moves and additions, and uncertainty in the design assumptions.

There is no percentage that works for every office. The reserve should match the way that particular network is expected to change.

Step 7. Test Normal Operation and Failure Conditions

Run the calculation with all power supplies operating, then run it again for the failure state the network is expected to survive.

What happens if one PSU fails? Can the remaining supply carry every critical endpoint? Which devices lose power first if it cannot?

If the design does not pass, you may need to redistribute devices, change the power configuration, add capacity, or define which loads can be shed. These decisions should feed directly into switch selection and the broader office network design before equipment is ordered.

Office PoE Power Budget Example

Here is a hypothetical office device schedule showing how the calculation works. The wattages are examples only. Replace them with manufacturer data for the devices in your project.

Device group Example calculation Subtotal What to check
WiFi access points 20 × 30W 600W Port class and total switch capacity
Desk phones 60 × 6W 360W Simultaneous restart load
Room controllers 4 × 15W 60W Conference room device requirements
Indoor cameras 12 × 12W 144W Camera model and operating features
PTZ cameras 4 × 25W 100W Higher peak power requirements
Door readers 8 × 5W 40W Any downstream powered components
Connected design load   – 1,304W Before reserve
Example 20% reserve 1,304W × 0.20 260.8W Illustrative reserve only
Design total   1,564.8W Compare with usable capacity

If a target platform advertises 1,440W of PoE capacity but the installed power configuration provides only 1,100W of usable output, this example does not fit even in normal operation. The design has to change before equipment is purchased.

Different Office Systems Affect the Budget Differently

An office rarely powers only access points and phones.

Adding conference room AV can bring schedulers, controllers, touch panels, and other room devices onto the same PoE switches.

The same applies when access control shares the network infrastructure. Readers, controllers, and connected door hardware can change how much power each connection needs.

Security cameras also vary significantly by model and function. PTZ, heating, infrared, and onboard processing can all affect demand, which is why camera-specific PoE requirements should be calculated from the equipment being installed rather than from a generic camera wattage.

PoE vs PoE+ vs PoE++ for Office Devices

The PoE standard determines how much power a connection can provide, but the switch and endpoint still have to support compatible standards and power classes.

  • IEEE 802.3af provides up to 15.4W at the source, with about 12.95W available to the powered device.
  • IEEE 802.3at increases source power to about 30W.
  • IEEE 802.3bt Type 3 supports up to 60W at the source.
  • IEEE 802.3bt Type 4 supports up to 90W at the source.

Terms such as PoE, PoE+, and PoE++ are useful shorthand, but do not rely on the plus signs alone. Confirm the exact IEEE support, class, and model requirements at both ends of the connection.

A higher-power device connected to a lower-capacity port may negotiate to a lower power level or refuse power, depending on the equipment.

Why You Should Not Use 100 Percent of a PoE Switch Budget

A switch with no remaining headroom has little room for future devices, replacement hardware, simultaneous restarts, or changes in how the office uses the network.

Reserve capacity is not a universal percentage. It should reflect the office’s real growth plans and the failure conditions the network needs to handle.

WiFi upgrades can change the calculation quickly. If an office is moving from WiFi 6E toward WiFi 7, higher access point requirements may affect both PoE capacity and the wired access layer supporting them.

How Much PoE Reserve Should an Office Network Have?

Use enough reserve to cover realistic growth and stress conditions rather than choosing a percentage by habit.

Consider:

  • Planned devices for the next 12 to 24 months
  • Simultaneous device restarts
  • Higher-draw replacement models
  • One power supply being unavailable
  • Spare ports likely to be used
  • Changes to WiFi, cameras, AV, or access control

The right number becomes clearer once those conditions are modeled.

Per-Port Limits Can Fail Before the Total PoE Budget

Every powered device has to pass two separate tests.

First, the individual port must support the power the device needs. Second, the combined load must fit within the switch’s usable total PoE budget.

A switch can therefore have hundreds of watts available overall and still deny power to one endpoint if that port, line card, or configuration does not support the required class.

Switch logs and monitoring tools can help identify denied-power events, limited-power warnings, or devices that negotiated below their expected level.

How Redundancy Changes Your Real PoE Capacity

Two power supplies do not automatically mean every PoE device stays online when one supply fails.

Some platforms use both supplies to create a larger combined power pool. Others can be configured so one supply is reserved for redundancy. The usable PoE capacity after a failure can therefore be very different from the normal operating capacity.

A useful enterprise network power assessment should model both conditions:

  • Normal state with all required power supplies available
  • Failure state with one supply, cord, stack member, or other planned component unavailable

If the failure-state capacity is lower than the connected load, decide which devices remain powered or change the design before deployment.

PoE Power Supply Redundancy vs Full Failover Capacity

Redundancy means the switch can continue operating after a power-supply failure.

Full PoE failover means the remaining power configuration can also support the entire connected PoE load without dropping endpoints.

Those are different requirements. If full failover matters, size and test the power supplies, switch architecture, and device distribution around that condition.

Include PoE in UPS, Heat, and Electrical Planning

PoE moves more electrical demand into the network closet. That affects the UPS, circuits, available power, cooling, and recovery plan.

A switch powering a large number of endpoints draws more from the wall than the same switch carrying data only. UPS sizing therefore needs to include the switch’s own load plus its PoE output and conversion losses.

This can become especially important in NYC offices with small telecom rooms, shared electrical infrastructure, multiple IDFs, limited ventilation, and building restrictions around electrical or after-hours work.

UPS Runtime Planning for a PoE Office Network

Start with the services that need to remain available during an outage and how long they need to run.

A short graceful-shutdown window requires a very different battery design from several hours of continued camera, access control, phone, or network operation.

Include PoE load when calculating runtime instead of sizing the UPS from the switch’s base consumption alone.

How Cabling Affects PoE Power and Distance

Power and data travel over the same Ethernet cabling, so cable length and installation conditions still matter.

Higher PoE levels can increase voltage drop and heat, particularly in large bundles. The structured cabling supporting those devices has to suit the required data rate, PoE level, cable length, conductor size, connection quality, and installation environment.

A power calculation cannot compensate for a physical cabling run that falls outside the design requirements.

Will PoE Work Over 100 Meters?

Standard Ethernet channel limits still apply.

Extenders, additional switches, or midspans can change the design, but they introduce new equipment, power requirements, and failure points. Treat them as separate design decisions rather than a default fix for an over-length cable run.

Monitor PoE Capacity After the Office Goes Live

A good PoE design should remain visible after installation.

Switch telemetry can show:

  • Current and peak power use
  • Denied-power events
  • Devices drawing more than expected
  • Capacity pressure
  • Changes after firmware or configuration updates

Set alerts before the switch reaches its usable limit so there is time to investigate instead of waiting for ports to lose power.

Live consumption is useful, but it does not replace the design worksheet. A quiet Tuesday afternoon cannot tell you what happens when every access point, phone, camera, and room device restarts at the same time.

And once cameras, access systems, phones, AV, and business devices are sharing the same switches, power is only part of the design. Separating those systems through appropriate network segmentation can reduce the operational impact when one device group has a problem.

When PoE Network Design Services in NYC Are Worth It

A simple office with a few low-power devices may not need a separate Power over Ethernet consulting engagement. A review becomes more useful when the network has multiple closets, higher-power devices, significant growth, or services that need to remain online during a failure.

Consider a professional capacity review when:

  • A WiFi upgrade is adding or replacing many access points
  • Cameras, AV, phones, and access control share the same switches
  • Several floors or network closets divide the PoE load
  • Dual power supplies or full failover are required
  • UPS runtime is important for critical services
  • Devices have started losing or being denied power after an expansion
  • A switch replacement or larger office network upgrade is already planned

For a new office build, PoE is easier to solve before pathways, closets, cabling, WiFi, AV, and security are locked in. Coordinating those systems during new construction cabling and infrastructure planning gives the network team a much clearer picture of the load each closet will eventually carry.

For an existing office or planned upgrade, request an office network and PoE capacity review before finalizing switch and power requirements.

Frequently Asked Questions (FAQs)

Often, yes. The cable run still needs to be checked for length, terminations, conductor quality, and the power level required by the new devices.

Some switches reserve power based on the device’s negotiated class or maximum requirement, so allocated power can be higher than the live draw shown in monitoring.

It depends on the switch. Some models can maintain PoE during certain software reloads, while others interrupt power during a reboot or firmware update.

Yes, if the change adds or relocates phones, access points, cameras, AV, or other powered devices. PoE capacity should be included in office IT moves and changes.

Usually, especially for larger networks. It gives IT teams better visibility into power use, port status, device priorities, and troubleshooting.


Low-Voltage Cabling Closeout Checklist for Commercial Offices

Cabling closeout is complete when the installed links have been inspected, tested to the specified limits, labeled consistently, reconciled with the as-built records, and handed over with any unresolved exceptions documented. For IT managers, facilities teams, project managers, and owners accepting the work, a folder of test PDFs is not enough if the cable IDs cannot be traced back to the actual installation.

What Should a Structured Cabling Closeout Checklist Include?

A structured cabling closeout checklist should confirm both the physical installation and the records needed to operate it after turnover. The approved project specification controls the exact requirements, but the handover package should normally account for:

  • Latest approved drawings, addenda, and accepted deviations
  • Installation inventory by cable type and location
  • Cable labels with matching port and outlet schedules
  • Copper and fiber test reports with traceable link IDs
  • As-built drawings showing installed conditions
  • Rack, patch-panel, and port records
  • Warranty documentation where required by the project
  • Punch-list status, including approved exceptions
  • Support and escalation contacts

A printed binder can still be useful, but the team taking over the network also needs searchable digital records that can be maintained as the office changes.

Cabling Closeout Evidence Register

Deliverable Acceptance check Evidence to retain Disposition
Copper and fiber test reports Correct scope and test limit, unique link IDs, required coverage, failures addressed Issued reports, available native files, retest history Accept, correct, or approved exception
Labels and port schedules Cable ends, rack, panel port, outlet, drawing, and report agree Naming convention, schedules, field verification Accept or reconcile
As-built records Installed routes, endpoints, rooms, panels, and approved deviations are shown Issued drawing set plus editable source where contracted Accept or revise
Rack and pathway work Installed condition matches the approved scope and open observations are addressed Photos, inspection records, punch-list closure Accept, correct, or qualify
Handover package Files open correctly, the index is complete, and ownership is clear Closeout index, contacts, warranty and support records Transfer custody

Start With the Approved Scope, Drawings, and Submittals

Acceptance should begin with the documents that defined the work. Comparing the finished installation with memory, a generic checklist, or an early drawing set can create problems before the review even starts.

Pull the latest approved:

  • Drawings and addenda
  • Product and substitution approvals
  • Naming convention
  • Specified test limits
  • Requests for information and field directives
  • Change orders and accepted deviations

On a commercial fit-out, many of these records originate during coordination between the GC, IT team, low-voltage contractor, electrical trades, landlord, and other project stakeholders. Keeping those responsibilities clear throughout the low-voltage planning and construction process makes final reconciliation much easier when pathways, telecommunications rooms, equipment locations, and installed routes are reviewed at turnover.

How to Review Copper Cable Certification Reports

A cable certification report should tell you which physical link was tested, what test limit was used, and whether that link passed or failed. The report only becomes useful closeout evidence when those results can be tied back to the installed cable.

Start by checking:

  • Unique link or cable ID
  • Specified category and test limit
  • Permanent-link or channel test context
  • Pass or fail status
  • Required test coverage
  • Failed, repaired, and retested links
  • Tester configuration or other supporting evidence when the project requires it

The test limit should also match the cabling that was specified for the project. That becomes easier to verify when the original scope clearly defines the applicable low-voltage cabling standards for the office network.

At closeout, the goal is not to re-engineer the original specification. It is to confirm that the required test was applied to the correct installed link and that unresolved results are clearly identified.

Verification, Qualification, and Certification Are Not the Same

Verification confirms basic connectivity and termination. Qualification checks whether a link can support a particular network application. Certification compares the installed link with a defined cabling performance limit and produces a result against that limit.

For closeout, confirm what level of testing the approved project documents require rather than treating these terms as interchangeable.

How Should Failed or Marginal Results Be Handled?

A failed or questionable result should not disappear from the record. The closeout package should show whether the link was corrected and retested or formally retained as an approved exception.

The accepting team does not need to diagnose every technical failure from scratch. What matters is a traceable sequence from the original result through corrective work, retesting, and final disposition.

Problems can also originate earlier in the specification. If the installed medium or expected performance does not line up with the original design, revisiting how Cat6, Cat6A, and fiber fit different network requirements can help separate a testing problem from a design or scope problem.

How Should Fiber Test Results Be Handed Over?

Fiber closeout records should identify the tested link or strand, the method and limits required by the project, and the relationship between the test result and the installed backbone.

Depending on the approved scope, the package may include:

  • Link and strand identifiers
  • Required loss results and limits
  • Specified wavelengths and reference method
  • Endpoint and polarity information
  • OTDR records where required
  • Connector inspection or cleaning records where included
  • Backbone routes, panels, cassettes, and spare-strand records

There is no single fiber test procedure that applies to every commercial project. Review the results against the approved specification and accepted project criteria.

How to Match Test Reports to Cable Labels, Patch Panels, and Outlets

Every cable identifier should resolve to the same physical link across the telecommunications room, rack, patch panel, outlet, drawing, port schedule, and test report.

Start with the approved naming convention, then trace a representative sample of installed links from one end to the other. The same stable identifier should appear wherever that cable is documented.

Avoid naming systems built around information that changes frequently, such as an employee or connected device. A cable ID should remain useful after desks move, equipment is replaced, or switch ports are reassigned.

Documentation should also match the actual cable installed above ceilings and through building pathways. In spaces where cable rating is part of the approved scope, records for plenum-rated cabling in commercial ceilings should remain traceable alongside the rest of the closeout package.

What Belongs on Low-Voltage As-Built Drawings?

As-built drawings should show what was installed, including approved field changes. They should not simply repeat the original design when the work changed during construction.

Depending on the project scope, useful as-built records may show:

  • Installed outlet and device locations
  • Cable IDs and home-run relationships
  • Telecommunications rooms and rack numbers
  • Patch-panel locations
  • Pathways, backbone routes, and risers
  • Relevant sleeves, penetrations, and access notes
  • Approved deviations from the design
  • Revision date and basis of record

The next IT or facilities team should be able to use the drawing to understand the installed infrastructure without reconstructing the project from emails, old markups, and contractor notes.

Build the Low-Voltage Punch List Around Evidence

A low-voltage punch list should state what is wrong, where it is, who is responsible for correcting it, and what evidence will close the item.

Typical cabling closeout items include:

  • Failed or missing test results
  • Damaged cables, jacks, or connectors
  • Missing or inconsistent labels
  • Unsupported or poorly routed cable
  • Inaccessible pathways or equipment
  • Undocumented field changes
  • Rack or patch-panel issues within the reviewer’s scope

Each item should have a clear status such as open, corrected, or accepted as an approved exception. Photos, test reports, revised drawings, or reinspection records can then show why the item was closed.

When Is Structured Cabling Ready for Final Signoff?

Structured cabling is ready for final signoff when the required work is complete, testing and labeling reconcile with the installation, as-builts represent field conditions, unresolved exceptions have been approved, and the accepting team has usable closeout records.

Before signoff, confirm that:

  1. The required installation scope is complete.
  2. Required test results are accounted for.
  3. Cable IDs reconcile across physical and digital records.
  4. Failed links have been corrected, retested, or formally excepted.
  5. As-built drawings reflect approved field conditions.
  6. Punch-list items are closed or formally accepted.
  7. The owner has custody of the final documentation.

Substantial completion and final closeout are not always the same contractual stage. Confirm what is being accepted and who has authority to approve remaining exceptions before treating the project as fully closed.

How Should Cabling Records Be Stored After Handover?

Closeout documents need a permanent home, a named owner, and a process for updating them. Otherwise, even a good handover package starts becoming inaccurate as soon as the first office change is made.

Organize records in a way that reflects how the infrastructure is managed, such as by floor, telecommunications room, rack, or site. Keep issued records together with editable source files when those were part of the contract.

Moves, adds, and changes should update the same source of truth rather than creating another disconnected spreadsheet.

The cabling record also needs to connect with the active network documentation. When switch configuration, VLANs, port assignments, firewalls, and device relationships are maintained as part of the wider corporate network design and installation, shared cable and port identifiers make troubleshooting and future changes considerably easier.

NYC Office Closeout Details That Deserve Verification

NYC commercial projects can involve building-specific closeout records that go beyond the cable test report. The exact requirements depend on the property, approved scope, and parties involved.

Review whether the project record needs to account for:

  • Landlord or managing-agent signoffs
  • Shared riser and telecommunications-room work
  • Base-building versus tenant records
  • Firestopping and penetrations within the approved trade scope
  • Abandoned-cable disposition
  • After-hours work or access-related changes
  • Occupied-floor or ceiling-access deviations

A multi-floor Manhattan project may leave portions of the infrastructure documented by different parties. When risers, telecommunications rooms, pathways, or building access involve both tenant and base-building teams, the coordination required during structured cabling work in Manhattan commercial buildings should carry through into the records handed over at completion.

Closeout also becomes easier when it has been planned before move-in rather than assembled after the ceilings are closed and the project team has dispersed. For a new office technology build-out, cabling records should be coordinated with the wider network, WiFi, AV, security, and infrastructure handover rather than treated as a separate last-minute package.

Frequently Asked Questions (FAQs)

Yes. Existing copper or fiber can be tested later, especially when an office has missing or unreliable certification records. A structured cabling assessment can identify what passes and what needs remediation.

A working connection only proves data can pass through the link. If certification was required, you still need the proper test results showing the cable meets the specified standard.

Keep both when available. PDFs are easy to review, while native tester files preserve more detailed data for future troubleshooting and verification.

Often, yes. Its condition, category, labeling, routing, and expected performance should be checked first. Existing Cat6, Cat6A, or fiber cabling may still be suitable for the new network.

Trace and identify the existing links before making major rack or patch-panel changes. Build a current record based on the physical installation, not old spreadsheets.

There is no universal percentage. The project scope should define acceptance requirements, and any mismatches found during sampling should trigger a broader review.

Not always. Smaller offices may be fine with well-maintained spreadsheets, while larger environments may benefit from infrastructure-management software. The key is keeping one accurate, current record.

It depends on the room and project conditions. NYC electrical requirements can restrict communications cabling in certain electrical spaces, so this should be verified during closeout.

Request a Cabling Certification or Closeout Review

Missing test results, inconsistent labels, unresolved failures, or inaccurate as-builts can leave an otherwise completed project difficult to operate and support. A structured cabling assessment, testing, or remediation can identify what is a documentation problem, what requires field verification, and what needs corrective work before the installation is accepted.

Request a cabling certification or closeout review when you need an independent assessment before final signoff or when taking over an existing office with incomplete cabling records.

Low-Voltage Scope of Work for a New Office Build-Out

A low-voltage scope of work defines the systems, responsibilities, drawings, interfaces, testing, and handover requirements for an office build-out. It should be agreed before bidding or construction so the tenant, GC, electrician, low-voltage contractor, IT team, AV team, security team, carrier, and building management know exactly where their responsibilities begin and end.

What Should a Low-Voltage Scope of Work Include?

A useful low-voltage scope of work goes beyond cable counts and device lists. It explains what needs to be built, who owns each part of the work, how the systems connect, and what must be delivered before the project is complete.

For a new office, the scope may cover:

  • Structured cabling and telecom rooms
  • Network and WiFi infrastructure
  • Conference room AV
  • Access control and video surveillance
  • Carrier and internet connections
  • Pathways, conduit, sleeves, boxes, and power
  • Drawings, submittals, testing, labeling, and closeout

It should also document existing conditions, owner-furnished equipment, building restrictions, working hours, exclusions, and other assumptions that affect pricing or construction.

When cabling, network, AV, wireless, and security are being planned together, the scope should connect those decisions to the wider IT infrastructure and low-voltage build-out rather than treating each system as a separate project.

Who Is Responsible for Low-Voltage Wiring in Commercial Construction?

There is no universal division of responsibility. The low-voltage contractor’s scope of work depends on the contract, drawings, building requirements, and how the project team is structured.

On one project, the electrical contractor may provide conduit and sleeves while the low-voltage contractor installs and terminates cable. On another, more of the pathway work may sit with the low-voltage integrator. Either can work if the responsibilities are clear before construction begins.

The project may involve:

  • Tenant IT and facilities teams
  • Architect and MEP consultants
  • General contractor
  • Electrical contractor
  • Low-voltage contractor
  • AV and security integrators
  • Network provider or MSP
  • Building management and required house vendors

For general contractors, those boundaries matter throughout rough-in, ceiling coordination, testing, and turnover. Clear low-voltage coordination during commercial fit-outs helps keep work from being assumed by one trade and excluded by another.

For a commercial low-voltage contractor in NYC, this becomes even more important when several vendors share telecom rooms, ceilings, risers, doors, and pathways.

How Division 27 and Division 28 Split the Work

Division 27 generally covers communications systems, while Division 28 addresses electronic safety and security systems.

A Division 27 scope of work may include structured cabling, data infrastructure, wireless pathways, AV cabling, paging, and related communications work. Division 28 may include access control, video surveillance, intrusion detection, and other electronic security systems.

Those divisions help organize the specifications, but they do not automatically settle every responsibility.

For example, an office access control system can depend on door hardware, electrical power, network connectivity, credentials, programming, and building requirements. Those pieces may belong to several different parties even though the security system itself sits within Division 28.

The same applies to equipment-room power, switch ports, PoE capacity, VLANs, cloud accounts, licenses, and shared pathways. Each one still needs an assigned owner.

What Needs to Be Decided Before the Low-Voltage Bid?

Contractors can only price the same project when they are working from the same assumptions.

Before releasing a low-voltage bid scope, the team should define:

  • Systems and expected performance
  • Drawings and device locations
  • Pathways and power requirements
  • Owner-furnished equipment
  • Testing and acceptance requirements
  • Alternates and exclusions
  • Building access and working-hour restrictions
  • Required closeout documents

The bid documents should also explain how substitutions, RFIs, coordination drawings, unknown existing conditions, and design changes will be handled.

This is where office build-out low-voltage planning directly affects budget accuracy. Missing responsibilities tend to reappear later as exclusions, field decisions, or change orders.

What Should Low-Voltage Drawings Show?

Low-voltage drawings should give contractors enough information to understand where systems go, how they connect, and where they interact with the rest of the build.

Depending on the project stage, drawings may identify device locations, telecom rooms, backbone routes, pathways, rack locations, mounting details, and system interfaces.

Submittals add project-specific details such as product data, shop drawings, rack elevations, AV signal flows, labeling standards, and security device schedules.

Wireless design needs another layer of information because walls, glass, furniture, neighboring networks, and device density can affect the final layout. A corporate WiFi site survey can provide the RF data needed to validate access-point placement and coverage assumptions.

Revision control matters too. Moving a conference room, wall, door, display, or access point can affect several technology scopes at once.

Where Low-Voltage Scope Gaps Usually Happen

Some of the most expensive problems happen between systems rather than inside them.

A camera may appear on the security plan but have no pathway through a rated wall. An access point may be installed without enough PoE capacity. A conference room may be wired before anyone confirms its display, control, network, and power requirements.

Common interfaces to assign include:

  • Conduit, sleeves, pull strings, tray, boxes, cores, and firestopping
  • Equipment-room power, grounding, UPS requirements, and cooling
  • Switch ports, PoE capacity, VLANs, firewall rules, internet handoff, and network security
  • Door hardware and access-control connections
  • Ceiling, millwork, glass, and mounting conditions for cameras, speakers, displays, and readers

Switching, VLANs, firewall rules, PoE, and wireless configuration should line up with the office network design instead of being decided after the cabling has already been installed.

Conference rooms create similar dependencies. Cabling routes, display locations, control equipment, network connections, acoustics, and power all need to match the planned conference room AV system before walls and ceilings limit the available options.

How the Delivery Model Changes the Scope

How the integrator joins the project affects who owns design, coordination, installation, and testing.

Design-Bid-Build

The design team prepares the drawings and specifications. Contractors price the completed design and install what has been documented.

This works well when there is enough time to complete the design before construction pricing begins.

Design-Assist

The low-voltage integrator becomes involved during design and helps refine pathways, system requirements, constructability, and coordination with other trades.

This can be useful for projects with more complex AV, wireless, security, or network requirements.

Design-Build

One provider handles both design and installation under the same contract.

This can suit faster office projects or companies that do not have a separate technology consultant managing the design.

Whatever model is used, the low-voltage construction scope should identify who owns drawings, design decisions, submittals, RFIs, equipment, installation, programming, testing, and final acceptance.

When Should the Low-Voltage Contractor Join the Project?

Low-voltage planning is most useful while technology requirements can still influence ceilings, walls, doors, power, furniture, telecom rooms, and pathways.

Useful coordination points include:

  • Lease review and test-fit
  • Design development
  • Preconstruction
  • Rough-in and installation
  • Testing and turnover

Waiting until construction is well underway can turn simple design decisions into rework. A telecom room may already be undersized, power may be in the wrong place, pathways may be missing, or conference room layouts may no longer support the intended equipment.

Early coordination gives the project team more room to solve those problems on drawings instead of in the field.

How to Reduce Low-Voltage Change Orders

Change-order risk drops when responsibilities, quantities, assumptions, exclusions, interfaces, and decision deadlines are documented before work reaches the field.

Useful tools include:

  • A responsibility matrix for each technology workstream
  • An open-issue and decision log
  • Coordinated drawings
  • RFIs for conflicting information
  • Existing-condition surveys before bidding
  • Alternates for work that cannot be fully defined yet
  • Written testing and acceptance requirements

The goal is not to predict every field condition. It is to identify who owns the decision when something changes and what information that person needs.

What NYC Office Conditions Belong in the Scope?

New York City office projects often come with building-specific requirements that affect scheduling, access, and installation.

The low-voltage scope may need to address:

  • Landlord and managing-agent approvals
  • Certificates of insurance
  • Freight elevator and loading access
  • After-hours work
  • Riser and telecom-room access
  • House-vendor requirements
  • Fire-rated walls and penetrations
  • Plenum spaces
  • Carrier demarcation points
  • Equipment-room power and heat

Requirements vary by building and project. Electrical, fire alarm, permitting, and code-related work should be coordinated with the appropriate design professionals and licensed trades rather than automatically assigned to the low-voltage contractor.

These are the NYC details that matter. Repeating borough names does not improve the scope, but identifying the building conditions that change the work does.

Use a Responsibility Matrix to Assign Every Interface

A responsibility matrix turns a long specification into a practical coordination tool. Instead of assuming who handles each item, the team assigns an owner and identifies what evidence is required at completion.

Workstream What Needs an Owner Possible Owners Completion Evidence
Pathways and power Conduit, tray, sleeves, boxes, cores, firestopping, outlets, UPS GC, electrician, building, low-voltage contractor Coordinated drawings and approvals
Structured cabling Cable, termination, racks, labeling, testing, as-builts Low-voltage contractor, IT, consultant Test reports and updated records
Network and WiFi Switching, PoE, VLANs, firewall, access points, licensing IT, MSP, network integrator Configuration and validation records
AV and security Displays, controls, cameras, readers, programming, credentials AV integrator, security integrator, IT Approved programming and acceptance testing
Carrier and handover Service, demarcation, riser, turn-up, records, support Carrier, building, IT, integrator Test results and handover records

Reviewing the matrix alongside the drawings makes it easier to spot work that has been omitted, duplicated, or assigned to two different trades.

What Should Be Included in Testing and Closeout?

Testing and closeout show whether the installed systems match the agreed scope and give the tenant the records needed to operate them after construction.

For commercial structured cabling, closeout may include cable and fiber test results, labeling records, patch schedules, and updated drawings.

Network turnover may include configuration records, VLAN information, firewall documentation, WiFi validation, and administrative access. AV and security systems may require programming records, room or door schedules, acceptance testing, credential information, and integration documentation.

The final handover may also include as-built drawings, approved changes, equipment records, training documentation, warranties, and support contacts.

Common Low-Voltage Coordination Questions

Sometimes. The electrician may provide conduit, sleeves, boxes, or other pathways while the low-voltage contractor handles cabling and termination. On other projects, those responsibilities are divided differently. The drawings, specifications, and responsibility matrix should state who owns each item.

Larger projects may use a technology consultant or engineer, while other office build-outs use an integrator in a design-build or design-assist role. What matters is identifying who has design authority and who approves the final system.

Owner-furnished equipment still needs assigned responsibilities for delivery, storage, installation, configuration, testing, warranty handling, and replacement of defective equipment.

Existing cable, racks, pathways, network hardware, security devices, or AV equipment should be surveyed before the scope is finalized. The project should identify what stays, what gets replaced, what requires testing, and who is responsible if existing equipment cannot support the new design.

Review the Scope Before the Bid Goes Out

The scope, drawings, responsibilities, and budget should be reviewed together before contractors price the work. A technically complete design can still create problems if the budget does not account for building access, equipment, labor, testing, carrier work, or other project conditions.


Teams still setting their technology allowance can use the same scope decisions when budgeting IT infrastructure for a new NYC office, so the number being approved reflects the systems the project is actually expected to deliver.


Once the scope and drawings line up, request a low-voltage scope and drawing review before bidding or construction locks in unresolved gaps.