News

Get the Latest News and Press Releases

Which Intercom System Works for a Classic New York Brownstone?

Classic brownstones define the character of neighborhoods across Brooklyn and Harlem, with their iconic stoops and architectural details dating back over a century. But the charm of these historic homes often comes with outdated entry systems that leave residents juggling keys, buzzing guests in blind, or dealing with broken equipment. Choosing the right intercom system for NYC brownstone properties means balancing modern functionality with respect for the building’s heritage.

Many brownstone owners face a unique challenge: their homes now serve as multi-unit dwellings, with garden-level and parlor-level entrances that both need coverage. The right system handles multiple tenants while fitting into the visual landscape of a protected historic facade.

From Buzzers to Video: The Evolution of the Brownstone Intercom

The original brownstone entry system was simple: a pull-bell at the door and somebody walking down four flights of stairs. Then came the mechanical buzzer, followed by basic audio intercoms in the mid-20th century. Today, video intercom systems have transformed what’s possible at your front door, allowing you to see visitors on your phone from anywhere instead of guessing based on a crackling voice.

Option 1: Simple Audio Intercoms

A basic audio intercom gets the job done without complications. You talk, they talk, you press a button to unlock the door. These systems work well for brownstones where visual verification isn’t critical and you just need reliable communication between the entrance and apartments upstairs. Audio-only setups cost less to install and often integrate with existing wiring in older buildings, which matters when you have tenants of varying tech comfort levels.

Video Intercom Options for Historic NYC Homes

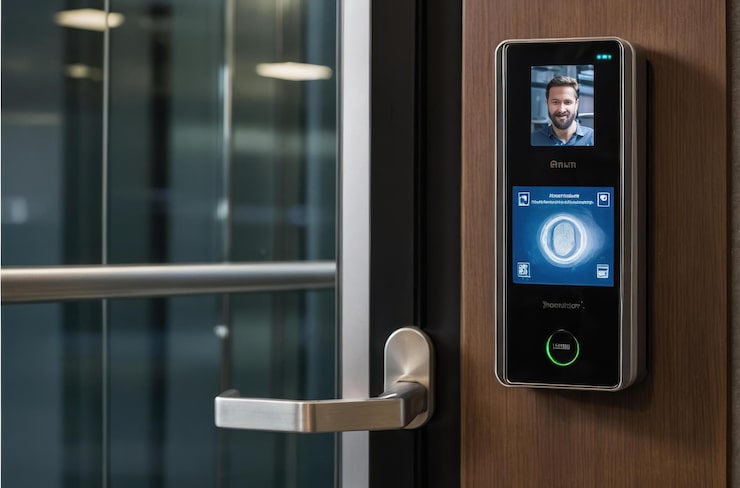
Being able to see who’s at your door changes the security equation completely. A historic home video intercom adds that layer of visual confirmation without requiring you to walk down from the third floor every time the buzzer rings. Modern video units come in low-profile designs that blend with brownstone aesthetics, offering clear images even in low light when someone’s standing under your stoop. For brownstone owners looking to add smart technology to their historic properties, video intercoms represent one of the most practical upgrades.

Smart Integration Features

Many current video intercom models connect with home security systems to create a comprehensive approach to property protection. Some units save video clips automatically when someone rings, giving you a record of all door activity.

Option 3: Smart & IP-Based Intercoms

IP-based systems represent the biggest shift in entry technology for multi-family brownstones. These connect to your internet network, routing calls to smartphones instead of in-unit hardware. You can answer your door from work, vacation, or the subway, then remotely unlock it for trusted visitors. When searching for the best intercom for multi-family brownstone buildings, these systems often rise to the top because when someone moves out, you just remove their access through the app rather than rewiring or reprogramming physical units.

Preserving Your Facade: Aesthetic Considerations for Historic Homes

Mounting modern equipment on a landmarked or historic building requires careful planning. Low-profile mounting plates, custom bronze or brushed nickel finishes, and recessed installation techniques help new technology disappear into old architecture. Replacing old intercom systems NYC buildings have relied on for decades often means the existing rough opening doesn’t match current equipment dimensions. Professional installation makes the difference between an upgrade that enhances your building’s appearance and one that looks out of place.

Best Intercom Systems for Multi-Family Brownstones

Converting a single-family brownstone into apartments creates specific intercom needs that off-the-shelf residential systems can’t always handle. Buildings with three to six units often benefit from systems designed for small multi-tenant properties, offering programmable tenant buttons, different ring patterns for each apartment, and temporary access codes for guests or service providers. Finding an intercom system for NYC brownstone conversions means considering both your garden-level and main entrance if your property has multiple entry points.

Popular Intercom Brands for Historic NYC Buildings

  • Aiphone offers modular systems that adapt to unusual building layouts, with options for both audio and video.
  • 2N makes IP intercoms with customizable faceplates in finishes that complement historic buildings and work with existing access control installations.
  • Akuvox handles apartment building solutions with tenant management features and property management software integration.
  • ButterflyMX has become popular in Brooklyn brownstones for its smartphone-first approach.
  • Siedle provides high-end options with exceptional build quality for properties where aesthetics matter as much as function.

Replacing Your Old Intercom System in NYC Brownstones

Brownstones built before 1950 often have wiring that was adequate for basic buzzer systems but struggles with modern equipment demands. A proper assessment checks wire gauge, condition, and routing before recommending solutions. The building’s layout also affects system selection; a four-story walk-up with tenants on every floor needs different coverage than a two-family brownstone with a basement rental. Many property owners discover that replacing an old intercom system in NYC involves more than swapping out the front panel, particularly when bringing historic buildings up to current building codes.

Making the Right Choice for Your Property

Start by identifying your priorities: budget, security level, ease of use, and aesthetic concerns all factor into the decision. The right system often combines elements from different categories. You might choose video at the main entrance with simple audio at a rear gate, or install a smart system for yourself while giving tenants basic audio units. Working with experienced installers familiar with NYC building requirements helps navigate these choices and avoid costly mistakes.

Aging in Place in NYC with Smart Home Technology for Seniors

For seniors who’ve spent decades in New York City, this place means home. The bodega owner who knows your order, the park bench where you’ve watched seasons change, neighbors you’ve known for thirty years. Moving away from all that feels impossible, and it doesn’t have to happen. Aging in place technology solutions are giving older New Yorkers practical ways to stay in their apartments and brownstones while addressing real safety concerns.

Why More NYC Seniors Choose to Age in Place

Your apartment holds memories that no facility can replace. Grandmother’s recipes tested in that same kitchen, family gatherings around the dining table, the view you’ve woken up to for decades. Smart home technology for seniors is helping New Yorkers maintain independence without sacrificing safety.

Three out of four people over 50 want to stay in their current homes as they age. With accessible home security services now available, that goal is realistic. Adult children living in other boroughs or states can check in without constant phone calls or visits that feel intrusive.

Aging in Place Technology Solutions for Everyday Challenges

Fall Prevention and Getting Around Safely

Walking through a dark hallway at 2 AM to use the bathroom shouldn’t feel dangerous. Motion-activated lighting changes that. Sensors detect movement and gently brighten pathways before you reach for a switch. A voice activated assistant for seniors lets you say “turn on the bedroom lights” without fumbling in the dark.

Brownstone living presents unique challenges with multiple floors and narrow staircases. When you add smart home automation throughout each level, lights respond to your presence automatically. Professional lighting and shading systems can be programmed to adjust throughout the day, mimicking natural light patterns that help maintain healthy sleep cycles.

Remembering Medications and Appointments

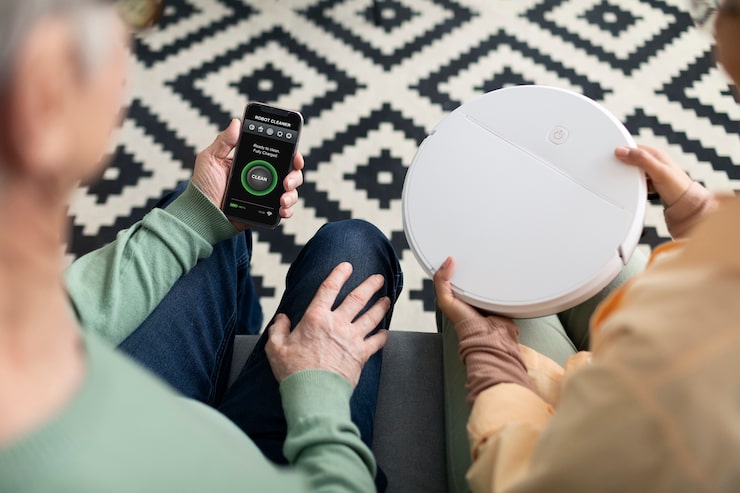
Smart displays sit on kitchen counters or nightstands and announce medication times with gentle audio and visual alerts. They also handle video calls with doctors for telehealth appointments. The same screen that reminds you about morning pills can connect you with your cardiologist or show you how to prepare a recipe.

Voice assistants answer questions about the weather, play your favorite radio station, and set reminders without complicated phone menus. For seniors who struggle with small buttons or touchscreens, voice activated systems remove physical barriers to staying organized.

Protecting Against Security Threats and Scams

Scammers target seniors, assuming older people are more trusting or less tech-savvy. Installing video intercom systems at building entrances lets you see exactly who’s buzzing before letting anyone in. You can speak to visitors through your phone even when you’re visiting family in Queens or Jersey.

Smart locks eliminate hiding spare keys under doormats or dealing with unreliable superintendent services. Adult children can unlock the door remotely if their parent falls and can’t reach it, or when a home health aide arrives. These systems work with access control installations that track who enters and when, creating a digital record for both security and accountability.

Maintaining Family Connections

Video calling devices designed for seniors skip the complicated setup that smartphones require. Press one large button and your granddaughter appears on screen. These bridge the gap between Sunday dinners and give grandparents front-row seats to school plays, piano recitals, and everyday moments they might otherwise miss.

The cameras work both ways. When adult children worry about a parent who lives alone, two-way video chat offers reassurance without feeling like surveillance. You can show them the new plant you bought or ask their opinion about rearranging furniture.

How to Help Elderly Parents Live at Home Safely with Remote Monitoring

Remote monitoring gives families information without constant check-ins that feel patronizing. Motion sensors on refrigerator doors confirm that someone is eating regularly. Installing security camera systems around entry points sends alerts when doors open or close, so you know your mother made it home from her afternoon walk.

Learning how to help elderly parents live at home safely starts with understanding which tools provide genuine support versus unnecessary complications. Nobody wants to feel spied on in their own home. Transparency about which devices are active and what they monitor maintains trust while providing the safety net both generations need. Door and window sensors work well when integrated with professional alarm system installation, alerting family members to unusual activity patterns without invasive cameras in every room.

Designing Systems That Help Without Adding Complexity

The best smart home setup is one that gets used. Complicated apps with dozens of menus sit untouched because nobody has time to figure them out. Professional installation matters. Smart home technology for seniors needs to work intuitively from day one, responding reliably to simple voice commands or single-button presses.

Seniors throughout Brooklyn neighborhoods have different needs than those in Manhattan high-rises. A walk-up apartment requires different solutions than a building with 24-hour doormen. The goal is independence, not adding more things to worry about. Technology should fade into the background of daily life, working quietly without demanding constant attention. When your lights turn on as you enter a room and your front door locks itself at bedtime, you’re not thinking about smart features. You’re just living in a home that adapts to your needs, letting you stay in the place you love.

Control4 vs Crestron vs Savant for Manhattan Homes

Planning a luxury renovation or new construction in Manhattan means making decisions that become permanent parts of your home. The smart home system falls into that category. Consumer products like Nest thermostats or Amazon Echo handle basic tasks, but they won’t create the seamless automation experience that high-end properties demand. The best high-end home automation system requires looking past consumer devices to professional platforms designed for luxury living.

Three companies lead the professional automation market. Control4, Crestron, and Savant each handle lighting, climate control, multi-room audio, video, and security cameras throughout your space. The real question when comparing Control4 vs Crestron vs Savant isn’t which one works better, but which one matches your priorities and lifestyle.

Why High-End Home Automation Systems Work Differently

Consumer smart devices and professional systems differ in how deeply they integrate. Individual smart products create a fragmented experience with multiple apps and inconsistent control. Integrated home automation systems unite everything under one interface.

Luxury properties in Manhattan come with specific challenges. You might have building-wide security systems to coordinate with, complex lighting scenes for skyline views, or climate control needs for valuable art collections. These situations need automation that handles sophisticated programming while staying simple for everyday use.

Understanding the Big Three Platforms

Control4 built its name on interfaces anyone can use and reliable performance at accessible prices. The company developed its own lighting control and maintains strong dealer networks nationwide.

Crestron sits at the premium end with nearly unlimited customization options. The platform handles commercial installations and ultra-luxury residential projects where off-the-shelf solutions won’t cut it.

Savant attracts homeowners who care about design, especially those already invested in Apple products. The system balances elegant interfaces with serious control capabilities. If you’re looking at Savant home automation installation in NYC, it works particularly well in Manhattan condos where appearance matters as much as performance. The platform also excels at audio-visual control.

How Control4 vs Crestron vs Savant Compare for NYC Living

FeatureControl4CrestronSavant
User InterfaceSimple, consistent, easy for anyone to useHighly customizable, can be complexApple-centric, elegant, intuitive
CustomizationLess flexible, more templatedLimitless. If you can dream it, Crestron can do itGood balance, but favors its own ecosystem
CostMost affordable of the threeHighest price point, premium investmentMid-to-high, depends on configuration
Best ForFamilies, ease of use, projects with a defined budgetUltimate luxury, unique requirements, commercial-grade reliabilityApple users, design-focused projects, excellent AV control

Interface Design

Control4 uses large, clear icons that anyone picks up quickly. The 2020 update cleaned up the visual design while keeping the straightforward navigation people appreciate.

Savant built its interface around photography and elegant layouts that appeal to visually-driven users. It takes slightly longer to learn than Control4, but the polish matches what you’d expect in a luxury interior.

Crestron takes a different approach. Your programmer creates the interface from scratch. A talented team delivers something beautiful and functional. An inexperienced one gives you complexity without usability. Review interface examples before you commit. Working with an experienced Crestron dealer in NYC who can show you their custom interface work makes all the difference.

Lighting Control

Each platform handles whole-home lighting differently. Control4’s keypads include ambient light sensors that adjust backlighting based on room brightness. The keypads also change color to show alarm status or alert you to open garage doors.

Savant typically pairs with Lutron lighting systems, giving you access to their extensive switch and faceplate color options. Crestron developed its own lighting that mirrors what Lutron offers, though with fewer finish choices.

Pre-war buildings add another layer of complexity when you’re planning structured cabling installations. Your installer’s familiarity with Manhattan properties becomes important here.

Music and Entertainment

Multi-room audio gets used constantly in smart homes. Control4 includes streaming services like Spotify, Tidal, Qobuz, Pandora, and iHeartRadio built right into the system. Professional audio video installation affects how well these streaming services integrate across zones. Savant took a similar approach with its own integrated streaming platforms.

Crestron added native streaming more recently after relying on third-party solutions like Autonomics for years. How well it works depends on your programmer’s skill. For conference room AV setups, Crestron often leads in commercial spaces.

Security Integration

Each platform connects with professional alarm systems, cameras, and electronic locks. Control4 currently supports the widest range of smart lock brands with complete native integration.

Video intercom systems work differently across the three platforms. Control4’s video intercom appears automatically on wall panels and touchscreens. Savant and Crestron need additional programming to achieve similar results.

Which System Fits Your Manhattan Property

Control4 makes sense when you want an intuitive operation that family members and guests can use without explanation. The platform works well for families with children and projects with defined budgets. A certified Control4 dealer can build sophisticated automation without Crestron’s premium pricing.

Crestron fits properties with unique requirements that template systems can’t handle. Think penthouses with commercial-grade security systems, properties that need building management integration, or homes where commercial reliability justifies the investment.

Savant appeals to homeowners deep into the Apple ecosystem who want automation that reflects contemporary design. The platform shines in smart home audio-visual projects where AV control plays a central role. When you’re weighing Savant vs Control4 for a Manhattan condo, Savant typically wins with owners who prioritize sleek design and Apple integration. Control4 appeals more to families valuing ease of use and broader accessibility.

Choosing Your NYC Installer Matters Most

The system matters less than the team installing it. A skilled programmer can make Control4 handle complex scenarios. A weak implementation undermines even Crestron’s capabilities. Finding the right balance between the best high-end home automation systems comes down to matching technology, user experience, and installer expertise to your Manhattan property.

Look at completed projects in buildings similar to yours. Ask about security licensing, ongoing support, and experience with pre-war building installations. The best installers understand co-op board requirements and building code compliance. Your automation platform becomes permanent infrastructure in your home. Pick an integrator you trust for long-term support, not just installation. The relationship extends years past the initial project.

Renovating Your Co-op? A Guide to the NYC Co-op Alteration Agreement for Tech Upgrades

Planning to install a home theater system, smart home controls, or new security cameras in your co-op? The excitement about upgrading your space often hits a wall when you hear about the alteration agreement.

This document protects the building and every resident who calls it home. Your neighbors share walls, floors, and ceilings with you. Getting your renovation approved by the co-op board starts with understanding this process and what documentation you need.

What is an Alteration Agreement and Why Does Your Co-op Require It?

An alteration agreement serves as a contract between you and your building’s board. It spells out what work you can do, when you can do it, and what protections you must have in place. Most NYC co-ops use a version based on the NYC Bar Association’s standard form.

The board reviews every detail because they’re responsible for maintaining structural integrity and keeping all residents comfortable. Poor installation work could damage shared infrastructure. The agreement creates boundaries that protect everyone while letting you move forward with your tech upgrade.

Before You Begin with Your Pre-Submission Checklist

Getting organized before you submit anything speeds up the approval process. Start by reviewing your building’s house rules and the standard alteration agreement form. Many boards provide these through the managing agent or on resident portals.

Your preparation checklist includes

  • Review building house rules and alteration agreement requirements
  • Hire a licensed contractor with required insurance coverage
  • Prepare detailed plans showing equipment locations and wiring paths
  • Create specifications for equipment going into walls or ceilings
  • Build a timeline respecting permitted work hours

Buildings typically restrict renovation work to weekdays between 9 AM and 5 PM. Some prohibit work during summer or holiday periods. If you’re planning security camera installations or looking to get co-op board approval for smart home technology, knowing these limitations helps you build realistic timelines.

Understanding Key Sections of the NYC Co-op Alteration Agreement for Tech Projects

Scope of Work

This section needs a clear description of every change you’re making. Don’t just write “install speakers.” Spell out how many speakers, where they’ll go, what wiring routes you’ll use, and how you’ll patch openings. Detailed documentation means fewer questions later.

Insurance Requirements

Your contractor must carry general liability insurance. Buildings in NYC typically ask for coverage between $1 million and $2 million, with some luxury buildings demanding up to $5 million. The contractor also names the building as an additional insured party. When you work with a licensed AV installer for NYC co-op buildings, they come prepared with this documentation.

Permits and Approvals

Any electrical work requires a Department of Buildings permit. Running new circuits for home or adding dedicated lines for AV equipment both fall into this category. Your contractor pulls these permits, but the alteration agreement often asks you to submit copies to the managing agent before work begins.

Low-voltage work like structured data cabling or intercom systems might not need DOB permits, but you still need board approval through the alteration agreement.

Indemnification Clause

This section protects the building from liability if something goes wrong during your project. You agree to cover any damages your renovation causes to common areas or neighboring apartments. The language sounds intimidating, but your contractor’s insurance handles most scenarios this clause covers.

Common Pitfalls When Getting Your Renovation Approved by the Co-op Board

Starting before approval arrives is the biggest misstep. Boards can stop your project mid-installation and fine you for unauthorized work. Wait for the signed agreement before beginning work, even for something as simple as installing a smart alarm system.

Working outside approved hours creates problems fast. Violating time restrictions puts your entire project at risk. Boards take these rules seriously.

Using unlicensed contractors causes immediate issues. Boards verify credentials, and unlicensed workers create liability problems for the building.

Working with a Licensed AV Installer for Your NYC Co-op Project

Experienced installation companies handle alteration agreements regularly. They know what documentation boards expect and how to present technical information clearly.

The right installer prepares detailed floor plans, equipment specifications, and installation methods that answer board concerns upfront. They talk directly with managing agents and building engineers, handling technical questions you might not know how to address.

Companies that have worked in hundreds of NYC buildings understand what different boards care about. Some scrutinize every wire path for audio video installation projects. Others focus on noise control and work schedules.

When you’re planning surveillance upgrades, professional installers adapt their proposals to match each building’s priorities for quick approval and smooth installation.

Beat the Heat: How Motorized Shades Can Cut Your ConEd Bill This Summer

Running your air conditioner full blast during a New York summer gets expensive fast. ConEdison bills climb higher every year, and if you live in a glass-walled high-rise in Hudson Yards or Long Island City, your apartment probably feels like a greenhouse by mid-afternoon.

The best motorized blinds for NYC apartments give you a smarter way to manage heat without losing natural light or your view. Set them up right, and they cut cooling costs while protecting furniture and keeping your home comfortable all day.

The Greenhouse Effect in Your High-Rise

South-facing and west-facing apartments take the worst of summer sun. Those large windows that make Manhattan living so appealing turn your space into a solar oven during peak hours. Direct sunlight pushes indoor temperatures up by 10-20 degrees in exposed rooms, forcing your HVAC to run nonstop.

High-rises with floor-to-ceiling glass create serious cooling challenges. They look stunning from the street, but all that architectural glass adds hundreds to your cooling costs when your AC fights constant solar heat.

How Much Do Smart Shades Save on Cooling

Different Fabrics Block Different Amounts of Heat

Solar shades filter sunlight while maintaining your view, blocking up to 90% of UV rays and cutting thermal gain significantly. These fabrics reflect solar energy before it enters your home, stopping heat right at the window.

Blackout shades give you maximum heat blocking when rooms get intense direct sun. Close them during peak hours and they create an insulating barrier that keeps warmth out. Dual-layer options let you switch between light filtering and room darkening based on what you need.

Why Automation Changes Everything

Manual shades only work when you remember to close them. Motorized systems run on schedules or respond to temperature sensors, adjusting all day without you lifting a finger. That’s how you get real motorized shades of energy savings instead of just hoping you remembered to close the blinds before the afternoon sun hit.

The Real Numbers Behind Motorized Shade Savings

The Department of Energy says smart window treatments can cut heat gain by up to 77 percent. Your actual savings depend on which direction your windows face and how much sun they get.

Window ExposurePotential Summer Cooling Savings
South-FacingUp to 30%
West-FacingUp to 25%
East-FacingUp to 15%

A typical two-bedroom Manhattan apartment with south and west windows could save $300-500 each summer on cooling. Over the years your shades last, that adds up to thousands in lower ConEdison bills. Most installations pay for themselves in 3-5 years.

Motorized Shades Energy Savings NYC Goes Beyond Lower Bills

What Else You Get Besides Cheaper Cooling

  • UV Protection keeps expensive furniture, hardwood floors, and artwork from fading. Sun damage can cost thousands to repair or replace.
  • Glare Reduction means morning and evening sun won’t make your TV unwatchable or create harsh reflections on your computer screen.
  • Privacy Control happens automatically when you schedule shades to close at sunset, no walking through every room needed.
  • Convenience from anywhere with your phone, even when you’re traveling. Your home looks occupied even when you’re away.

Connecting Motorized Shades to Your Smart Home

Lutron Shades vs Somfy NYC?

When you’re picking motorized blinds for a NYC apartment, Lutron and Somfy are the two names that come up most. Both work well, just in slightly different ways.

Lutron systems connect easily with most smart home platforms and let you schedule based on sunrise and sunset times. If you’re already looking at Lutron lighting and shading for your home, everything runs through one interface.

Somfy brings solid motor technology with whisper-quiet operation, which matters in apartments where sound carries through walls. Both brands let you build scenes that combine your lighting, temperature settings, and shade positions. Wake up to shades that slowly open with the sunrise, or set an away mode that closes everything when you head to work.

Before installation, owners should check if they need getting approval for smart home installations in NYC co-ops, as some buildings require documentation for electrical work.

Setting Up Advanced Automation

Connect your shades to temperature sensors and weather data for hands-off operation. When indoor temps climb above your target on sunny afternoons, shades close on the right windows automatically. Cloudy days? They stay open for natural light.

This works even better when you add smart home automation that brings your shades, thermostat, and other systems together. The setup learns what you like and adjusts itself, finding the sweet spot between comfort and energy efficiency. Add voice control through Alexa or Google and you can tweak things from the couch.

When choosing between Control4, Crestron, and Savant for whole-home automation, each platform handles shade integration differently but all can centralize your climate, lighting, and security controls.

Start with your south and west-facing windows if you want the biggest drop in summer cooling costs. Those are the ones taking the hardest hit from afternoon sun, so that’s where you’ll see the impact fastest on your energy bills.

Can You Add Smart Tech to a 100-Year-Old Brownstone?

Walk up to your Park Slope brownstone and the door unlocks automatically. Inside, lights adjust to evening mode, your playlist starts, and the temperature is perfect. Your original crown molding, hardwood floors, and century-old plaster walls stay completely untouched.

This happens every day in brownstones across Cobble Hill, Bedford-Stuyvesant, and Fort Greene. The question isn’t whether you can add smart technology to a 100-year-old building, it’s how to do it without damaging what makes your home special.

The First Thing to Know About Brownstone Upgrades

The best technology is invisible. When renovating a historic brownstone with technology, your upgrades should protect what’s already there. If your brownstone falls under NYC Landmarks Preservation Commission designation, exterior changes need approval. But even non-landmarked homes benefit from this mindset: integration that enhances daily life without compromising the architecture.

The Reality of 100-Year-Old Construction

Brownstones built between 1870 and 1930 share features that affect tech decisions:

  • Plaster walls over wood lath (crack easily, hard to patch)
  • Original electrical systems, sometimes with knob-and-tube wiring
  • High ceilings creating hot and cold zones
  • Thick masonry walls blocking wireless signals
  • Historic facades with strict modification rules

Get an electrical assessment first. Many brownstones run on 60-amp or 100-amp service, which struggles with modern devices. Upgrading to 200-amp service gives you the foundation for a brooklyn brownstone smart home.

Installing Tech Without Destroying Your Walls

What Makes This Hard

Plaster walls crack, crumble around screw holes, and hide surprises. Running new wires means cutting, patching, and often losing original plaster you can’t replicate. For landmarked homes or exceptional plasterwork, this isn’t acceptable.

What Works Better

Wireless home automation for historic homes has come a long way. WiFi, Z-Wave, or Zigbee systems eliminate new wiring runs, protecting your walls while delivering full functionality.

For stronger connectivity:

ChallengeWhat to UseWhy It Helps
Thick walls block WiFiMesh network systemsMultiple access points cover vertical space
Multiple floorsPowerline adaptersUses existing electrical wiring
Keeping things hiddenAccess points in closetsBehind furniture or in storage

When wires are necessary, work with home automation installers who know old buildings. They fish cables through existing spaces and use basement/attic routes to minimize wall cuts.

Heating and Cooling Multiple Floors

Brownstone owners know that the third floor swelters in winter while the parlor floor stays cold. Single-zone systems push heat up with no balance across stories. You’re overheating the entire house trying to warm one cold room.

Here’s how to install smart home temperature control in multi-story house layouts:

Smart Thermostats with Sensors

Nest Learning Thermostat and Ecobee SmartThermostat place sensors on each floor. The main unit replaces your existing thermostat (simple swap), while wireless sensors report temperature data back. The system averages temperatures across sensors or prioritizes rooms at different times: bedrooms at night, common areas during the day.

Zone Dampers

For brownstones with ductwork, motorized zone dampers are installed inside existing ducts to direct airflow. Combined with a smart thermostat, you get true multi-zone comfort. Needs professional installation but works within your current system.

Basic thermostat replacement takes a few hours. Whole-home automation coordinating climate with other systems takes more planning.

Results?

Most homeowners see 15-20% lower heating costs. Every floor becomes comfortable, top-floor bedrooms cool enough to sleep, garden-level kitchens warm enough to cook.

Keeping Historic Switches While Going Smart

Original light switches, push-button mechanisms, porcelain faceplates, brass toggles are part of your home’s character. Modern plastic switches or touch panels ruin that. But you still want dimming, scheduling, and lighting scenes.

You can keep every original switch and still add smart control:

Smart Modules Behind Switches

Lutron Caseta installs behind your existing switch. Original hardware stays and works normally, plus you get phone control, schedules, and automation scenes. Works for dimmers and on/off control.

Smart Bulbs

Philips Hue or LIFX screw into existing fixtures. No wiring changes. Wall switches keep working, bulbs respond to apps, voice commands, and automation. Perfect for chandeliers and decorative fixtures.

New Switches That Fit

If replacing switches, choose smart options in oil-rubbed bronze, aged brass, or matte black instead of white or chrome.

Security That Doesn’t Ruin Your Facade

Modern security cameras on historic facades look out of place and can violate Landmarks Preservation Commission guidelines. But security matters for valuable homes in developing neighborhoods.

Robust security without visual intrusion is possible with the right approach:

Video Doorbells

Modern video doorbells are smaller and available in bronze, brass, or black finishes matching existing hardware. Installation replaces your current doorbell using the same wiring. For landmarked properties, confirm LPC compliance first.

Cameras

Interior cameras placed in windows monitor stoops, front yards, or rear gardens without exterior mounting. Position behind sheer curtains or in upper windows. For exterior cameras: mount under eaves, disguise as light fixtures, or position at rear entries where facade rules don’t apply.

Smart Locks

August Smart Lock installs on the interior, leaving exterior hardware unchanged. Schlage and Yale offer smart locks in traditional finishes. Complete systems coordinate locks that disarm alarms and cameras that record when motion triggers.

Security Components

ComponentWhat It DoesInstallation Notes
Door/window sensorsDetects openingsWireless models don’t damage frames
Motion detectorsInterior monitoringBattery-powered and repositionable
Glass break sensorsDetects intrusionMounts on window frames
Smart sirensAlerts during eventsHidden in closets

LPC Requirements

NYC Landmarks Preservation Commission requires approval for cameras on primary facades, new doorbell installations on landmarked buildings, exterior lighting changes, and any visible modifications including wiring. Interior work typically doesn’t need approval, but verify your situation.

The Best Systems for Historic Homes

Systems that consistently perform well across Brooklyn historic homes, include:

Temperature Control

Nest Learning Thermostat (3rd Gen) – Works with older heating including radiators, includes one sensor (more available), learns your schedule, compatible with most brownstone HVAC.

Ecobee SmartThermostat Premium – Includes one sensor, supports unlimited additional sensors for multi-floor monitoring, built-in air quality monitoring, works with radiators.

Lighting

Lutron Caseta Wireless – Installs behind existing switches, doesn’t require neutral wire (important in older homes), reliable proprietary wireless, integrates with major platforms.

Philips Hue – No wiring changes, 16 million colors, works with existing switches, good for accent lighting and fixtures.

Audio and Video

Sonos Multi-Room Audio – WiFi-based, no speaker wire through walls, finishes that complement traditional decor, expandable room by room.

In-Ceiling Speakers – Install in dropped ceilings or between joists, paintable grilles, requires speaker wire but better sound quality.

Security and Access

Ring Video Doorbell Pro 2 – Smaller form factor, venetian bronze finish, uses existing wiring, 1536p HD video.

August Wi-Fi Smart Lock (4th Gen) – Interior installation, exterior hardware unchanged, works with existing deadbolt, auto-unlock.

Arlo Essential Spotlight Camera – Wire-free battery-powered, 1080p video with color night vision, weather-resistant.

Whole-Home Integration

Control4 (professional installation, complex systems), Savant (high-end interface), Apple HomeKit (Apple ecosystem), Home Assistant (open-source, tech-savvy users).

What to Expect During Installation?

Installing smart home tech in a brownstone is different from new construction. Here’s the typical process when working with installers experienced in historic homes:

Initial Visit

A technician walks through your home to identify challenges testing Wi-Fi coverage, inspecting the electrical panel, checking whether walls are plaster or drywall, and photographing potential equipment locations. You’ll discuss priorities and budget.

Planning Phase

The team designs a system around your home’s constraints. This includes selecting equipment suited for historic construction, planning an installation approach that minimizes wall damage, and mapping out how different systems will integrate. Timeline accounts for any permits or approvals.

Installation Day(s)

Installers protect original hardwood floors and work carefully around plaster walls. They clean up daily, test all systems before leaving, and train you on how everything works.

Timeline

  • Smart thermostat: 2-4 hours
  • Whole-home lighting: 1-2 days
  • Security system: 2-3 days
  • Full automation: 1-2 weeks

Budgeting Your Smart Home Upgrade

Investment varies based on scope. General ranges for Brooklyn brownstone installations:

  • Smart thermostat with sensors: $400-800 installed
  • Lighting control (per room): $200-500
  • Video doorbell: $300-500 installed
  • Smart locks: $250-400 per door installed
  • Security camera system (4-6 cameras): $1,500-3,500
  • Whole-home audio (3-4 zones): $2,500-6,000
  • Complete smart home integration: $8,000-25,000+

These reflect quality equipment and professional installation by technicians who know historic homes.

The Power of System Integration

Connected systems transform how you live. However, these require planning during installation to ensure compatibility and proper programming.

  • Arriving Home: Door unlocks as you approach, lights turn on based on time of day, thermostat adjusts, music starts, security disarms.
  • Leaving Home: One button locks doors, arms security, adjusts thermostats, turns off lights, activates cameras.
  • Overnight: Lights dim throughout, thermostats adjust for sleeping, motion sensors activate on lower floors while disabling upstairs.

Bringing Your Brownstone Into the Modern Era

A century ago, your home represented modern comfort: indoor plumbing, central heating, electricity. Now, you’re doing the same thing with different technology.

Smart climate control, security, lighting, and audio enhance your historic home without compromising its character. The key is working with installers who understand both modern systems and historic preservation.

Whether you start with one smart thermostat or plan full automation, take time to do it right. Your brownstone has survived because owners maintained it thoughtfully. Properly installed smart technology continues that tradition making the house work better for how you live while preserving what makes it special.

Ring vs. Nest vs. SimpliSafe: Which Security System is Best for NYC Renters?

Most security guides focus on suburban homeowners, not your Brooklyn walkup or Manhattan studio where drilling isn’t allowed.

New York City renters face challenges suburban guides ignore. Co-op boards demand documentation. Package thieves patrol shared lobbies. Your lease forbids permanent fixtures. You might move in six months.

This guide answers one question: which DIY security system works best for NYC apartment living?

So, What Each System Does Best?

Ring Works Best for Package Protection

180-day video storage and multiple doorbell options make Ring the strongest choice for package theft. Works exclusively with Alexa devices for smart home integration.

Google Nest Uses AI to Learn Your Routines

AI-powered face recognition and routine learning. Best if you’re already using Google devices and want intelligent automation.

SimpliSafe Offers Month-to-Month Monitoring

Month-to-month monitoring with no long-term commitment. Perfect for renters facing uncertain housing situations or wanting set-it-and-forget-it security.

What Each System Costs and Offers?

Here’s everything that matters for an apartment living in one place.

FeatureRing AlarmGoogle Nest SecureSimpliSafe
Best ForPackage watchers, Alexa usersGoogle Home enthusiastsFlexibility-focused renters
Monthly Monitoring$20 (includes video)$29$23 basic / $33 with video
ContractNoneNoneNone
Smart HomeAlexa onlyGoogle HomeAlexa and Google (basic)
Battery Backup24 hours12 hours24 hours
Video Storage180 days30 days30 days
Siren Volume113 decibels104 decibels95 decibels
Setup Time30-45 minutes30-45 minutes20-30 minutes

Ring vs Nest vs SimpliSafe for NYC Apartment Living

Ring

Ring stores video for 180 days, six times longer than competitors. That matters when you notice a missing package weeks later. The Neighbors app connects you with other Ring users in your building for community alerts. The 113-decibel siren is loud enough to wake neighbors through walls.

  • Pros: Multiple doorbell models for different door types, 24-hour battery backup, self-monitoring option
  • Cons: Alexa-only integration, limited co-op board guidance

Google Nest

Face recognition is what sets Nest apart in busy buildings. The system learns who belongs and who doesn’t—your roommate at midnight doesn’t trigger alerts, but a stranger in the hallway does. The AI learns your schedule and adapts automatically.

  • Pros: Pros: Face recognition cuts false alarms, learning algorithms, works seamlessly with Google Home
  • Cons: 12-hour battery backup (half the competition), $29 monthly cost

SimpliSafe

SimpliSafe stores video for 30 days with the Core plan ($33/month). The monitoring company calls 44 seconds after alarms trigger. The base station talks you through installation. Water leak sensors catch pipe bursts in older NYC buildings.

  • Pros: No contracts, voice-guided setup, temperature monitoring
  • Cons: Bulkier sensors, 30-day video storage

When people ask which DIY security system is best for renters, it often comes down to how long you plan to stay.

Getting Past NYC Landlords  and Co-op Board Rules

All three systems use adhesive mounting without drilling. However, co-op boards scrutinize more than just installation methods.

Ring’s visible cameras might violate rules about recording common areas. Check your lease before mounting doorbell cameras facing hallways.

Nest’s smaller equipment draws less attention during inspections, though boards may require proof the system doesn’t interfere with building security.

SimpliSafe’s simple design satisfies conservative boards. Its local alarm functions work without the internet, addressing connectivity concerns.

All three companies provide spec sheets for board submissions. Get pre-approval by matching these specs to your board’s camera placement rules, or consult a security installer familiar with NYC co-op requirements.

Which System Is The Best Match For You?

Choose Ring if:

Package theft is your main worry and you need long-term video evidence. You use Alexa. Your building allows hallway cameras. Ring wins the renter friendly video doorbell comparison with the most models and mounting options.

Choose Google Nest if:

You’re invested in Google products. Face recognition matters because your building has constant delivery traffic. The higher monthly cost fits your budget.

Choose SimpliSafe if:

You’re not sure how long you’ll stay. Month-to-month flexibility matters more than features. Your building has older infrastructure where water leaks and temperature monitoring matter.

How Much You’ll Spend Each Year

  • Ring: $200-250 equipment + $20 monthly = $440-490 first year
  • Nest: $400-500 equipment + $29 monthly = $748-848 first year
  • SimpliSafe: $200-250 equipment + $23-33 monthly = $476-646 first year

All three skip contracts. Return windows: Ring (30 days), Nest (30 days), SimpliSafe (60 days).

How NYC Building Types Affect Installation

Pre-war buildings have plaster walls and thick concrete construction. Adhesive strips can work, but it’s worth testing them first to make sure they’ll hold. Wireless sensors tend to handle plaster better than concrete, which can interfere with signal strength. Installing equipment in pre-war NYC buildings requires planning for connectivity issues.

Modern high-rises typically offer better wireless penetration, but you’ll likely deal with more interference from neighboring networks since there are so many units in close proximity. This makes sensor placement more important than in other building types.

Brownstones present their own challenge when it comes to sensor range, especially if you need coverage across multiple floors. Companies like Ring and SimpliSafe offer range extenders specifically to help with this issue. Adding smart tech to century-old brownstones involves similar range planning.

Walkups are generally easier for installation since you have more straightforward access throughout the building. However, removal can become challenging if you’re moving furniture up several flights of stairs when it’s time to relocate.

Finding Your Best Fit Among the Three

There’s no universal best security system for NYC renters. Your building type, main concerns, and smart home setup point toward different choices.

Ring dominates package theft monitoring with unmatched video storage. Nest delivers the smartest automation for Google users. SimpliSafe provides maximum flexibility for renters facing unpredictable housing.

When comparing, focus on solving your problem and consider what matters most: long video storage, smart learning, or month-to-month flexibility.

Can You Install a Security System in a NYC Rental? A Renter’s Complete Guide

Package theft is up 30% in NYC apartment buildings since 2023. Break-ins target ground-floor units in Manhattan and Queens at twice the rate of upper floors. If you’re renting, you want protection, but can you install a security system in a rental without losing your deposit or violating your lease?

Yes. The options available to New York City renters have changed in the past few years. You don’t need permission for most of them, and you won’t damage anything.

Start With Your Lease Agreement

Your lease spells out what counts as an “alteration” in your building. Standard NYC rental agreements typically prohibit permanent modifications but define “permanent” differently.

Look for sections on alterations, installations, or drilling. Some leases in doorman buildings allow removable devices. Others in older walk-ups prohibit anything attached to walls.

The Green Light Zone: What You Can Install Without Asking

These devices require no landlord permission in most NYC rentals. They leave no damage and come with you on moving day.

Wireless Indoor Cameras

Cameras sitting on shelves or tables need no approval. You’re monitoring your own space. Models like the Wyze Cam v3 or Ring Indoor Cam cost $30-60 and connect to your phone via WiFi.

For mounted cameras, 3M Command strips hold up to 5 pounds without damaging paint. Renter friendly security cameras NYC tenants use most often include the Blink Mini and TP-Link Tapo. Both offer motion alerts and work without subscriptions.

Contact Sensors for Doors and Windows

Small sensors attach with 3M adhesive backing. One piece goes on the door frame, another on the door itself. They alert your phone anytime someone opens that entry point.

Ground-floor apartments in Queens and Brooklyn benefit most from window sensors. Fire escape access points need monitoring too. The SimpliSafe Entry Sensor and Ring Alarm Contact Sensor both peel off without residue.

Motion Detectors

Battery-powered motion sensors mount in corners using adhesive strips. They detect movement and send phone alerts. The Ring Motion Detector runs 3 years on one battery and installs in under 2 minutes.

All-in-One Starter Kits

SimpliSafe and Ring Alarm sell complete kits designed for renters. A basic Ring Alarm 5-Piece Kit ($200) includes a base station, keypad, contact sensor, motion detector, and range extender. Everything uses removable mounting or sits on flat surfaces.

These systems integrate all your devices into one app instead of managing multiple apps for different cameras and sensors.

System TypeInstallation TimeMonthly CostLease Approval Needed?
Wireless cameras5-10 minutes$0-10No
Contact sensors2-5 minutes$0-5No
All-in-one kits30-60 minutes$0-20No
Video doorbells10-20 minutes$0-10Usually yes
Smart locks15-30 minutes$0Yes

The Yellow Light Zone: Devices That Need Landlord Approval

Some devices fall into gray areas. Ask before installing these, even if they seem removable.

Video Doorbells

The question “do I need landlord permission for ring doorbell” has a complicated answer in NYC. If your apartment door opens to a shared hallway, you’re recording common space. That affects your neighbors’ privacy.

The Ring Video Doorbell and Nest Hello both offer no-drill mounts. However, hallway recording still requires landlord approval in most buildings. Co-op boards in Manhattan and Brooklyn often have strict policies about hallway cameras.

Smart Locks

Replacing your lock violates most NYC leases. Landlords must have access for emergencies and maintenance.

Some smart locks work differently. The Level Lock and August Smart Lock fit over your existing deadbolt without replacing it. You keep the original key system while adding smartphone control. These retrofit models still need approval.

The Red Light Zone: Completely Off-Limits in Rentals

These require formal alteration agreements and almost never get approved in rentals.

Hardwired security systems need wires run through walls. Installers drill into studs, fish cables behind drywall, and mount panels permanently. You’d be liable for repairing all damage.

Cameras in common areas are off-limits. You cannot install personal surveillance in hallways, lobbies, stairwells, or laundry rooms. These spaces belong to the building. Installing cameras there creates liability issues and privacy complaints. Looking for home security services that understand NYC rental restrictions helps you avoid these mistakes.

Different NYC Buildings Have Different Rules

Building type changes what works. A high-rise in Midtown Manhattan has different challenges than a brownstone walk-up in Park Slope.

  • Doorman buildings: Management often restricts hallway cameras completely. However, interior apartment security faces fewer obstacles. WiFi connectivity is usually strong.
  • Older walk-ups: Thick plaster walls can block WiFi signals. Battery-powered sensors work better than WiFi cameras in back bedrooms. Landlords in these buildings are often more flexible about removable devices.

Your Legal Rights to Safe Housing in NYC

New York City law requires landlords to provide secure entrance doors and functioning locks. You can request lock rekeying if previous tenants had keys.

The NYC Tenant Protection Unit outlines your right to a safe living environment. Building owners must maintain security doors, intercoms, and lobby access systems. Adding your own security supplements these requirements.

Handling the Gray Areas in Your Lease

Some leases stay vague about security devices. They might prohibit “alterations” without defining what that means.

Send your landlord a brief email. List the specific devices you plan to install and how (Command strips, shelf placement, etc.). Mention that everything removes without damage. Keep that email thread. Written approval protects your security deposit during moveout inspection.

Building Security Based on Your Apartment Layout

  • Studio apartment: One camera covering the entry door, contact sensors on windows if ground floor. Budget: $100-150.
  • One-bedroom: Camera at entry, window sensors, one motion detector in the living area. Consider a SimpliSafe 5-piece kit. Budget: $200-300.
  • Ground-floor unit: Prioritize window sensors and glass break detectors. Add a camera facing the fire escape if you have one. Budget: $250-400.
  • Upper floors: Focus on door security and package monitoring. A video doorbell (with permission) covers most concerns. Budget: $100-200.

How to secure a rental apartment depends on your vulnerabilities. Assess your building’s layout and spot weak points first. Consider getting help from an alarm system installer who can identify risks specific to your building.

Audio Recording Laws for Your Security Cameras

New York is a one-party consent state for audio recording. You can legally record conversations you’re part of. However, cameras facing your front door might capture delivery drivers and guests without their knowledge.

Many NYC renters disable audio on doorbell cameras to avoid complications. You still get video of package deliveries and visitors. Ring and Nest cameras let you turn off microphones in settings.

When to Install It Yourself vs Hiring Help

Most wireless systems take 30-60 minutes to set up yourself. Ring and SimpliSafe apps walk you through each step. You need basic smartphone skills and maybe a stepladder.

Professional installation makes sense for older buildings with WiFi dead zones, complex layouts with multiple rooms, or integrating security with existing smart home devices. Make sure any professional you hire knows they’re working in a rental and will use only removable mounting methods.

Make Sure You Cover These Bases Before You Start

Before installing anything:

  • Search your lease for “alterations,” “installations,” “drilling,” and “fixtures”
  • Choose devices with removable mounting (Command strips, shelf placement)
  • Confirm cameras don’t point into neighboring units or common areas
  • Get written landlord approval for video doorbells and smart locks
  • Avoid personal surveillance in shared spaces (hallways, lobbies)
  • Consider disabling audio recording on cameras facing your door
  • Save all communication with your landlord about installations
  • Test WiFi signal strength before buying wireless devices

Getting Started With Your Rental Security System

Installing a security system in a rental is simple once you understand your lease and choose the right devices. NYC renters have access to the same technology as homeowners, just in removable formats.

Focus on wireless, battery-powered devices that mount with removable strips or sit on surfaces. Communicate with your landlord about anything questionable.

The best security for apartments combines multiple layers: contact sensors on entry points, cameras in key locations, and motion detection in vulnerable areas. This no-drill security system for apartments approach gives you real protection without jeopardizing your lease.

Professional home security services can help you design a system that maximizes protection while respecting your rental agreement.

Is Your Conference Room Ready for Hybrid Work?

Monday morning, 9 AM. Your team gathers in the conference room for the weekly standup. Three colleagues dial in from Brooklyn, two from Jersey City, one from home in Queens. The camera cuts off half the table. Someone asks a question from the back, but it sounds like underwater static to everyone on the call. Five minutes disappear while you troubleshoot screen sharing.

This scene repeats itself thousands of times each day across Manhattan office buildings. 83% of employees now prefer hybrid work arrangements, but most conference rooms remain stuck in 2019. The result is wasted time, frustrated employees, and meetings where remote participants feel invisible.

For NYC businesses paying premium rates for office space, every square foot needs to justify its cost. Your conference room has gone from just another meeting space to the hub that keeps distributed teams connected. If it fails at that job, you’re burning money.

The New Reality for NYC Office Spaces

Office spaces across Manhattan tell the same story. Individual desks sit empty most of the week. Conference rooms? Booked solid from 9 to 5.

40% of office meetings now include remote participants, changing what your meeting space needs to accomplish. The room has to work equally well for people in chairs around the table and people joining from a laptop 10 miles away.

Manhattan office rent doesn’t get cheaper. Buildings in SoHo, the Financial District, and Midtown command premium prices. A conference room that creates friction during meetings represents both a technical failure and a business liability.

What Your Conference Room Needs for Hybrid Work?

Displays That Work for Hybrid Teams

That 55-inch TV mounted on the wall worked fine five years ago. Today, it creates more problems than it solves. Modern hybrid conference rooms use dual-display configurations. One screen shows remote participants at life-size scale, the other handles presentations and documents.

Some businesses go with 4K commercial displays or ultra-wide screens. The investment pays off during client pitches and strategy sessions. Your team in Chicago can read every line of the spreadsheet. Your partner in LA sees the whiteboard clearly.

Cameras That Track Whoever’s Speaking

The worst hybrid meetings happen with a single wide-angle camera treating everyone as distant figures. AI-powered cameras with auto-framing and speaker tracking changed this dynamic.

These systems identify individual faces and create separate video feeds for each person in the room. Some models track whoever is speaking and adjust the frame automatically. The technology bridges the gap between physical and virtual presence.

Microphones That Don’t Kill Your Meetings

Someone three chairs away asks a question. People in the room hear it fine. Remote participants hear mumbled noise. The meeting stops while someone repeats everything.

Ceiling microphone arrays or beamforming table mics solve this problem. They pick up voices from every corner with equal clarity. The speakers distribute sound so everyone in the physical space can hear remote colleagues without clustering around the monitor.

Walk In, Tap the Screen, and Your Meeting Starts

Traditional conference setups had a dozen failure points. Laptops freeze. HDMI cables vanish. Nobody can find the right adapter.

Both Zoom Rooms and Microsoft Teams Rooms eliminate the friction. Walk into the room, tap the screen, and the meeting starts. Camera activates, microphones turn on, and your calendar pulls up the right meeting automatically.

The main difference comes down to which platform your company already uses. Teams Rooms integrates with Microsoft 365. Zoom Rooms works best if Zoom is your primary video platform. Both include AI-powered features like automatic transcription, speaker tracking, and noise cancellation.

SystemBest ForKey FeaturesIntegration
Zoom RoomsZoom-first companiesSmart Gallery, one-touch join, AI CompanionWorks with most platforms
Microsoft Teams RoomsMicrosoft 365 usersIntelliFrame, Front Row layout, Copilot integrationNative Microsoft stack
SetupBothSingle-touch startCalendar sync
PricingBothPer-room licensingCloud-based management

Your Conference Room Setup Affects Employee Retention

Meeting equity sounds like corporate speak until you sit through a few broken hybrid meetings. The concept is simple: remote participants should have the same ability to see, hear, and contribute as people in the room.

Remote workers face disadvantages in traditional conference room setups. They miss side conversations, can’t read body language, and struggle to interject in fast-moving discussions. Over time, this creates a culture gap. Top talent leaves for companies that take hybrid work seriously.

Companies that figure out how to set up a hybrid conference room see better employee engagement. When your video system shows remote faces at the same scale as in-room participants, when microphones pick up every voice, and when presentations display clearly on both ends, geography stops mattering.

What You Get Back From the Investment

Conference room AV solutions in NYC cost money. Nobody pretends otherwise. The question is what you get back.

Client Impressions

A client joins your pitch meeting remotely. The video is crystal-clear. The audio never cuts out. They form conclusions about your business based on how well your tools work. A conference room becomes your first impression.

Productivity Gains

Add up the hours your team wastes repeating information because someone couldn’t hear, rescheduling meetings that fell apart, or troubleshooting connections. Small improvements to meeting quality return hours to your team.

Employee Satisfaction

Frustrating technology creates frustrating workdays. The best video conferencing setup for a small business isn’t just about hardware. It’s about showing your team you take their experience seriously.

Advanced Features That Push Past the Basics

The core components get you functional. Additional features take things further.

  • Intelligent Director: Uses multiple cameras and AI to give everyone in the room equal screen time with remote participants.
  • Smart Gallery: AI breaks up a single wide-angle view into individual video streams, creating separate tiles for each person.
  • Interactive Whiteboards: Digital displays that function like traditional whiteboards but save everything to the cloud and allow remote participants to annotate in real time.
  • Wireless Presentation: Anyone walks in, clicks one button, and shares their screen. No cables, no adapters.
  • Room Analytics: Track usage patterns, identify which spaces get overbooked, and optimize your office layout based on real data.

What It Takes to Get Your Setup Working Better

Start with an honest assessment. Record your next hybrid meeting. Watch it like you’re a remote participant. Can you see everyone clearly? Does the audio capture all voices? The gaps become obvious.

NYC buildings throw curveballs at AV installations. Concrete walls in pre-war buildings interfere with WiFi. Co-op boards have strict rules about drilling. Street noise bleeds through windows. Odd room dimensions create audio dead zones.

Working with teams experienced in conference room design in commercial spaces accounts for these building variables. Microphone placement, camera angles, and display height all matter. Get one element wrong and the whole system underperforms.

Conference rooms only deliver value if they work reliably. Things break. Software needs updates. That’s why many NYC businesses work with providers who offer ongoing IT support for meeting technology.

Why This Matters for Your Business

Hybrid work isn’t a temporary adjustment. 24% of new job postings now offer hybrid arrangements, up from 15% just two years ago. Your conference room either supports this reality or fights against it.

You don’t need the most expensive equipment. You need a setup that lets people focus on the meeting instead of the technology. Improving meeting equity for remote employees isn’t about being nice. It’s about keeping good people and running effective meetings.

The companies that figure this out first have an advantage. The ones that don’t lose talent to competitors who did.

Dropped Calls & Slow Wi-Fi? Why Your NYC Home Office Needs Structured Cabling

Your screen freezes mid-sentence during a pitch to your biggest client. You watch the spinning wheel, see your face pixelate, then the dreaded “reconnecting” message. You apologize, restart your router, and hope the rest of the call holds. This isn’t a one-time glitch. It’s Tuesday.

For thousands of NYC professionals, the home office has become the primary office. Your Upper West Side one-bedroom or Financial District studio now handles the same workload that used to require enterprise-grade infrastructure. Yet most people are still running everything over consumer Wi-Fi that was fine for streaming Netflix in 2019.

Unreliable internet isn’t just frustrating. It’s a professional liability. Clients notice when you drop off calls. Deadlines slip because file uploads time out. The cost of bad connectivity adds up in ways your monthly internet bill never shows.

Structured cabling offers a way out. It’s about treating your internet connection like the utility your career depends on.

What Structured Cabling Means?

Most people hear “structured cabling” and imagine a tangle of wires turning their apartment into a server room. The reality is simpler. Structured cabling is a planned network of Ethernet cables inside your walls that creates pathways between your modem and your workspace.

Think of it this way. Wi-Fi is like a city street during rush hour. Your data competes for space with everyone else’s. Neighboring networks clog the same channels. Physical obstacles slow things down.

Structured cabling builds you a private highway. Your data gets its own lanes running directly from point A to point B. No competing traffic. No obstacles. The same reliable path every time.

The system uses Cat6 or Cat6a Ethernet cables running from a central patch panel to wall outlets throughout your space. You plug your computer into a port on the wall, just like an electrical outlet. The cables stay hidden. You get reliable connectivity at your desk.

What Structured Cabling Does for Your Workspace?

Consistent Speed When You Need It Most

Wi-Fi signals fight through walls, dodge interference from microwaves, and compete with dozens of neighboring networks. A physical cable doesn’t care about any of that. You get the full bandwidth your plan provides, delivered consistently.

The difference between wifi vs ethernet for video conferencing isn’t subtle. Wired connections maintain stable speeds during screen sharing. They don’t drop packets when someone starts streaming in the next room. File uploads finish in predictable timeframes.

For remote workers handling video calls and large file transfers, setting up your workspace with reliable internet ready for hybrid work means that difference compounds throughout the workday.

Everything Looks More Professional

Structured cabling consolidates all your network wiring into a central hub, then delivers it to clean wall ports where you need it. No power strips snaking across your floor. No router cables creating trip hazards. No tangles behind your desk.

This organization simplifies maintenance. Technicians can diagnose problems from a labeled patch panel instead of tracing random cables. Problems get fixed faster with less disruption.

Built to Handle Future Bandwidth Needs

Today you need bandwidth for Zoom and cloud storage. Next year your company might roll out 8K video collaboration or AR/VR tools. Installing professional network cabling now means you’re ready for whatever comes next.

The TIA-570-C residential cabling standards that guide modern installations handle bandwidth demands that don’t even exist yet.

But My Wi-Fi Seems Fine. Do I Still Need It?

Not everyone needs structured cabling. If your work involves mostly email, light document editing, and occasional video calls, Wi-Fi probably handles it fine. Whether structured cabling is necessary for home setups depends on what you do and how much your income relies on connectivity.

Here’s a simple checklist:

  • Do you host video conferences daily or multiple times per week?
  • Does your work involve transferring large files (design projects, video footage, databases)?
  • Does your connection slow down when others in your household are online?
  • Does your work require handling confidential client data or proprietary business information?
  • Have you experienced disconnections during critical meetings or presentations?
  • Do you work in finance, tech, creative fields, or other industries where connectivity impacts your reputation?
  • Is your home office your primary workspace, not just an occasional backup?

If you checked three or more boxes, the benefits of hardwiring home office infrastructure probably outweigh the investment. Your connection isn’t just supporting your work. It is your work infrastructure.

How Much Does This Cost in NYC?

Installing structured cabling requires upfront spending. The cost of structured cabling NYC installations varies based on apartment square footage, wall construction type, number of rooms needing connections, and how complex the cable runs are.

Think about it as ROI, not expense. Calculate how many hours you’ve spent troubleshooting Wi-Fi issues this year. Multiply your hourly rate by that number. Add the value of client relationships damaged by unreliable connectivity.

A wired network also increases your property value. Buyers and renters in NYC increasingly look for apartments with strong connectivity infrastructure.

The system reduces ongoing costs by minimizing the need for frequent help desk support tickets. Less time lost to connectivity issues. No need to upgrade every time bandwidth requirements increase. The infrastructure you install today keeps working as technology evolves.

Old Building Construction vs Modern Connectivity Demands

Pre-war apartments in the Upper East Side have thick plaster walls that block Wi-Fi signals. A layout of a 100-Year-Old Brownstones in Brooklyn puts your router three rooms from your desk. Co-op boards require permits before you drill into anything.

You can buy the most expensive router and still struggle to get a signal from your living room to your bedroom office.

Structured cabling works with these constraints. Installers route cables through existing pathways, behind baseboards, or through walls with minimal disruption. They handle co-op board paperwork and building codes.

In a typical Manhattan building, your Wi-Fi competes with 30+ neighboring networks using the same channels. Improving internet reliability for remote work in these conditions often means leaving the crowded wireless spectrum. A wired connection removes you from that competition.

Security Benefits That Matter for Remote Work

Wireless signals pass through walls. Anyone within range can attempt to intercept them. With Ethernet, someone needs physical access to your cables. For professionals handling client financial data, medical records, legal documents, or proprietary business information, that difference matters.

Wired connections eliminate an entire category of security vulnerabilities. You’re not broadcasting your data through the air where tools can capture it. You’re sending it through physical cables that require direct access to compromise.

This physical security works alongside advanced network security protocols and firewalls to create defense in depth. For industries with compliance requirements or client confidentiality obligations, this layered approach isn’t optional.

Is Structured Cabling Right for Your Home Office?

Your home office needs to support the same level of performance clients expect from any professional. If they’re counting on you to deliver work on time and show up reliably for meetings, your internet connection can’t be the weak link.

Structured cabling removes connectivity as a variable. You stop wondering if your connection will hold during presentations. The infrastructure just works.

The installation requires planning and professional work, but the payoff is permanent. For NYC professionals treating their home office like their primary workspace, this is about building infrastructure that matches your professional standards.

Consider how much smoother your workday could be without connectivity problems. That’s a quality of life improvement that pays dividends every day.